Content Deployment - Live Embedding NimbleStory solutions in Sharepoint
📔 Overview
NimbleStory powered interactive solutions can be deployed in a variety of ways that are summarized here: https://nimblestory.atlassian.net/wiki/spaces/NKB/pages/1188397057
In this document, we will detail the steps for our most common scenario, Live Embedding content in a Sharepoint Site.
This method of content deployment provides for easy integration and quick updates when content needs to be updated.
📕 SharePoint Preparations (One Time)
By default, most Sharepoint environments limit what can be embedded into sites/ pages by domain. Our testing has been done using SharePoint Online/ Office365 but these steps should work for any currently supported SharePoint environment.
Identify the SharePoint Site(s) you’d like to add NimbleStory Live Embeds to and for each Site, work with someone who has Site Administration rights to check the following items:
Add “http://nimblestory.com ” as an allowed embedable domain in your environment by following the guidance in the following Microsoft suport document.
Ensure this site allows the Embed Web Part (this is enabled by default, but some Sites may have disabled it)
Ensure you have access to the Page editor on the page(s) you want to add this to.
📘 NimbleStory Preparations
Any content in NimbleStory can be Shared as a link or embed/iframe block and embedded into SharePoint, but there are some details that change depending on client needs. Once the content is deemed ready for sharing, here are the steps to accomplish this.
Produce the share link, this includes generating a “share token” that gets added to the URL so we can ensure the content is only available to those that have been granted the shared link.
Start by accessing the content through the regular nimblestory link and login.
Once the content is open, launch the Share options from the Menu button at top right, as shown below
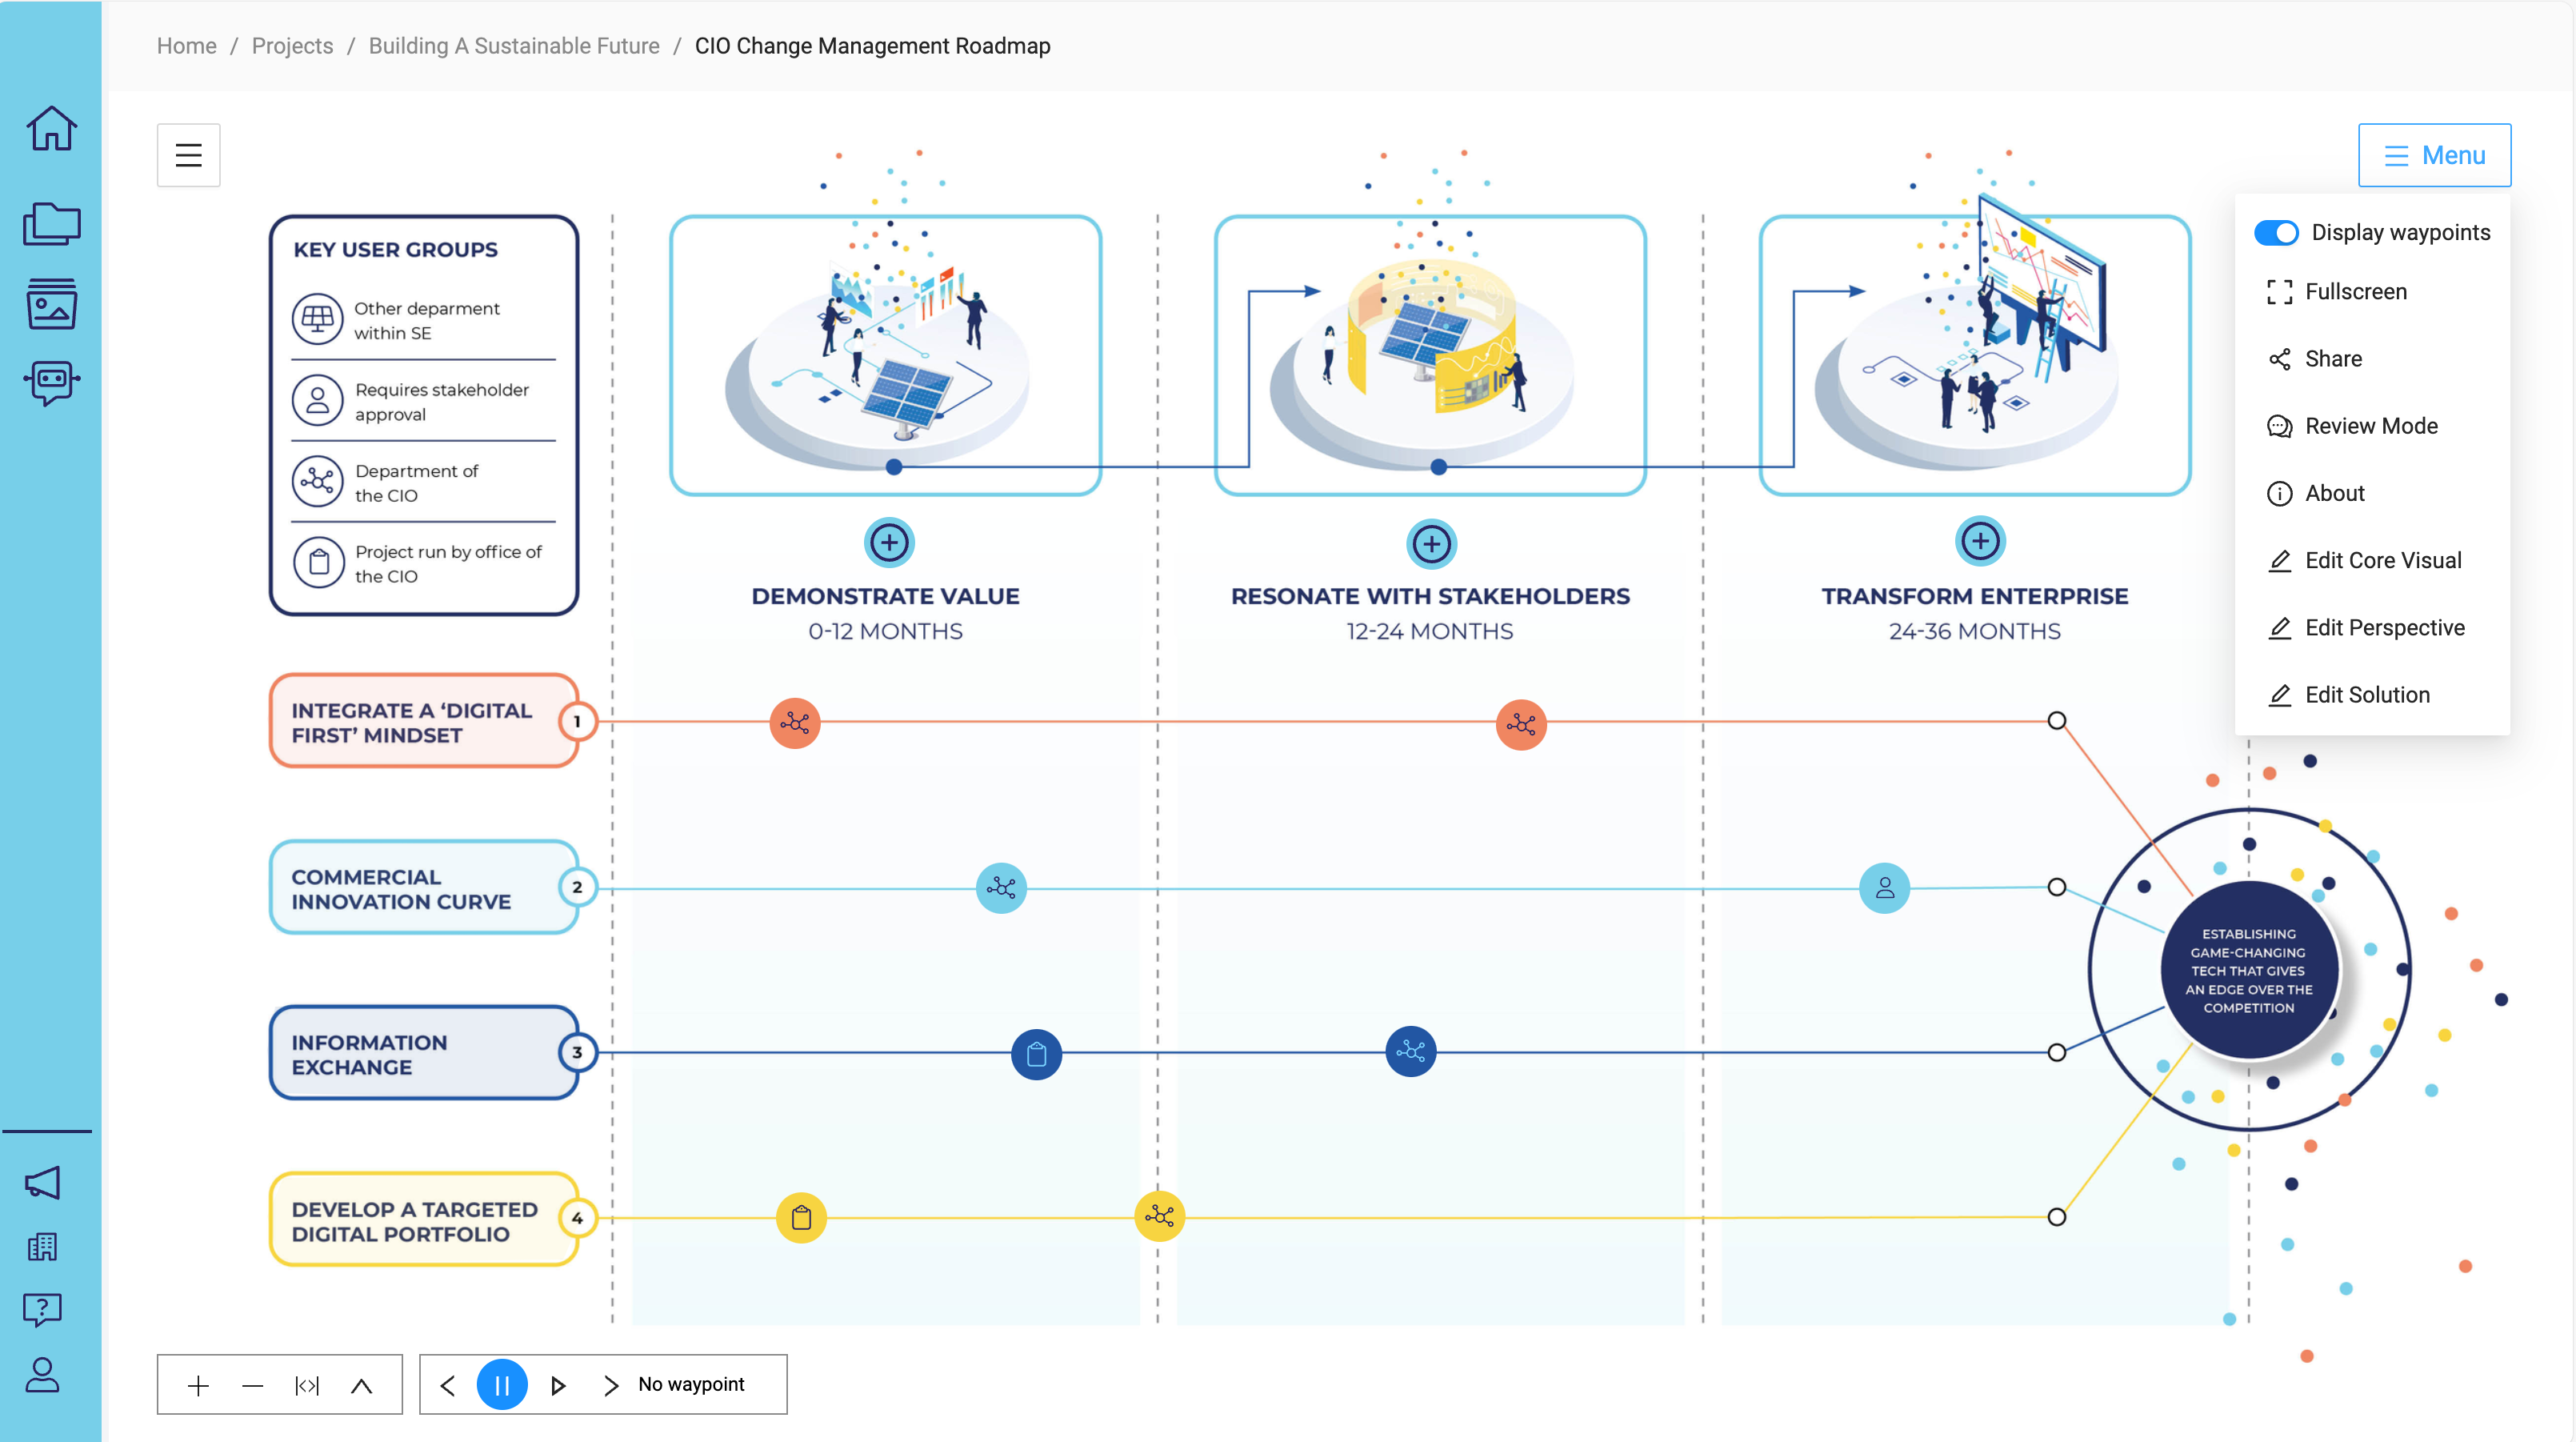
Using the Share options, select
Guest Access
Generate iframe
Generate New Share Code
Dsisable Title
Set an appropriate expiration date if needed, or leave blank to have the link permanent/ not expiring.
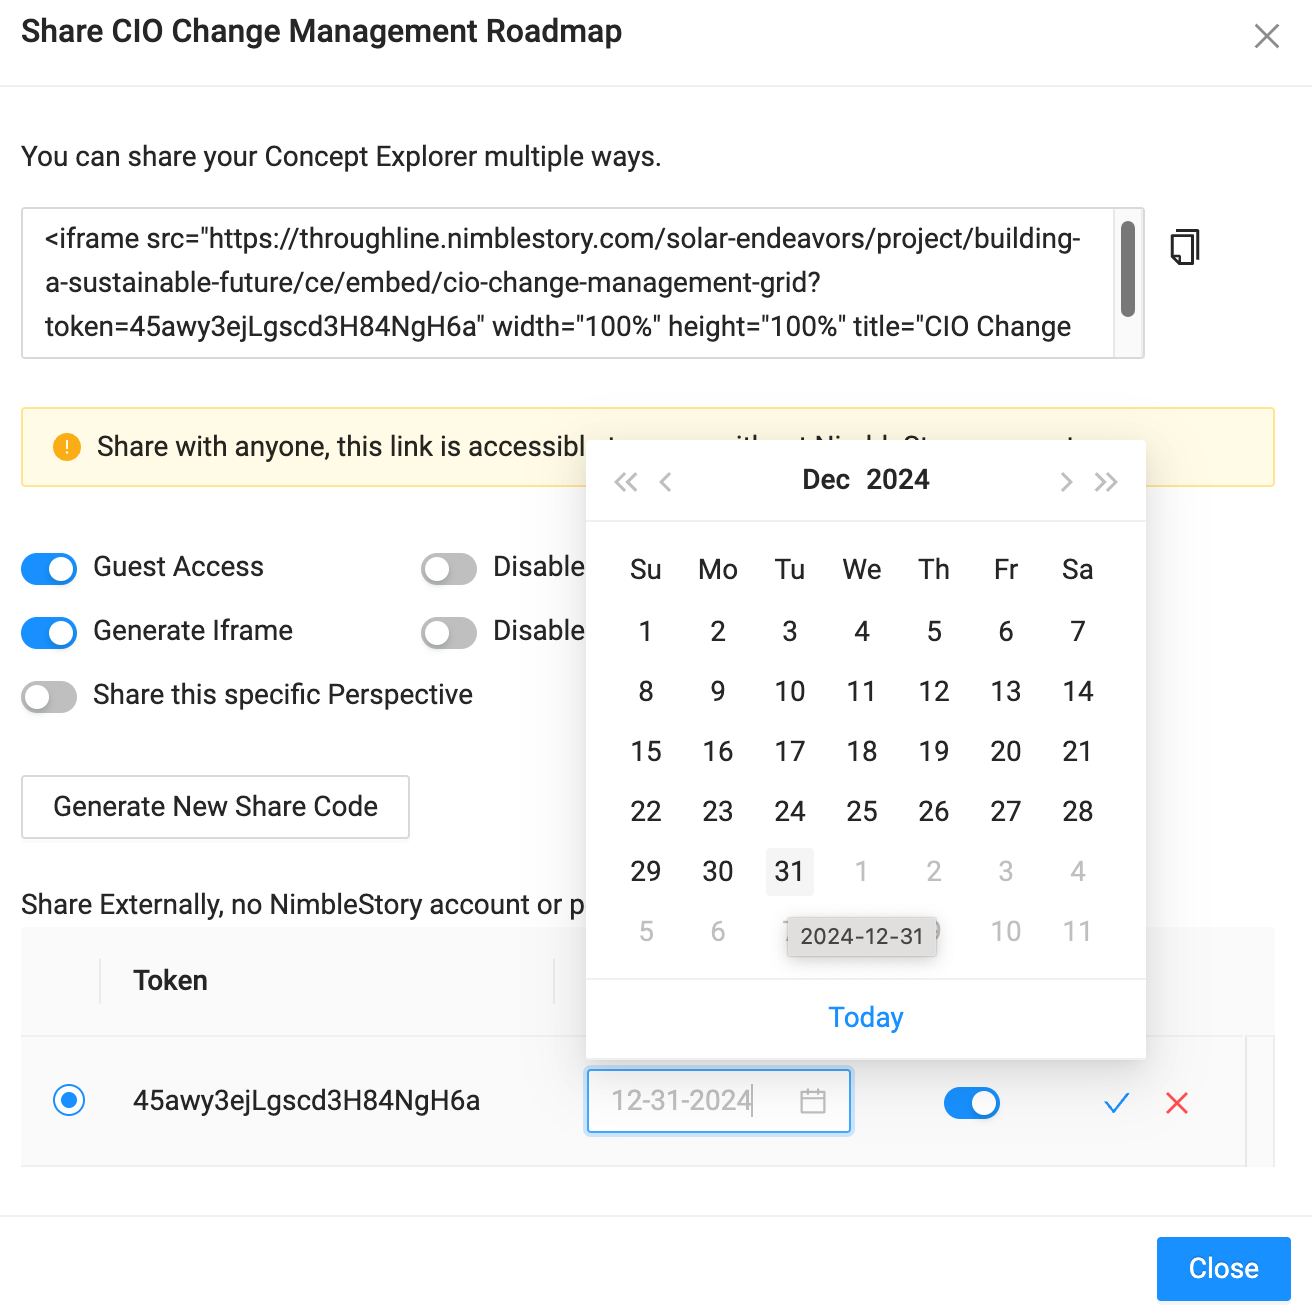
Then copy the resulting iframe block using the copy icon at top right. This is the iframe “code” you will use in the SharePoint environment’s Embed web part.If this embed, requires limiting WHERE it is embedded by domain
Save this iframe block so it can be used in the SharePoint Page Embed Setup steps.
IF this content share needs to be protected by more than just the sharetoken generated above…
So that this iframe block can ONLY be embedded in mycompany.com’s sharepoint site, and not mycompetitor.com’s sharepoint site…
THEN provide the domain name(s) for the Sharepoint site to the NimbleStory team so we can set up the Domain Lock on your content share link.
this will get applied behind the scenes to the share token generated in the previous step and results in that share link being locked to your SharePoint site.
📗 SharePoint Page Embed Setup
Microsoft SharePoint has an easy to use Page Editor for any user with page edit permissions. Pages are edited with web parts, blocks of content that can be layouts or text blocks/ images/ videos/ etc. One particular Web Part is the Embed Web Part. Web Embeds are a way of including content from other sources into your site. Many sites do this to include content like Youtube Videos or News / Social Media Feeds or even Advertisements.
Here is a Microsoft Support page that can get you started if SharePoint Editing is new to you, but the steps are fairly easy.
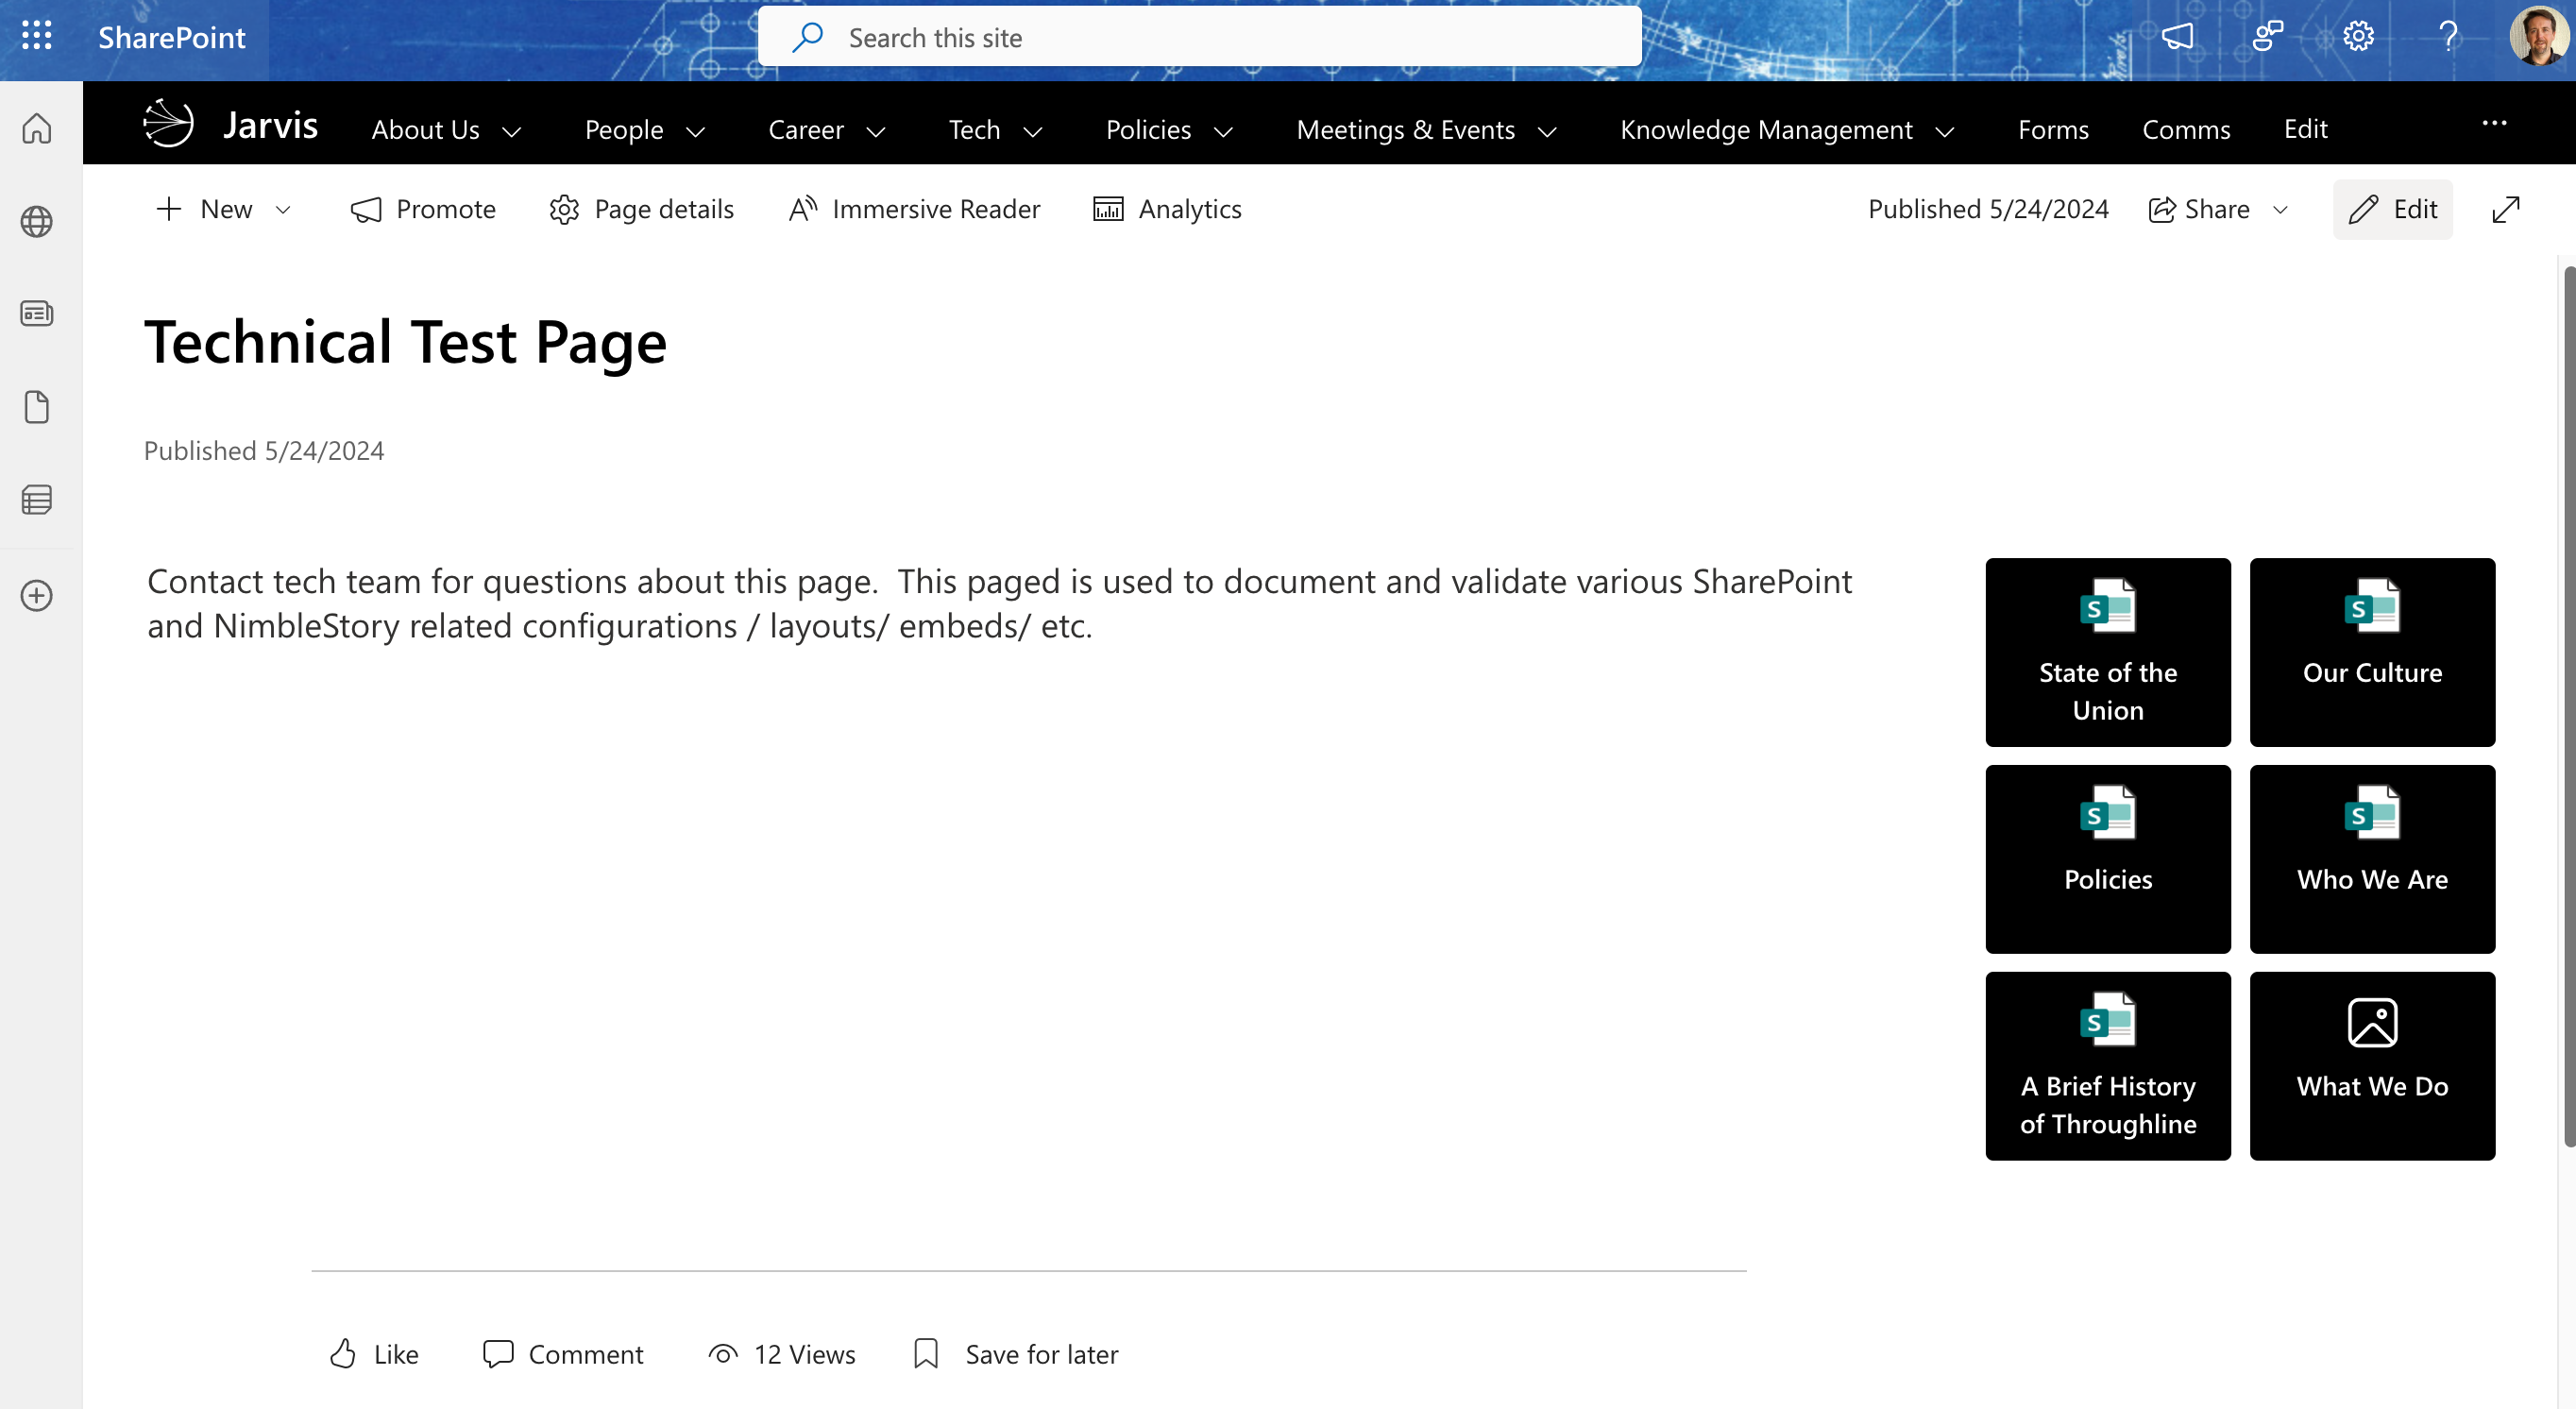
Load the Page in SharePoint for viewing
Select the Edit item at the top right of the page with the Pencil Icon next to it and you will be taken to the Page Editor as seen below.
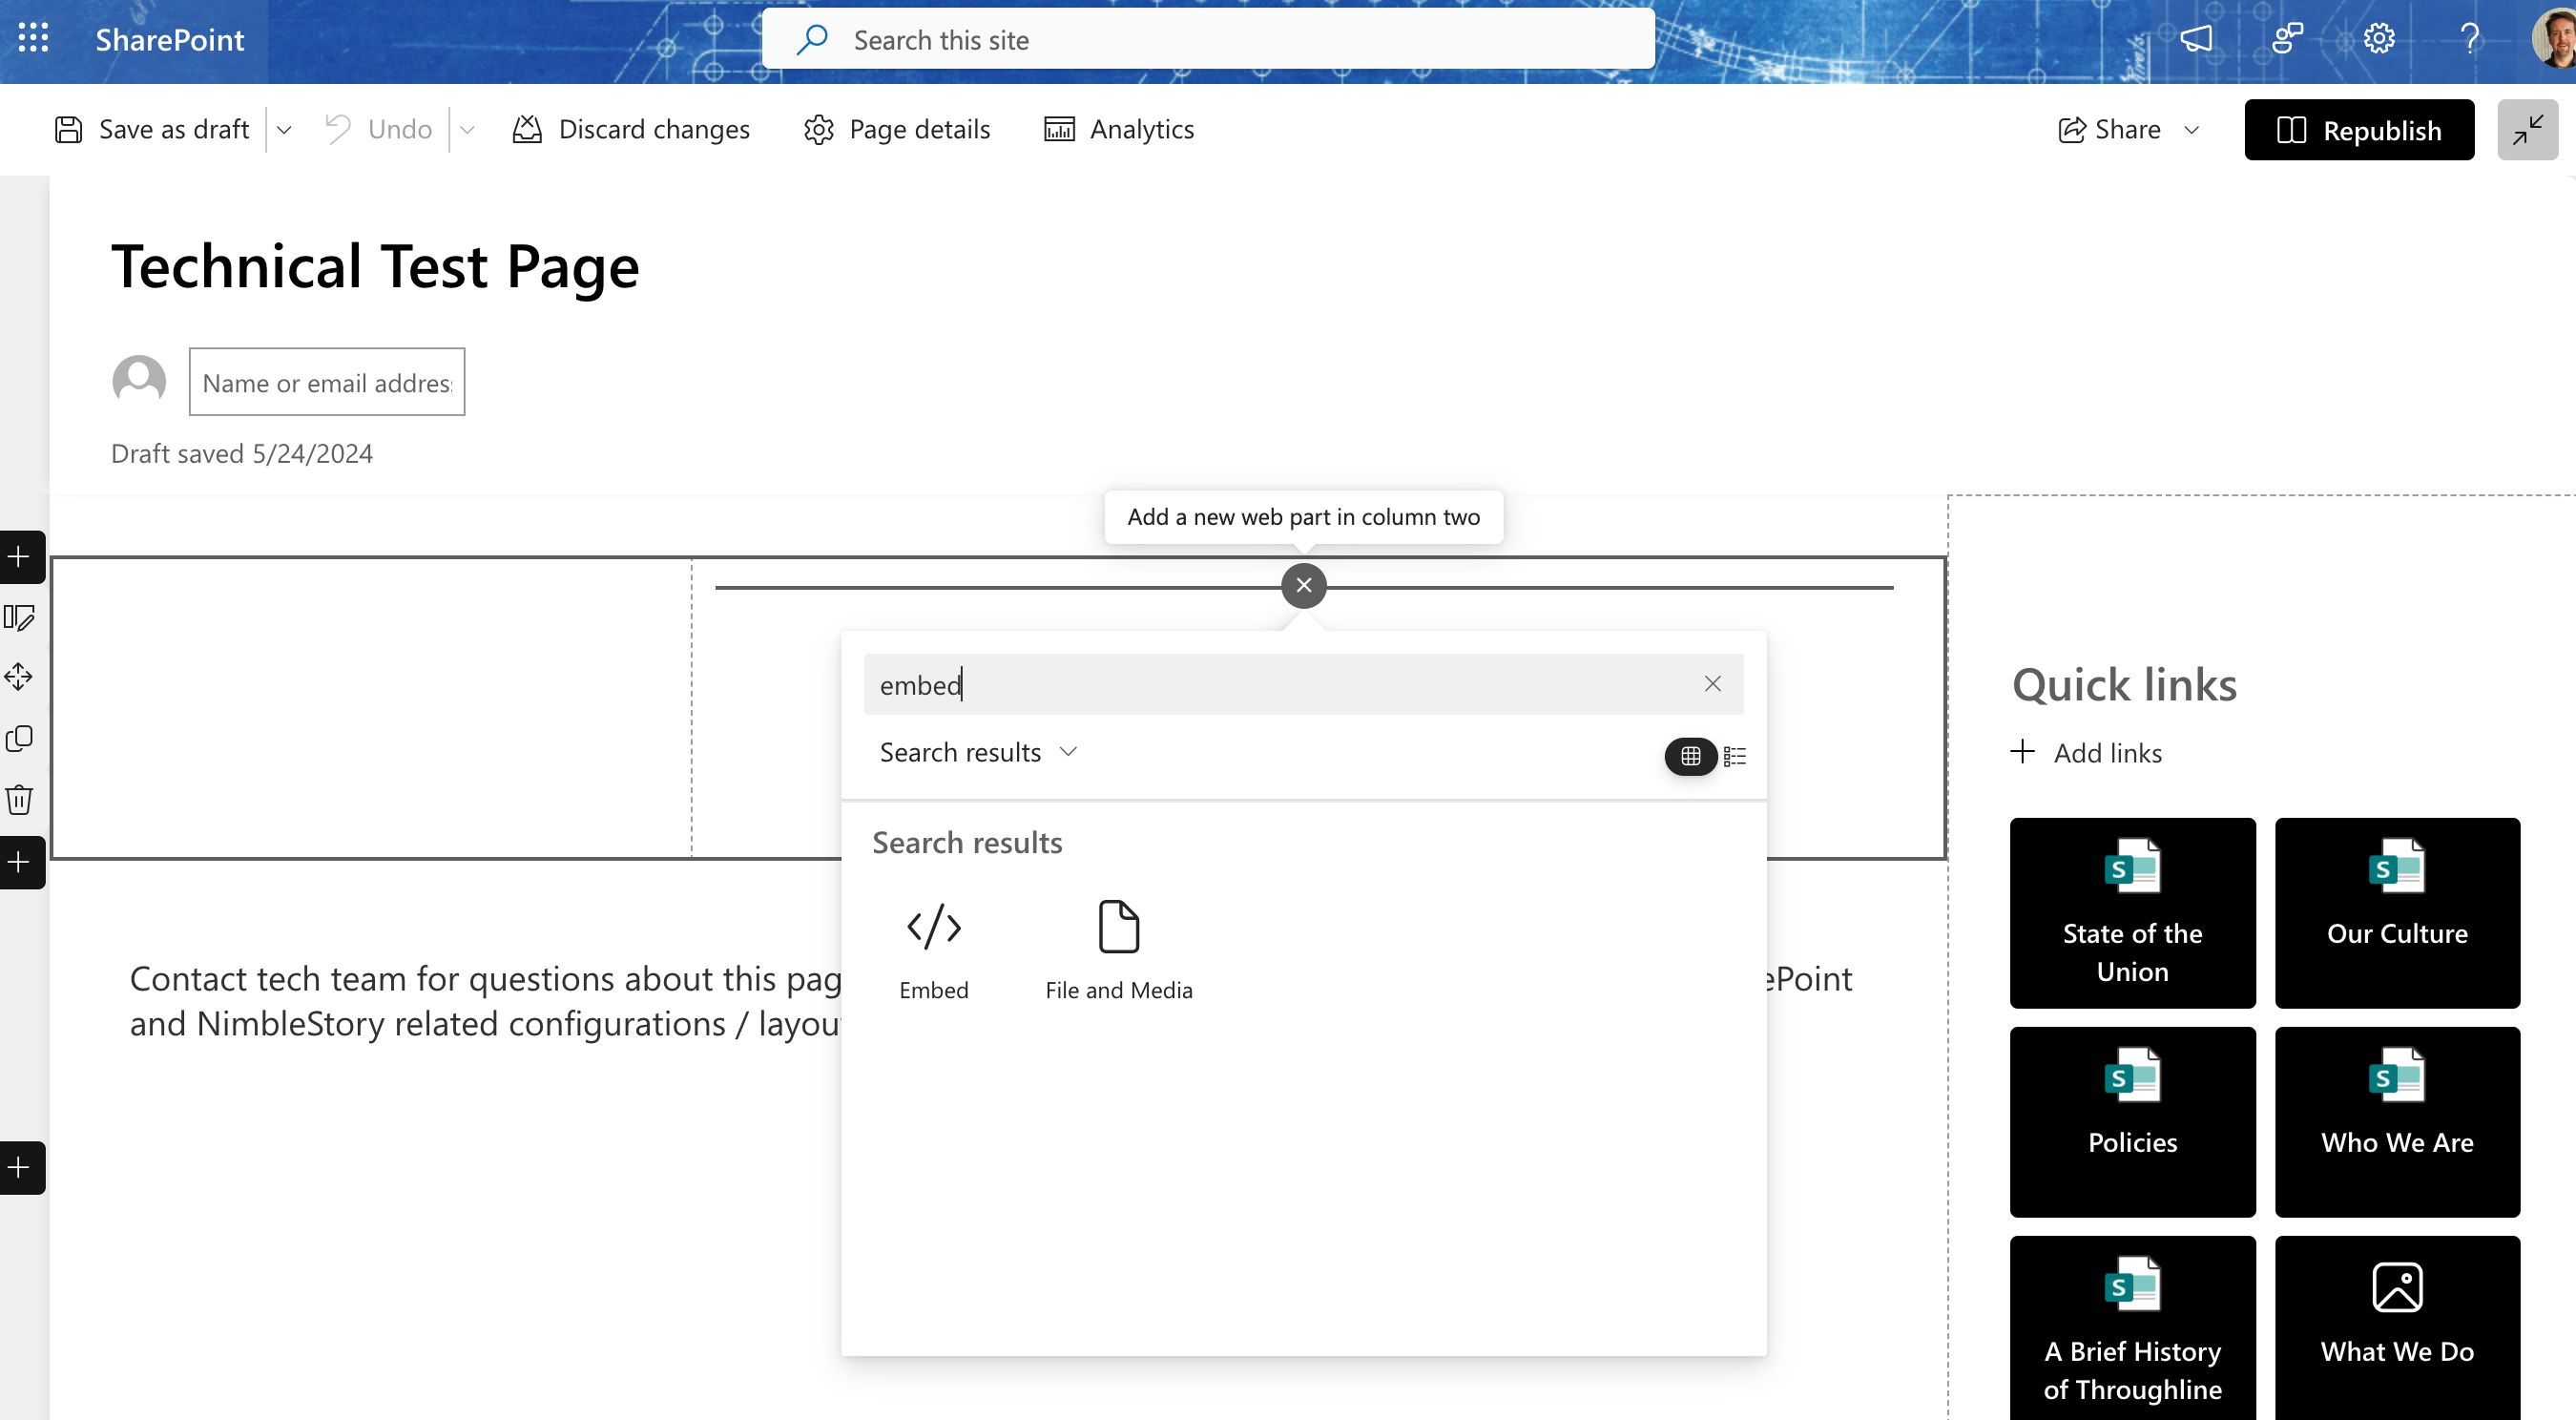
From the Editor, you can use an existing Section or add a new one from the far left side by hovering and clicking the Plus sign.
Hover your mouse over the section/ area of the page that you’d like the NimbleStory content to appear in and click the + button to add a new Web Part.
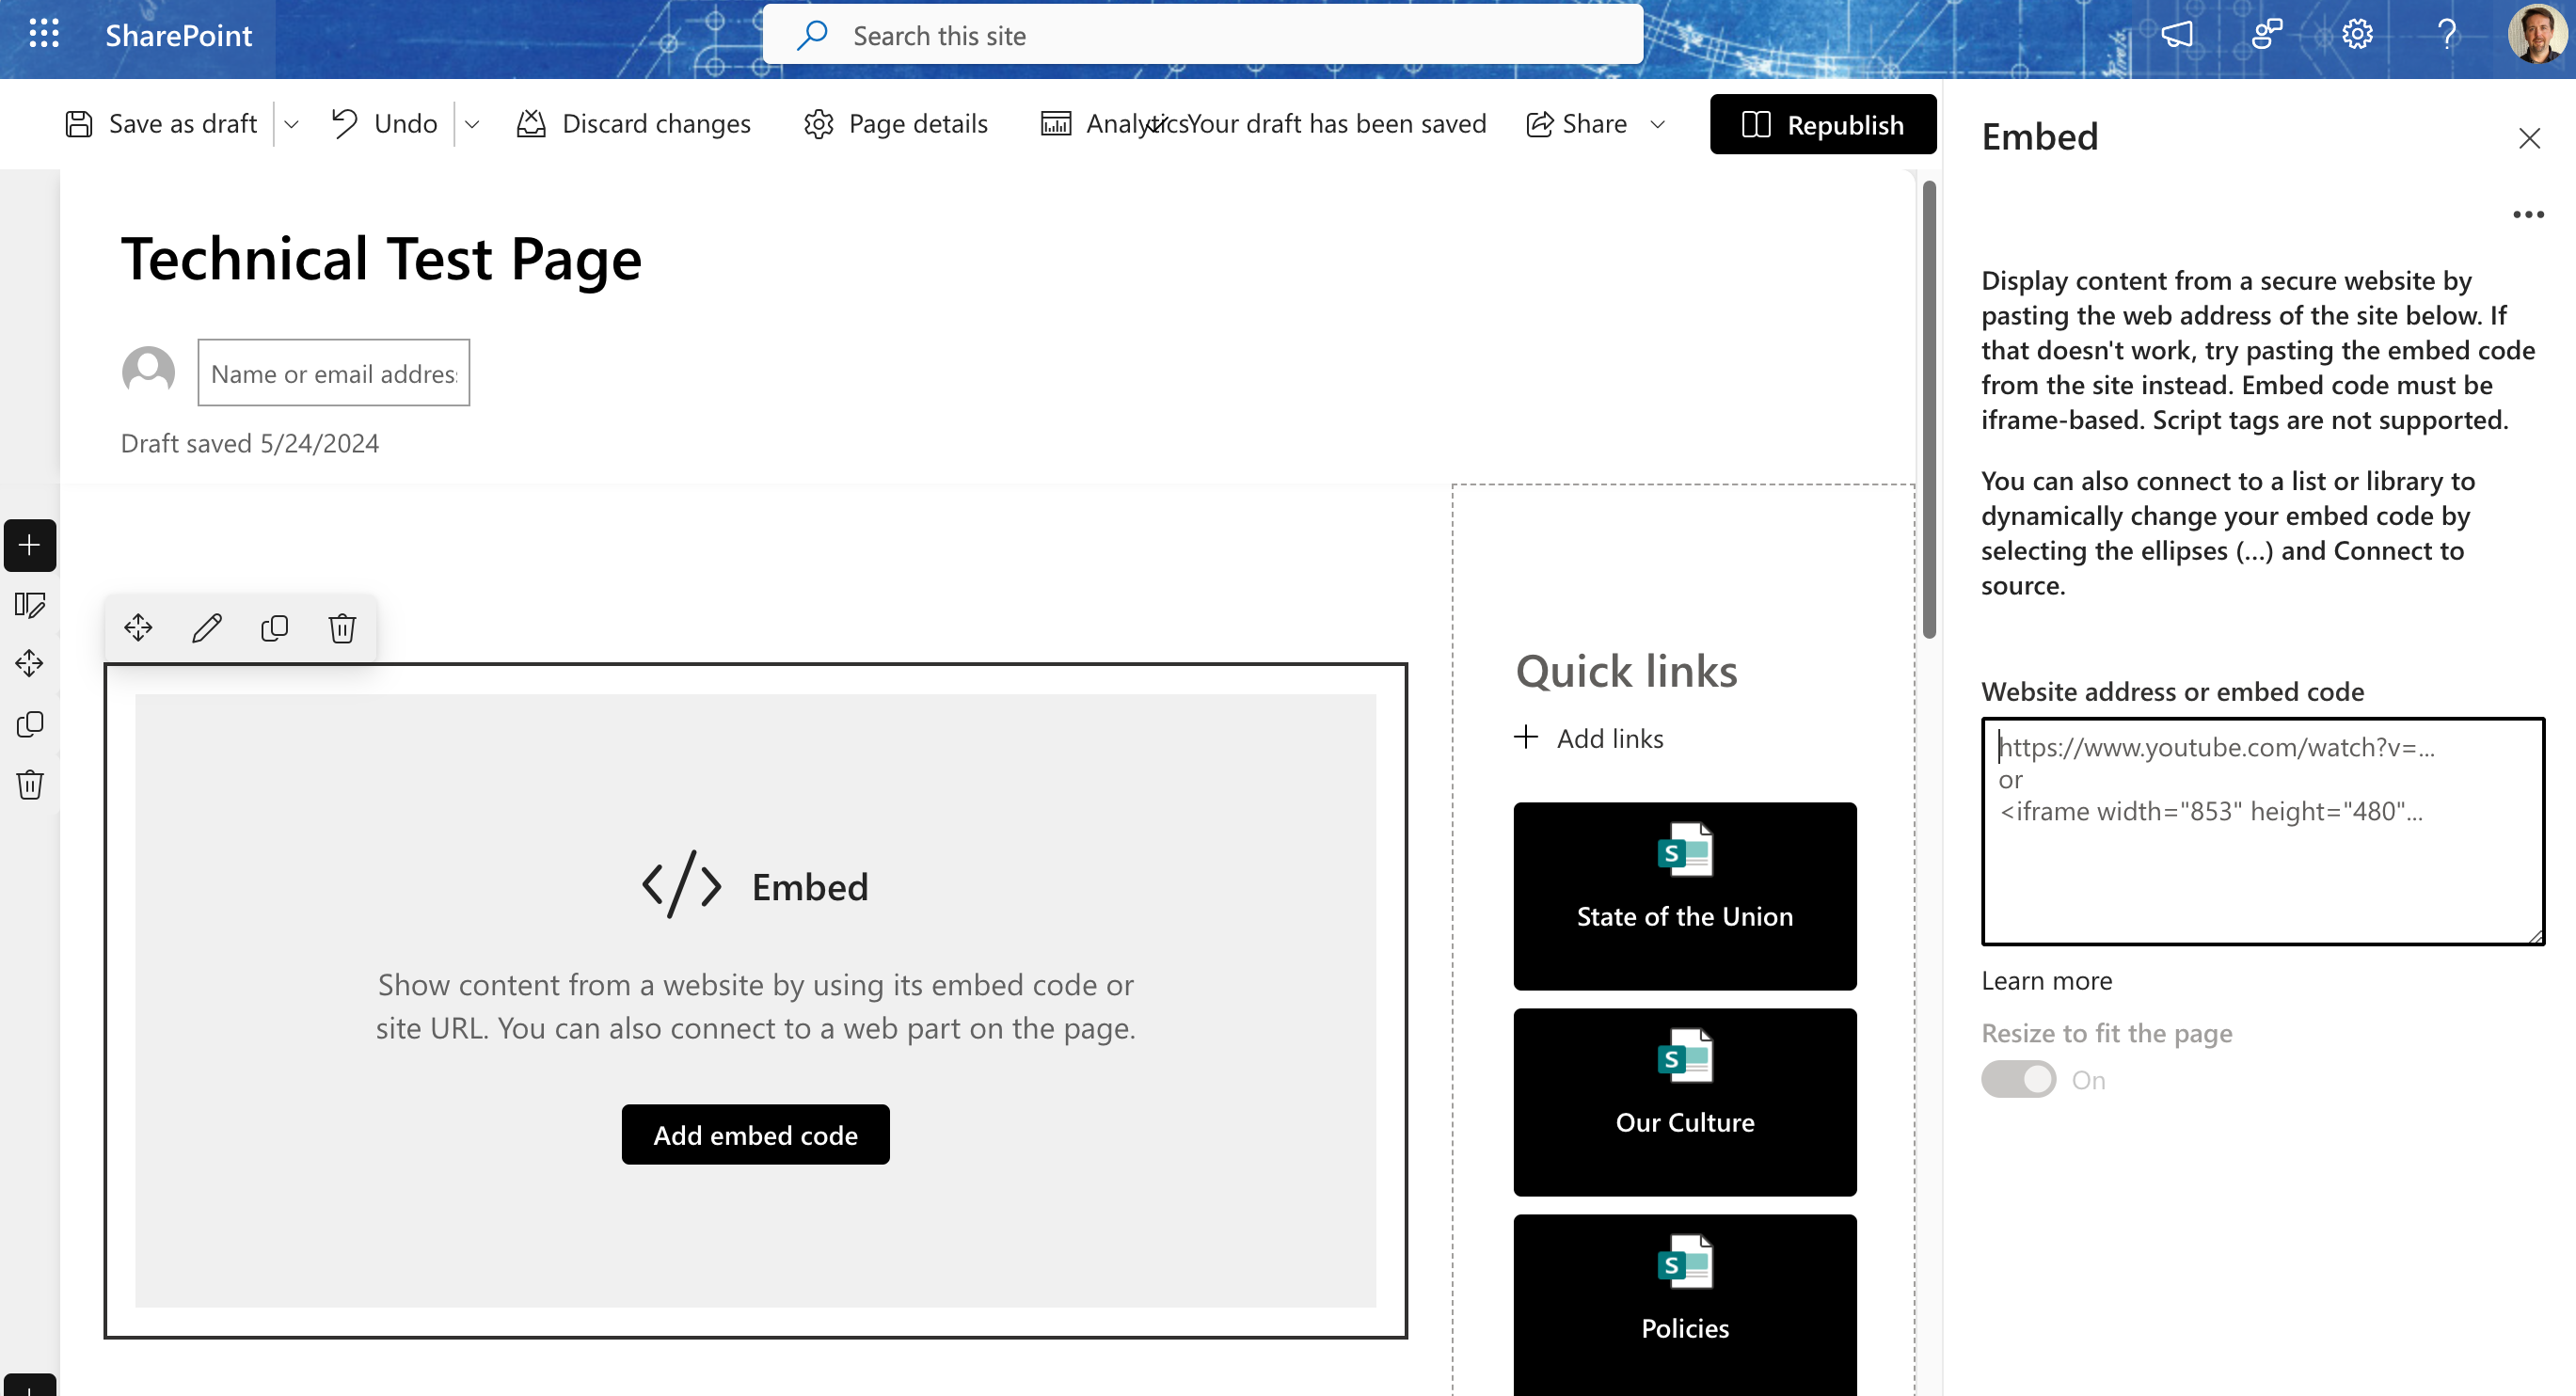
When the Web Part menu appears, scroll to or type “embed” to find the Embed Web Part and add it. It will look something like this:
Copy/ Paste the iframe block from step 1/ f in the NimbleStory Preparations section above into the Embed Web Part “Website address or embed code” field shown on the right side of the Page editor.
Click Republish to save your changes and review the result. Here is an example.
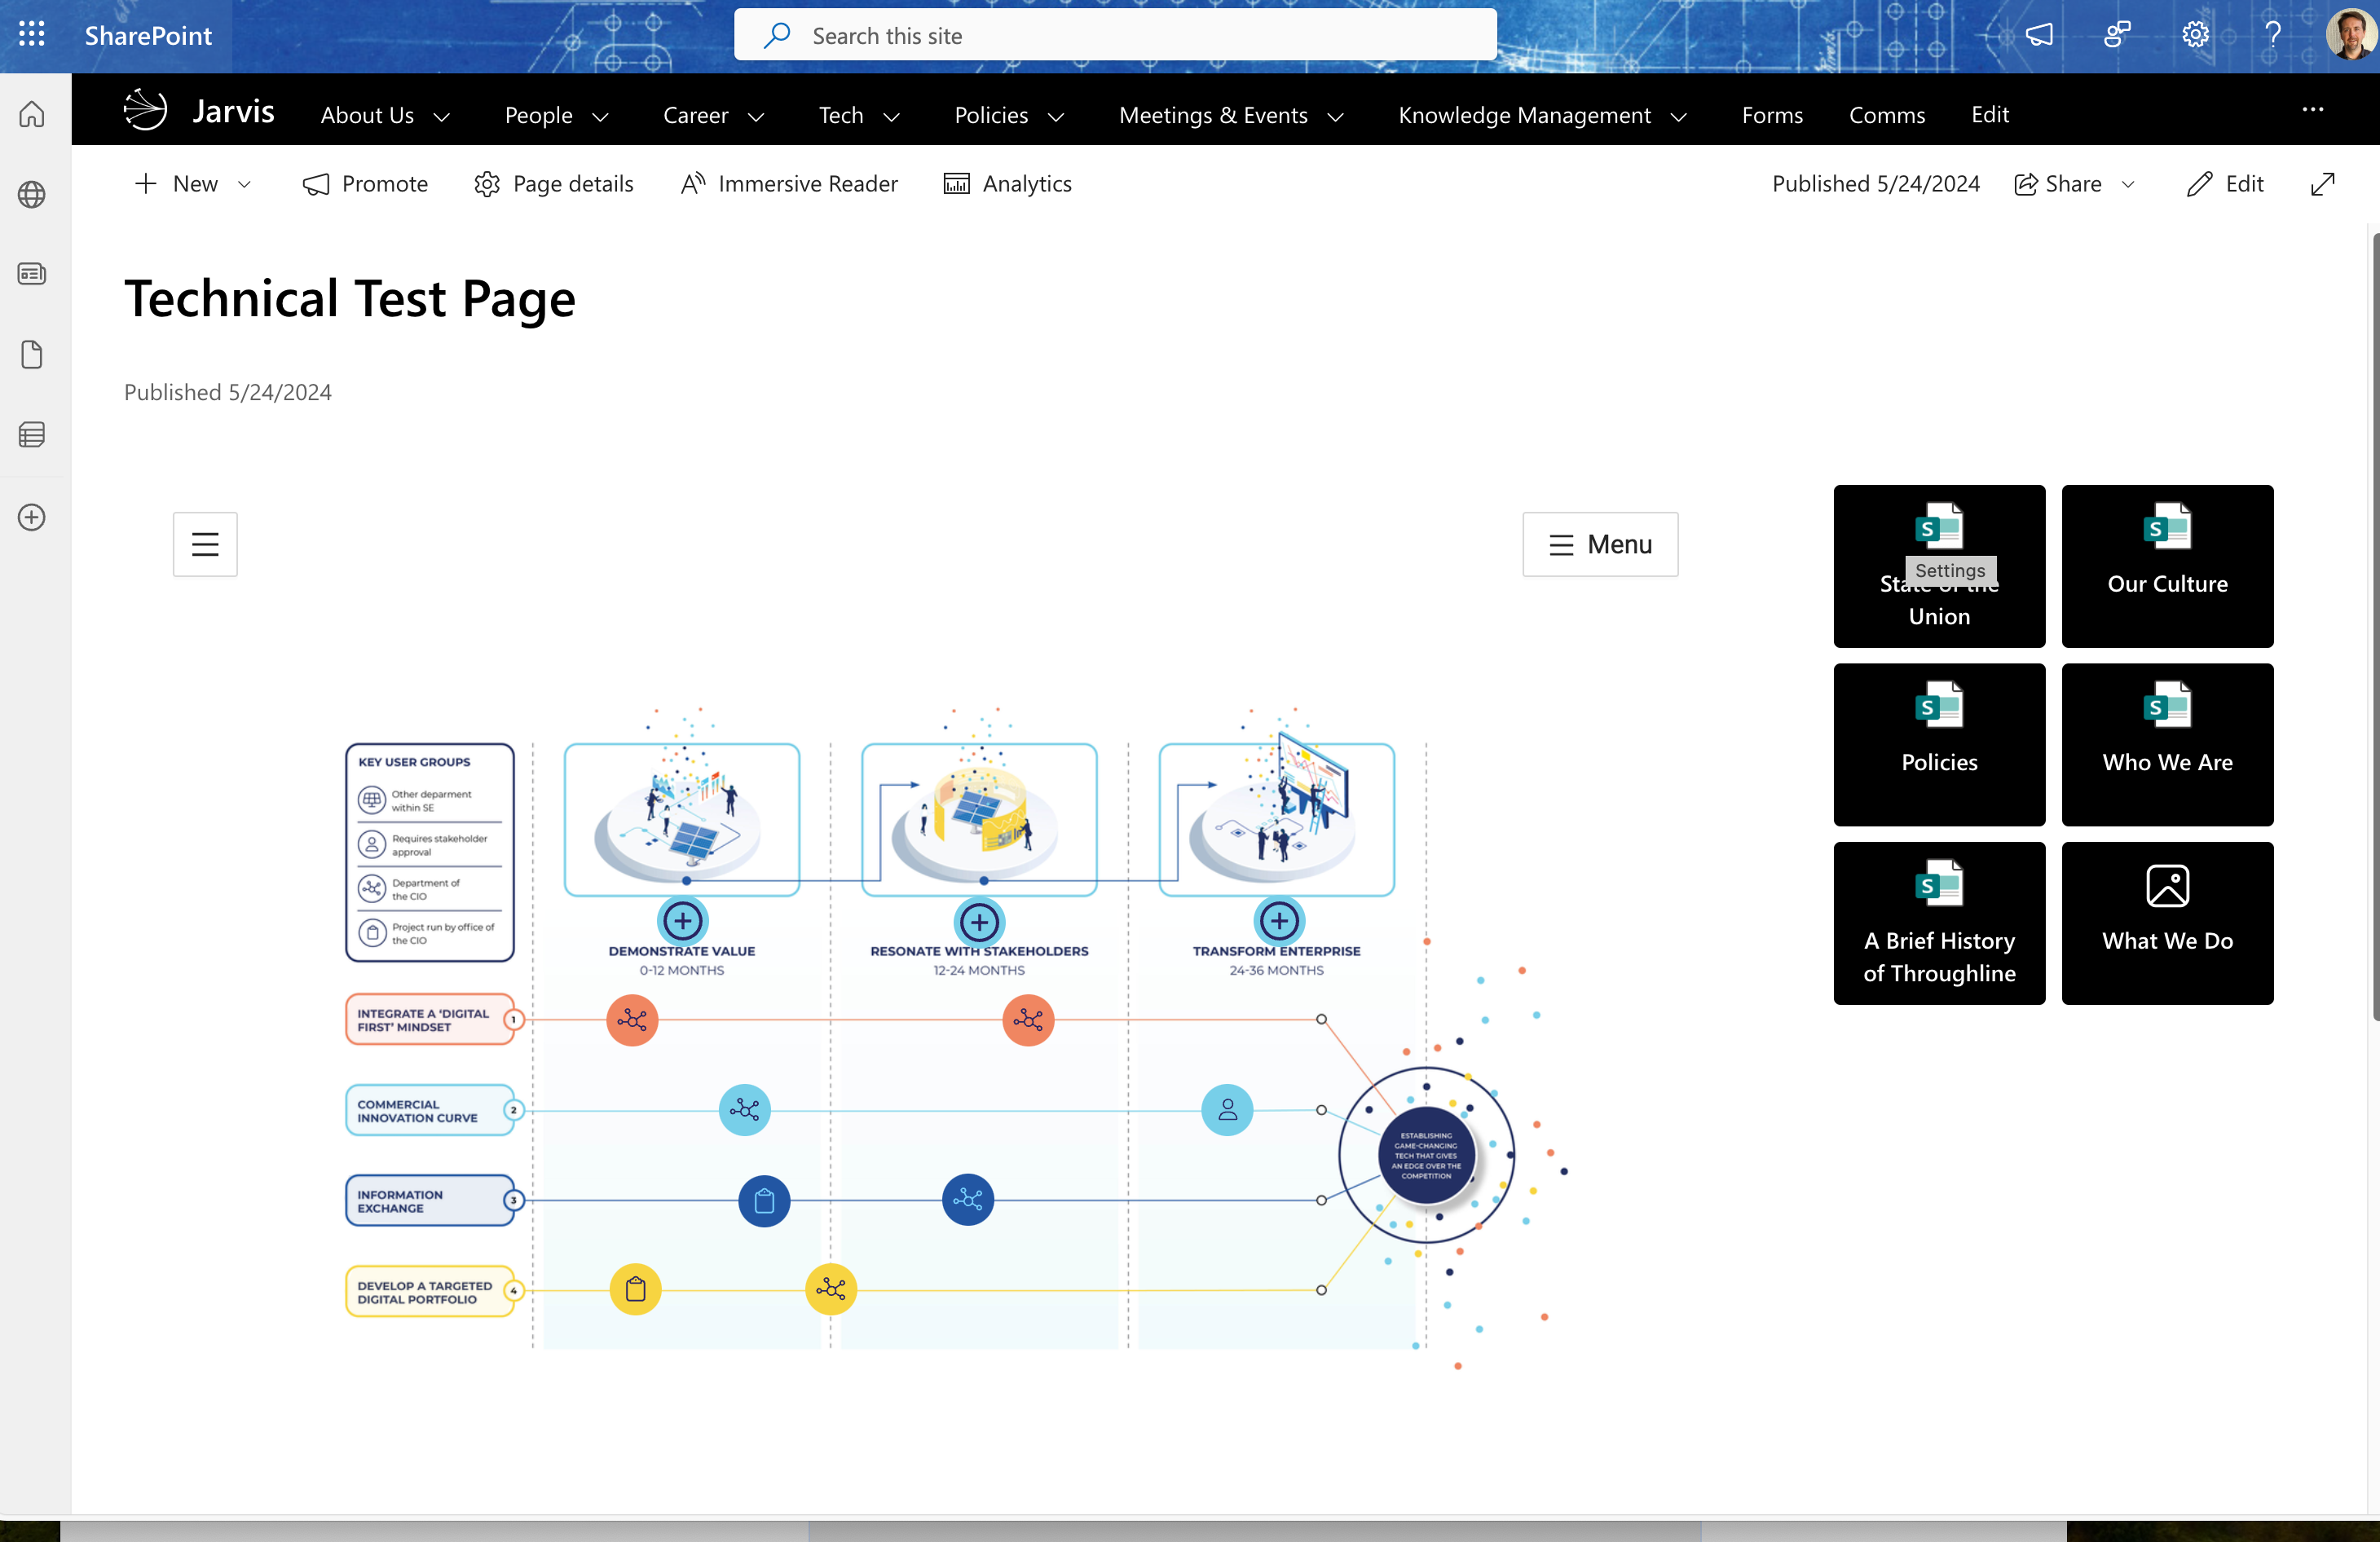
Note that placement/ sizing/ and introductory materials to explain the solution may be required, these are just as easily added in the Page Editor using SharePoint’s built in text and document Web Parts but are not covered in this NimbleStory focused instruction.
If there are problems with the rendering/ sizing/ styling/ menu options, discuss them with your NimbleStory point of contact and we can make adjustments.
If the embed fails to load at all, refer back to the SharePoint Preparation steps to ensure those items have bee completed correctly.
📋 Related articles
Audience | Public |
Section | NimbleStory Basic |
Status | Rough Draft |
Applies to | NimbleStory 3.0 and higher |
Next Review Date | Nov 2022 |
| Version | Date | Comment |
|---|---|---|
| Current Version (v. 2) | May 24, 2024 16:52 | @a user |
| v. 1 | May 24, 2024 16:49 | @a user |

