Adding Content to a Project
As you manage your Project space you have the ability to add a variety of different content types to share with your team members and other stakeholders. Below you will find guidance on the various forms of content that are made available. As more additions are more in future releases there will be a notation included for which release made it available.
Instructions
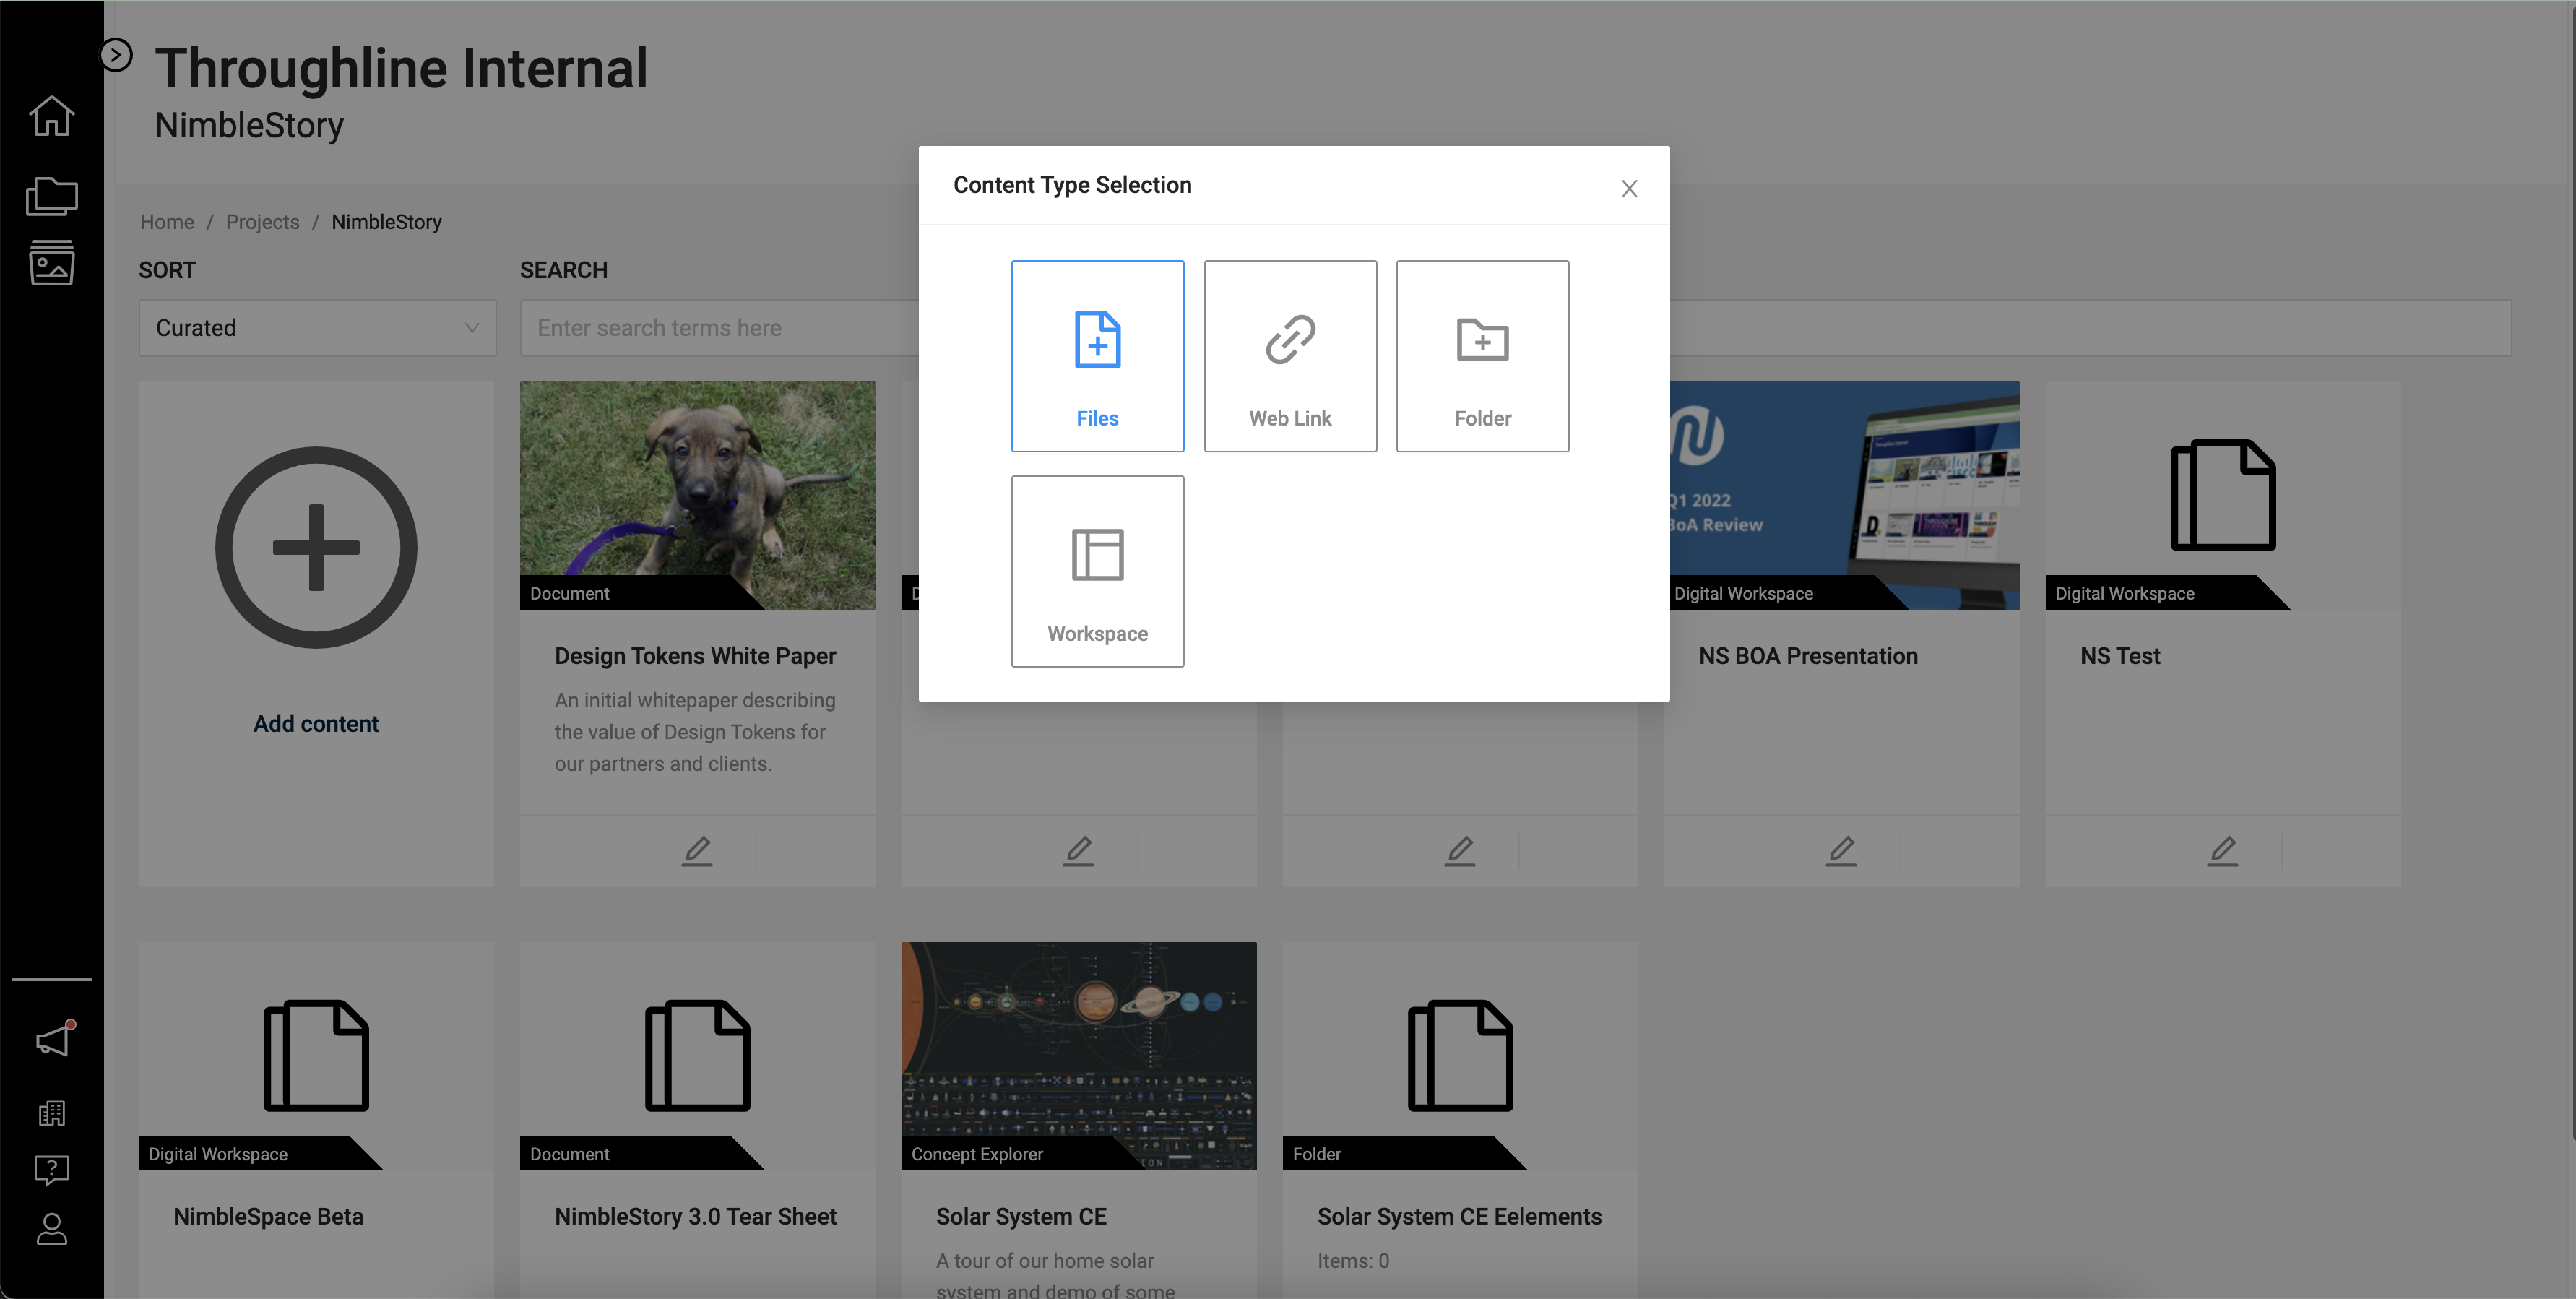
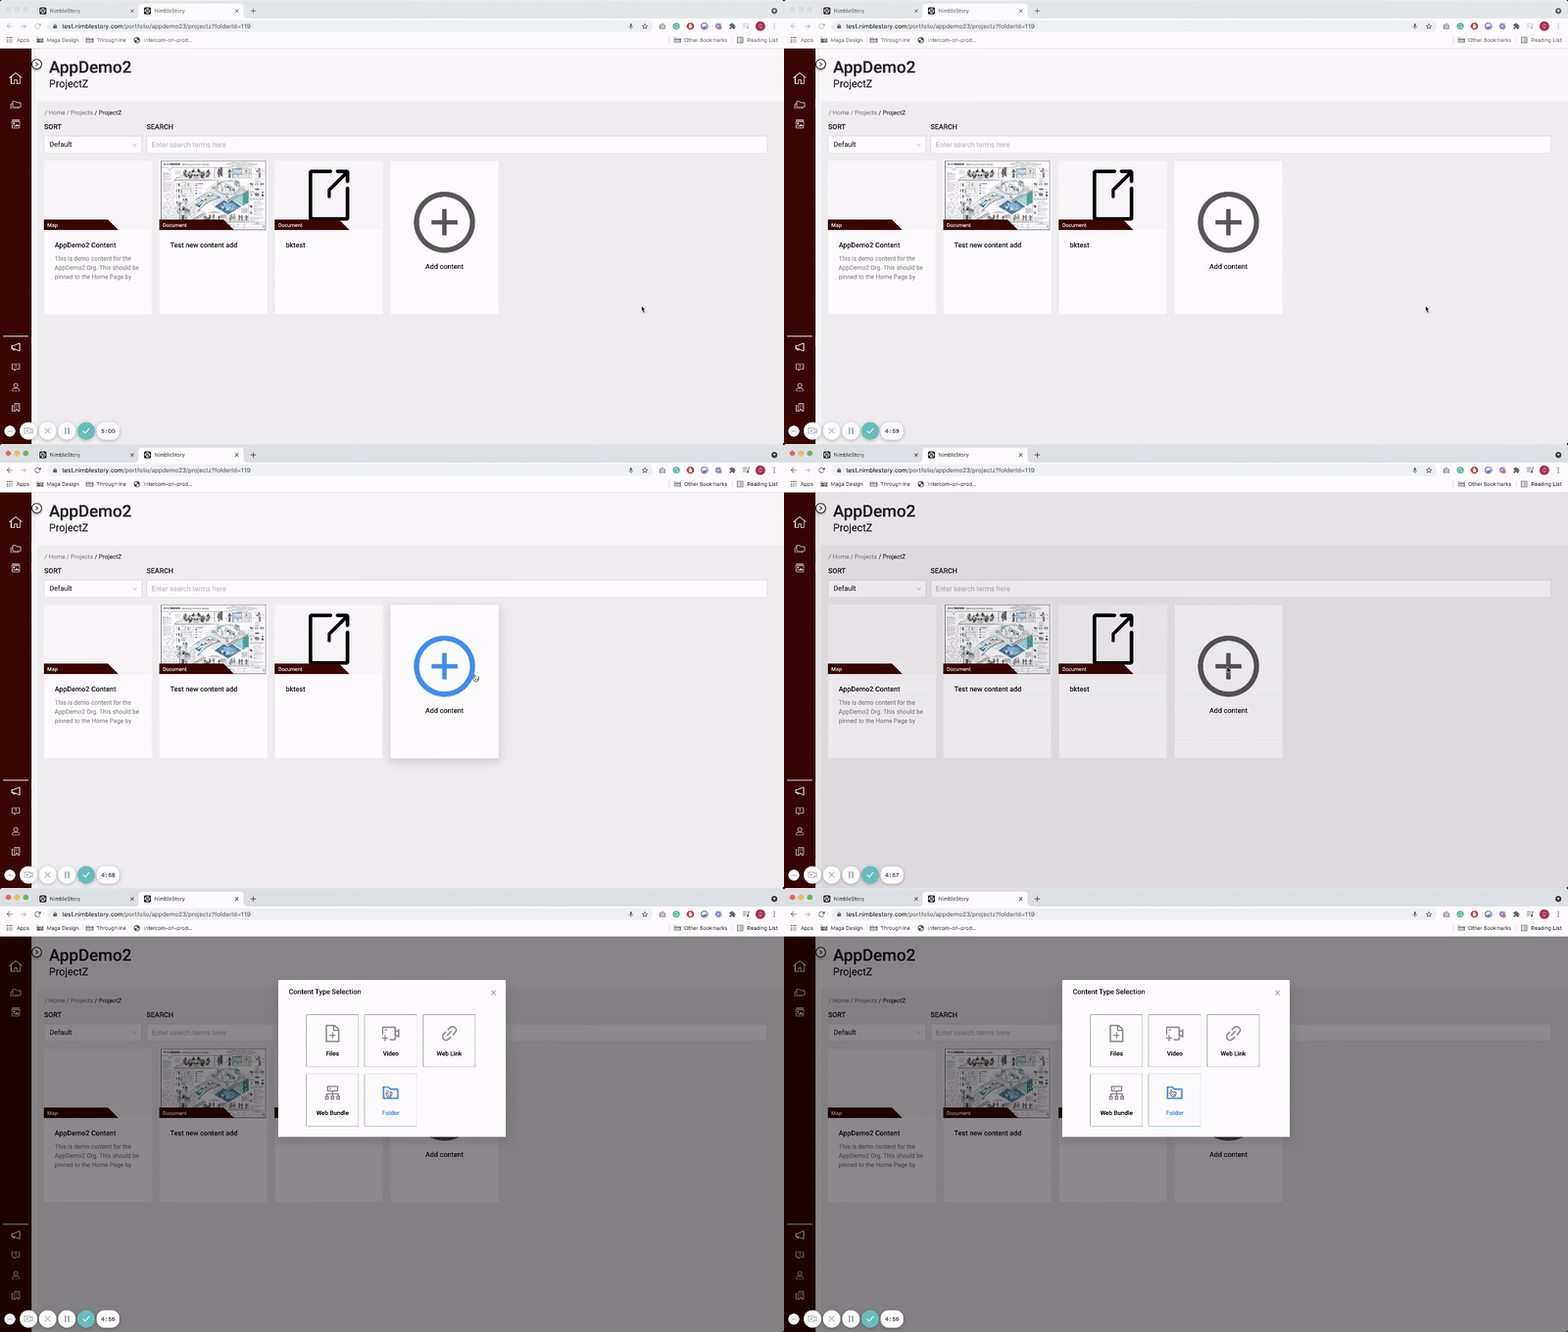
Assets can be added to a Project by first selecting the Add Content card which will appear as the last card in the set of existing content cards. If the Add Content card does not appear within your project contact your admin to have it enabled. Next, select the type of asset you wish to upload.
Content Types RELEASE 3.2.2
In the recent release of 3.2.2 we have made some significant changes to help you better upload and manage content within your Project in a more seamless manner. Previously when you selected the Add Content card from the project space you would be presented a modal with six options to select from. Recently, we combined a set of these subtypes to provide more flexibility and as a result will now only see the following options: Files, Links, Folders, and Workspaces. This means that Files and Webundles are now treated the same as well as Video and Links.
Similar to being able to associate multiple files with a piece of content you can now mix files and links together.
Files & Links Content Upload Page RELEASE 3.2.2
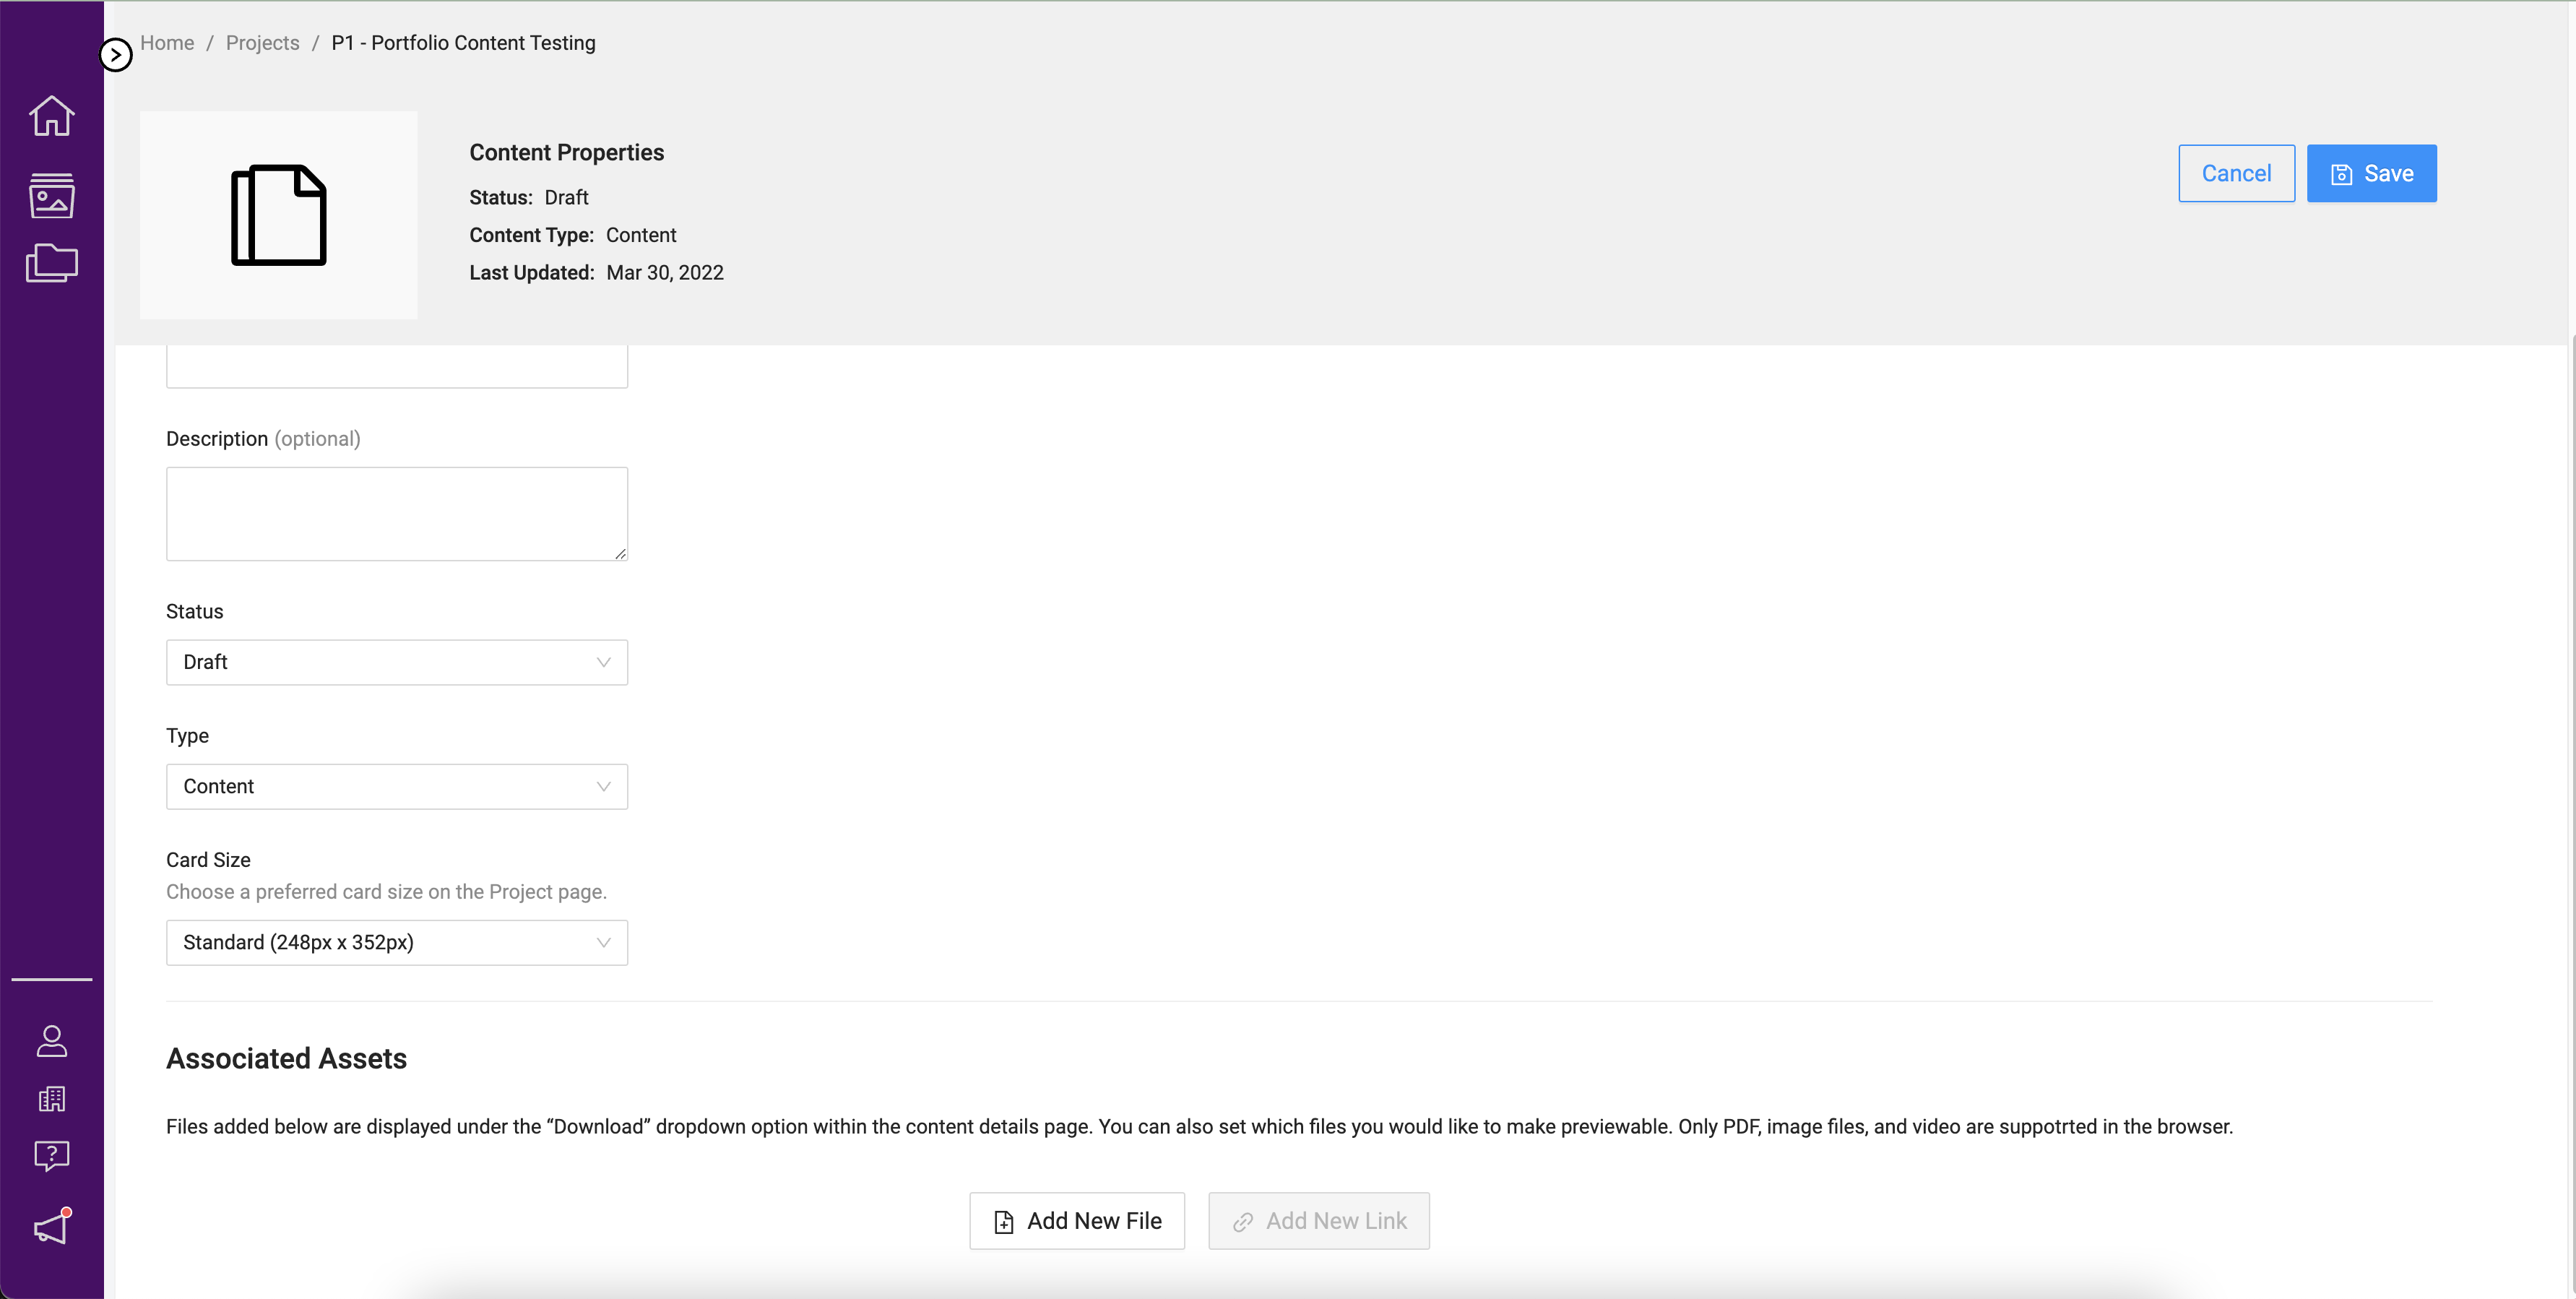
When you select either the Files or Links option from the Add Content modal you will be directed to a new content view. On this page you can configure the basic information about the asset including:
· Title – name of the asset
· Description – optional information about it
· Status – associated flag
· Type – kind of content related to the asset
· Card Size – display size as it will appear on the Projects Home view
Depending on which of the two options you selected will be presented with a file upload option at the bottom of the page or an empty links option to embed content.
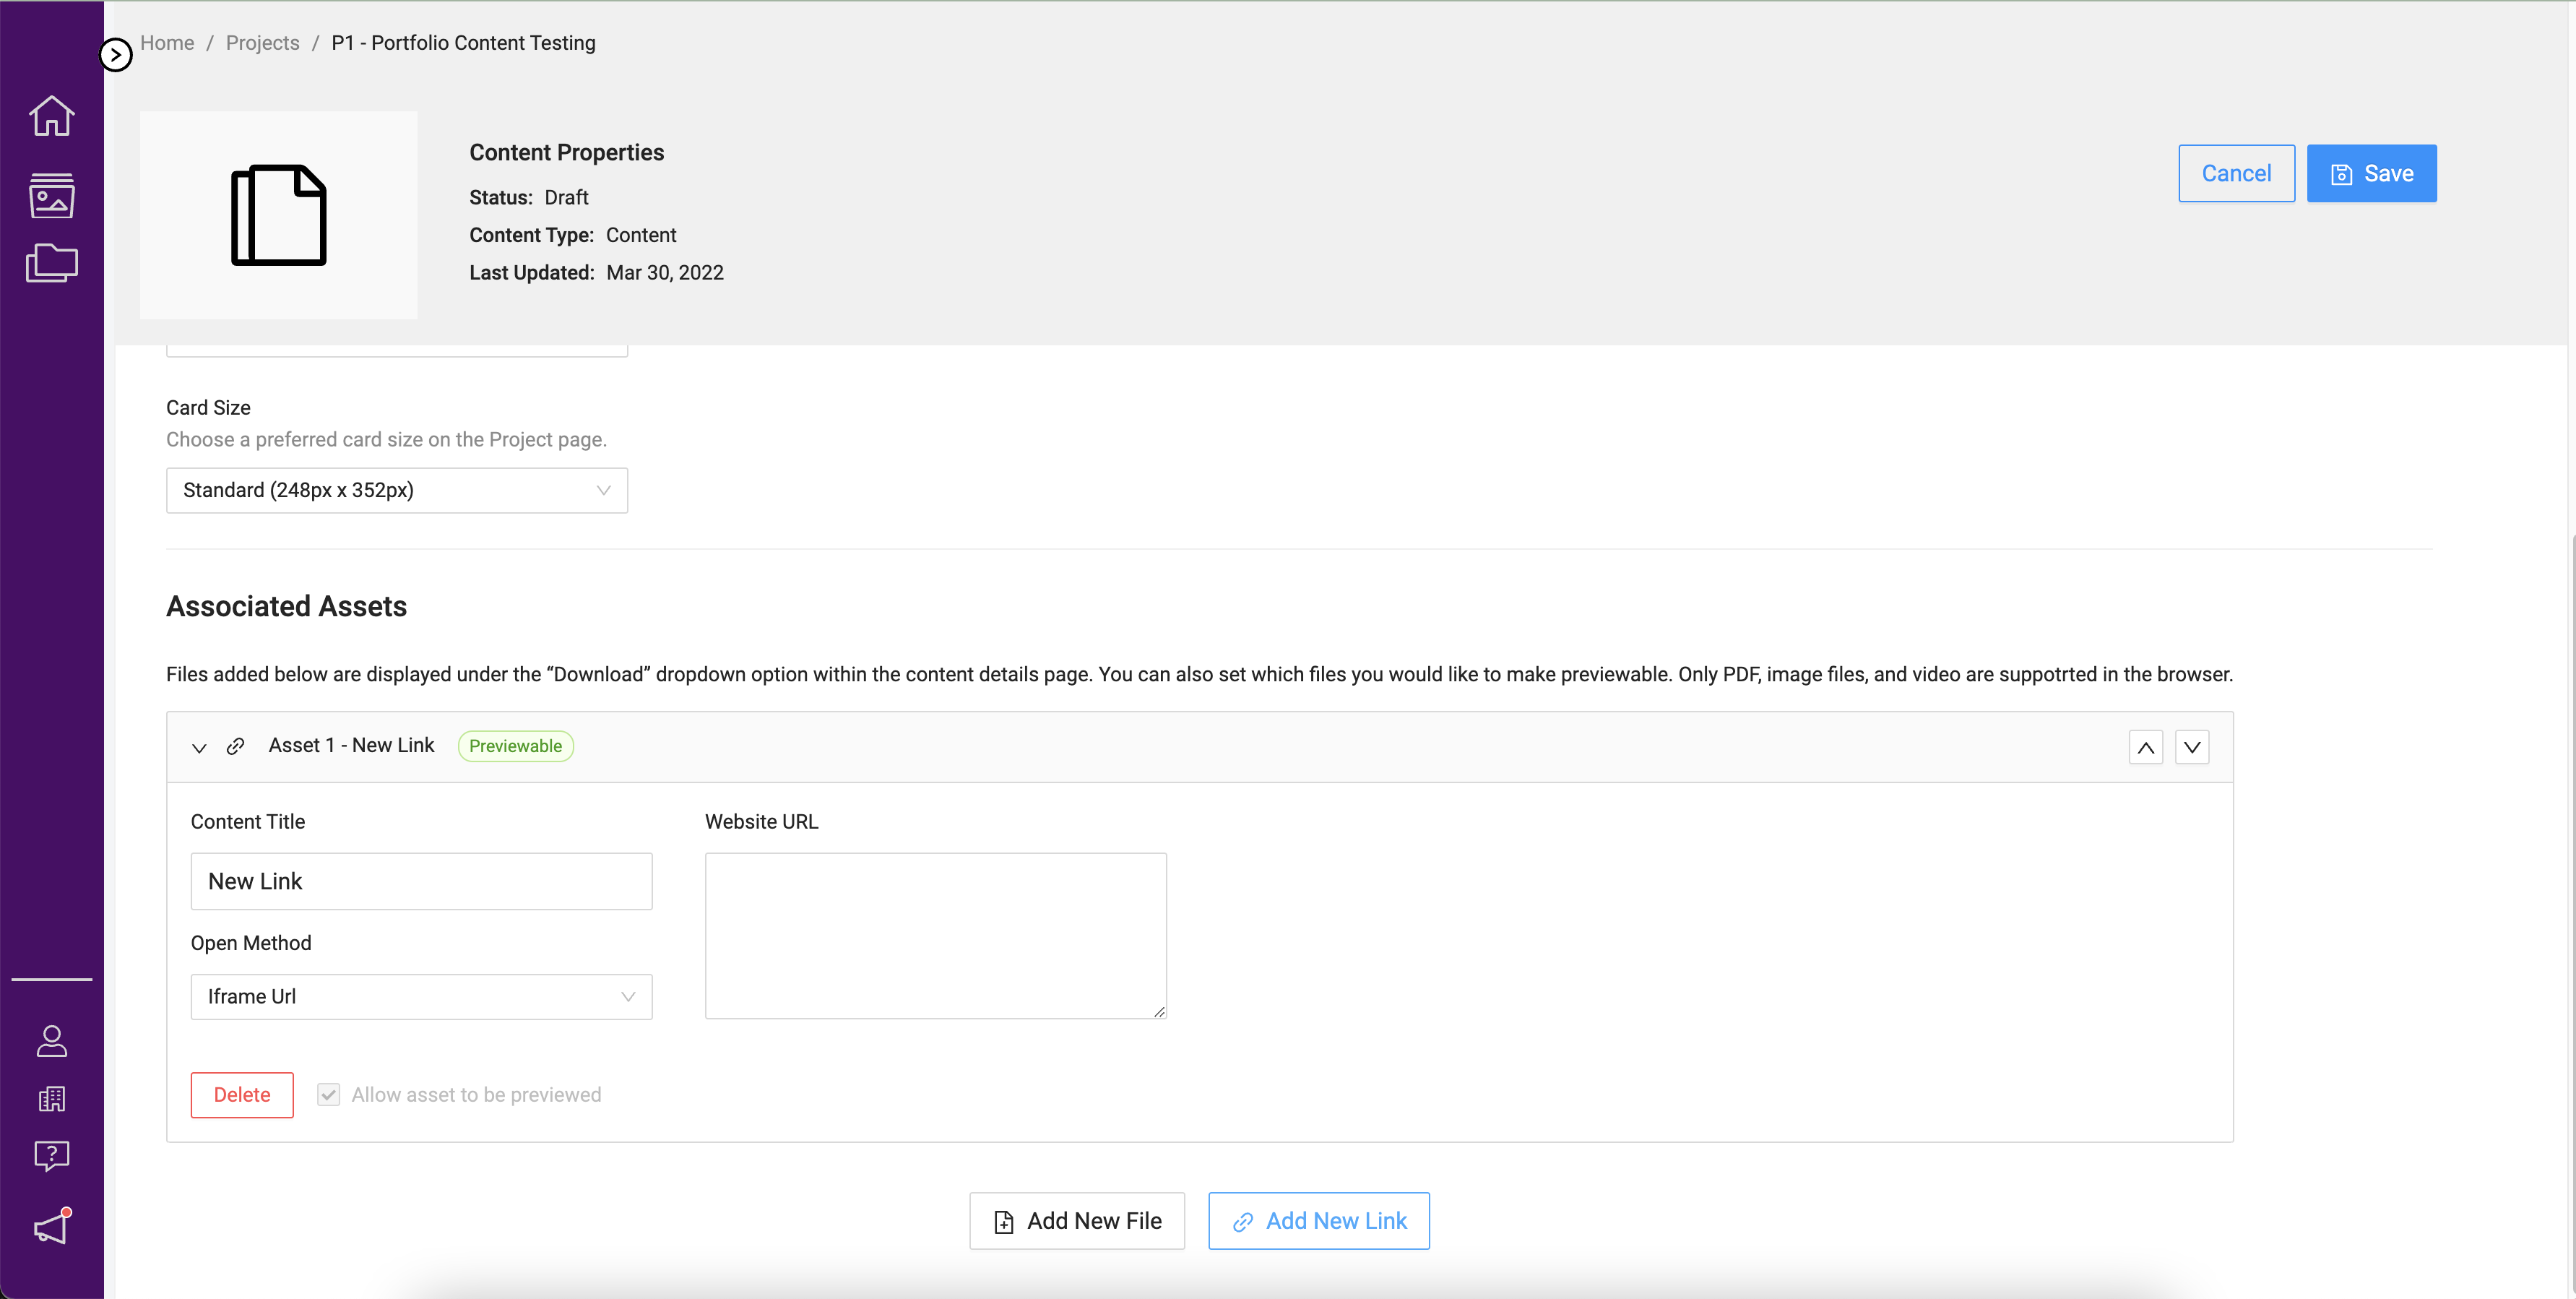
Once you had added an initial asset you can add more assets below it as either Files or Links.
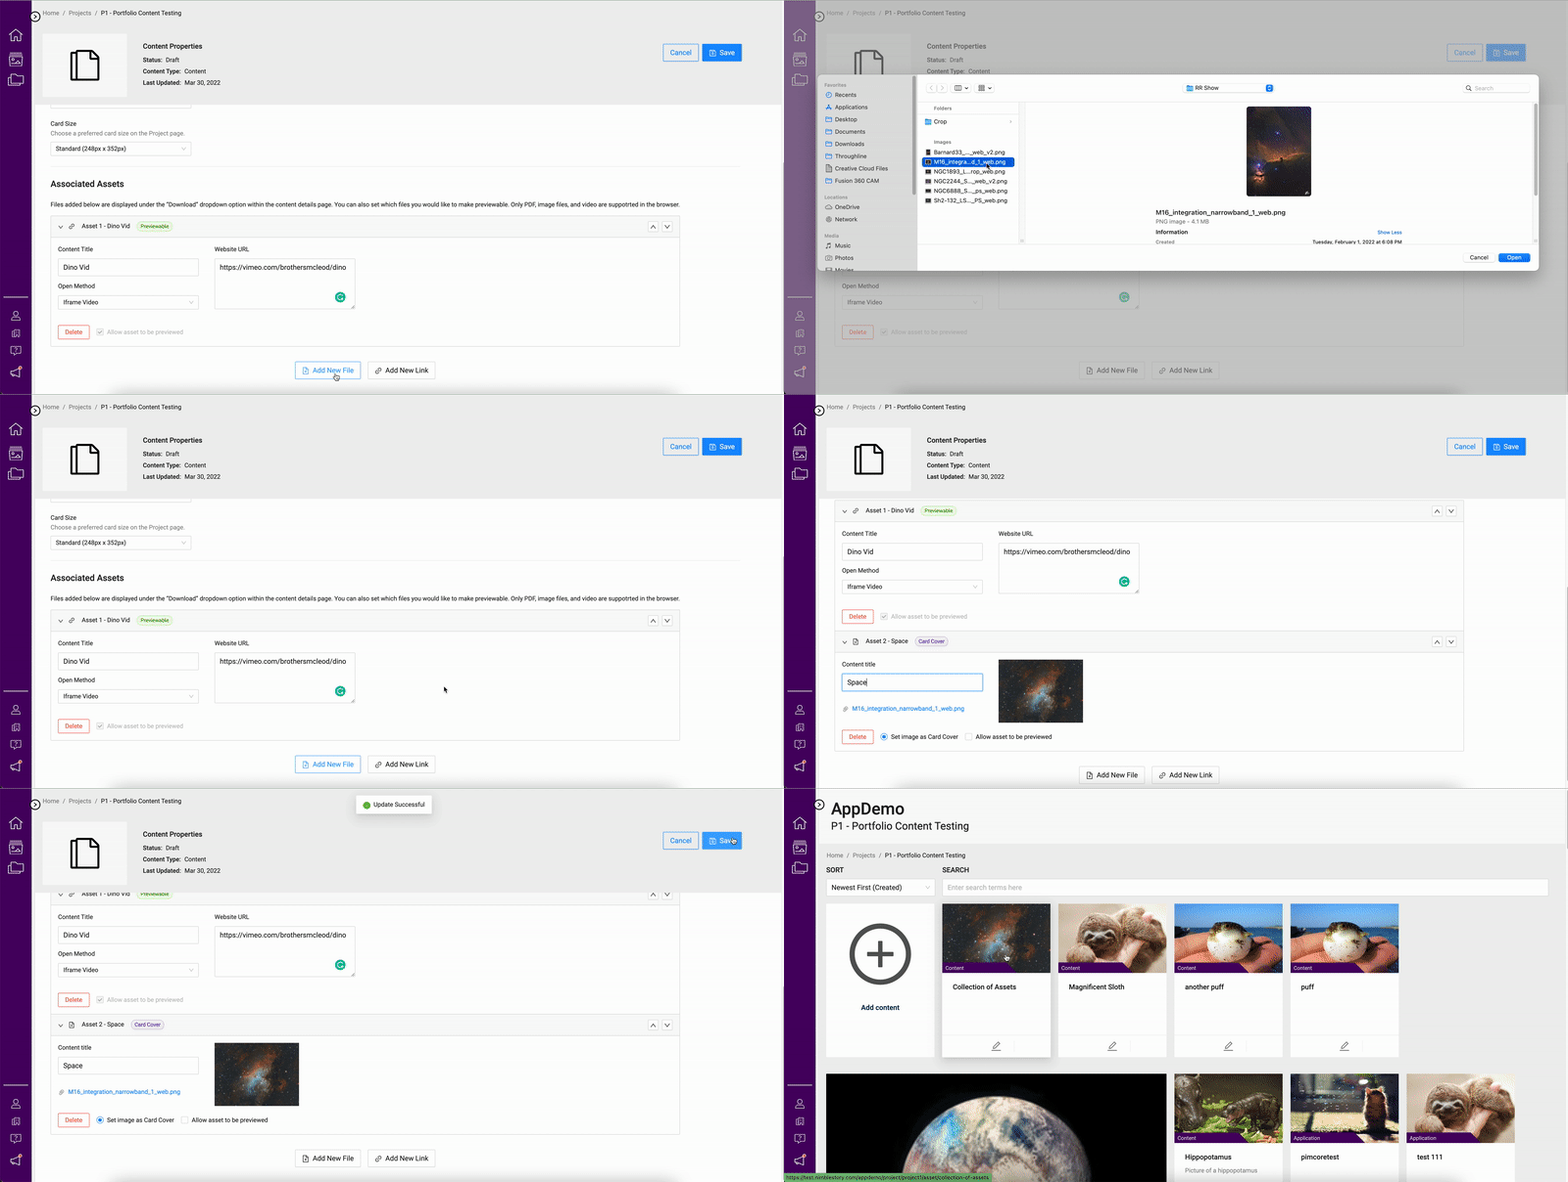
A Note on Web Bundles: Only users with Project Owner or Curator rights have the ability to set a zip file as previewable.

You may also use the up and down arrows in the section headers to change the or of the content.
Configure Tags RELEASE 3.3.8
Tags can now be applied for Portfolio Content. In this initial release, you can configure tags for File and Link-based assets, and soon for Digital Workspaces and Folders. You can search from a set of system-assigned tags to a piece of content in either the Create or Edit views. To apply a tag simply select the dropdown and choose from any of the available selections. You may select more than one as they relate to the asset.
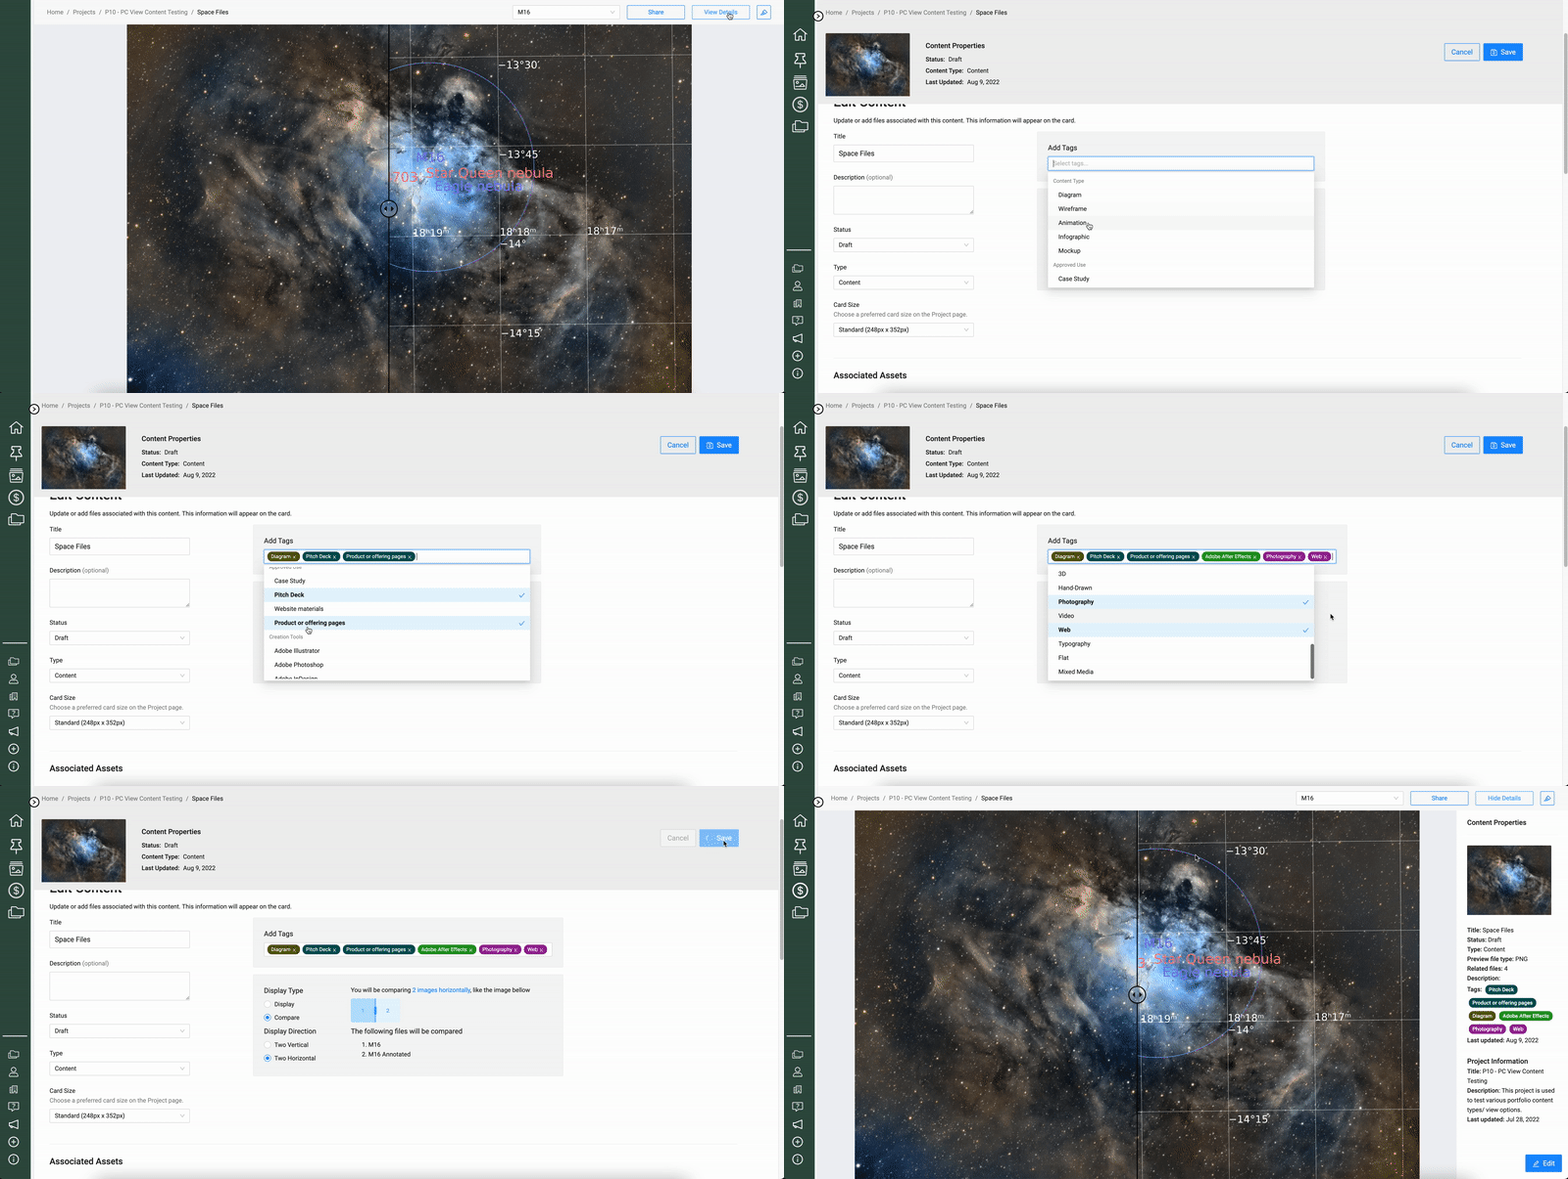
Applying Tags
NOTE: Tags have a cascading nature. Tags set at the Organizational level will cascade down to Projects and then down to Content.
Configure Views RELEASE 3.3.8
Additionally, you can now customize different views for File and link-based content. You will now have the option to set previewable content as visible side-by-side, or if there are four assets they can be displayed in a grid. You may also compare two previewable pieces of content with a reveal slider.
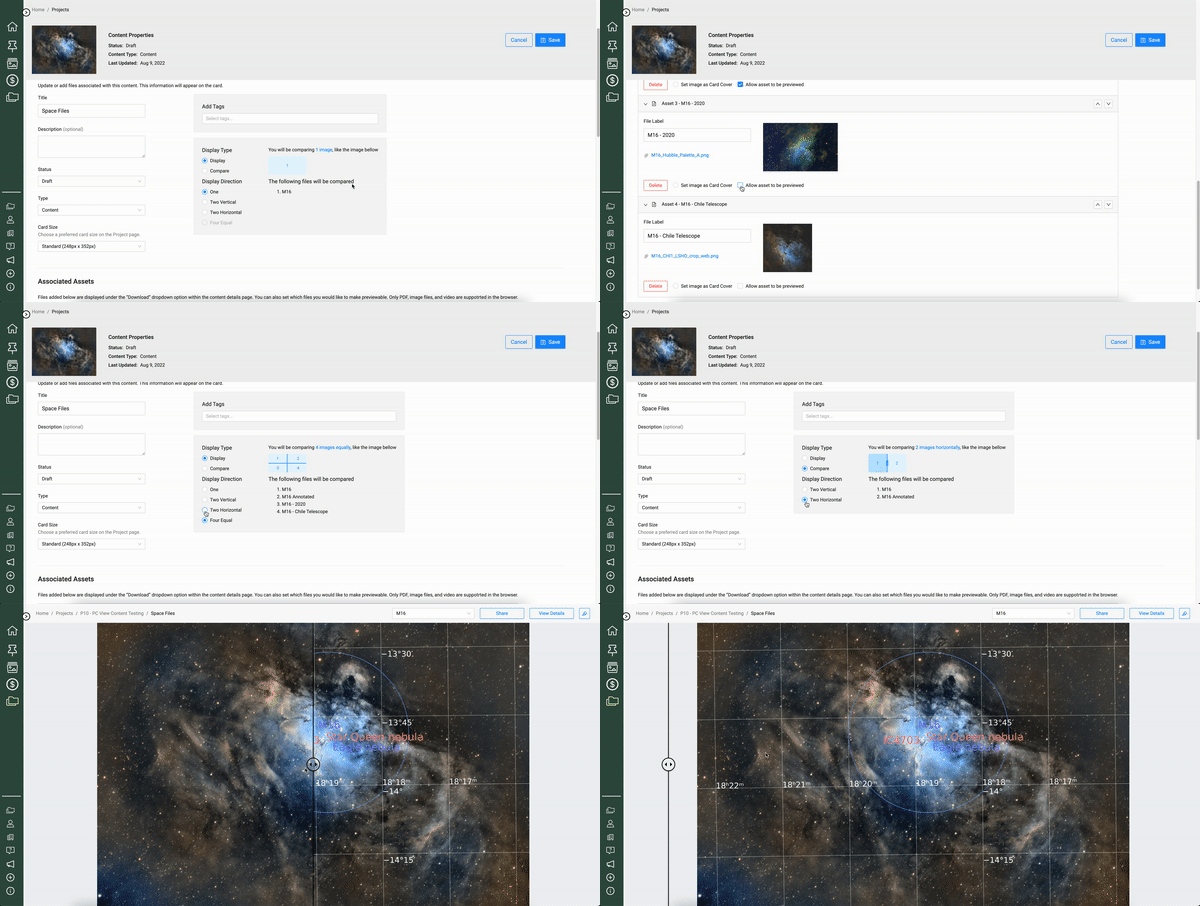
Comparison of Two Assets
Folder RELEASE 3.0.3
Folders can be added to your Project space which allows your organization to create additional levels of structure. A folder can host any form of content or assets made available in NimbleStory. To add a Folder select the Add Content card and select the Folder option.
When adding a folder the only required input is the Title. You may also add a description and a card image thumbnail to differentiate the Folder card within the project.
Once you have selected “Submit” a new folder will be made available as an interactive card within the Project space.
If the new folder does not immediately appear you may need to refresh your browser.
Workspace RELEASE 3.0.6
A Workspace is a collaborative environment where users can virtually work together. NimbleStory supports a number of these environments by allowing you to connect Miro, Mural, FigJam, and Freehand directly in your project. Additionally, the beta feature NimbleSpace allows you to have to add a personal working space to your project.
NOTE: Currently, NimbleSpace only supports a single user working within it at a time. In future updates, we plan to enable multiple users to collaborate at once.
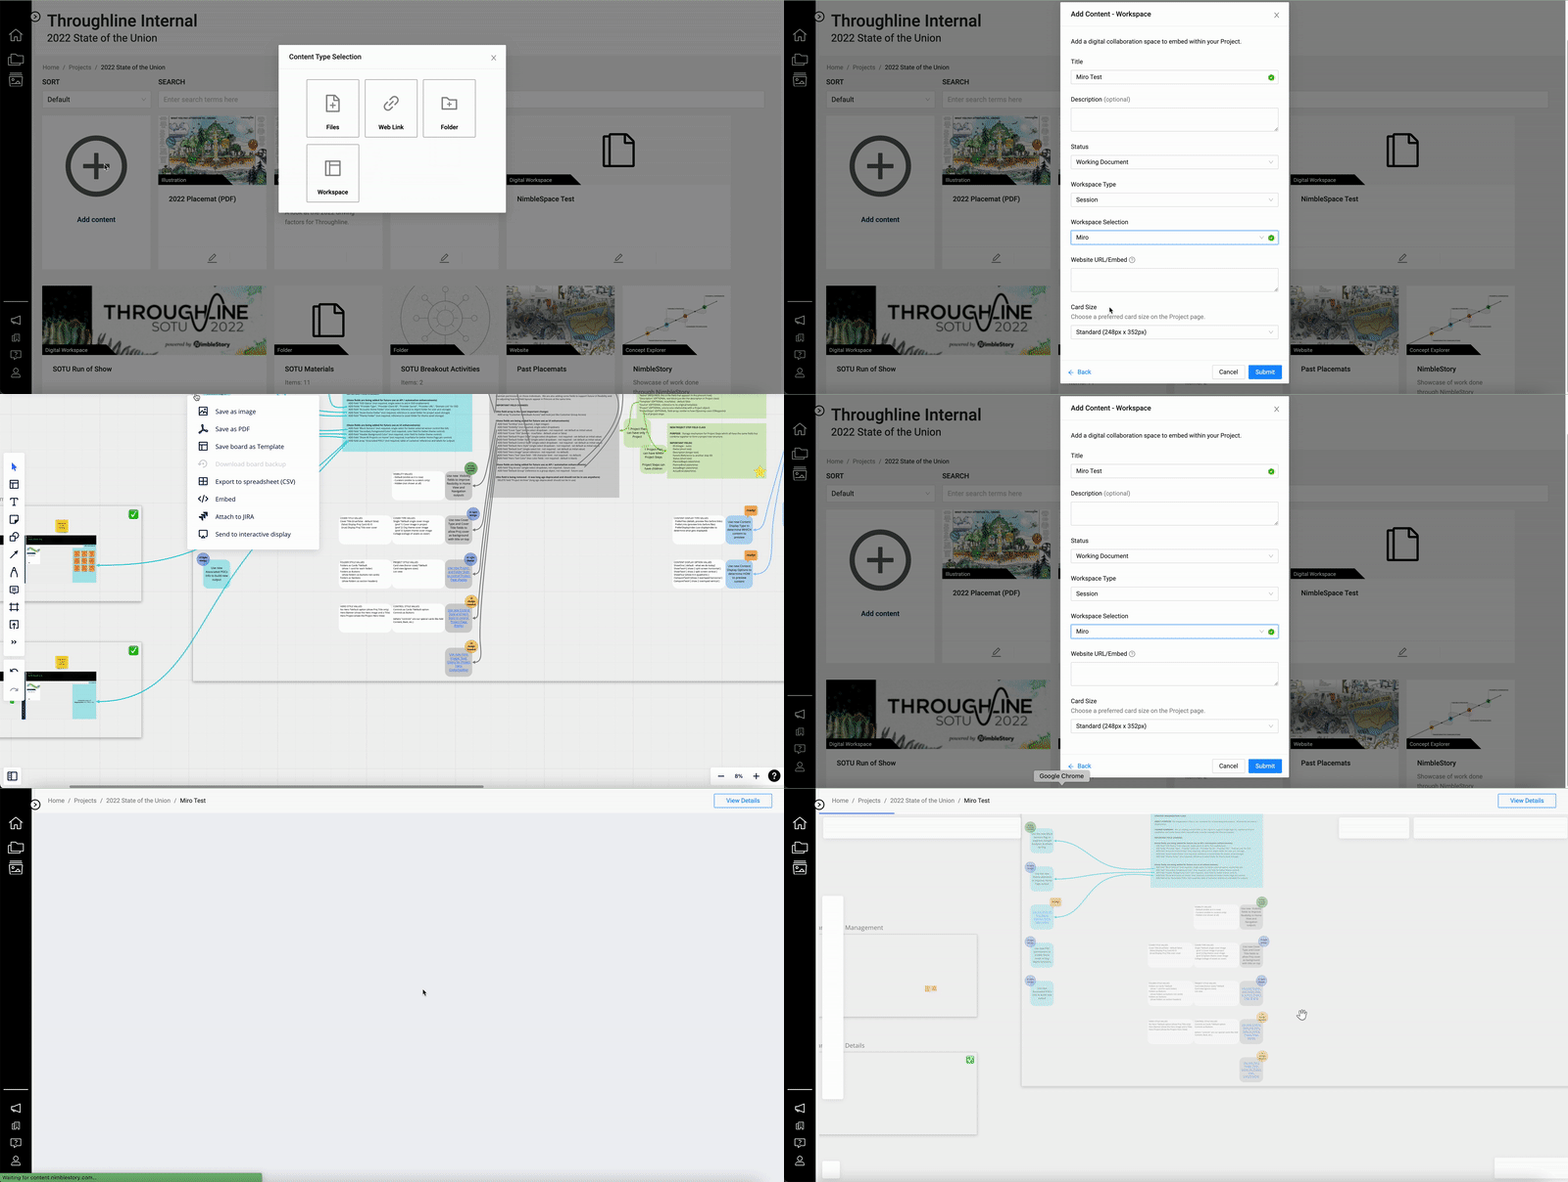
You can also add web links to external pages as assets within a Project. To do so, select the “Workspace” option from the asset types provided in the “Add Content” menu.
Provide a Title for it and select a status for the asset. You can add any additional information about the Workspace in the description portion.
Next, define the Workspace Type - by default, it will select NimbleSpace but you can select from other options as well.
If you choose another option such as Miro you must use the embed URL provided from the board.
Select Submit to add it to the project.
