Leveraging Batch Upload
📔 Overview
This article provides an overview of the batch upload functionality, primarily designed for handling file-type content. In NimbleStory, each piece of content is associated with a specific resource within a project. This feature allows multiple files to be linked to the same asset, streamlining content management and organization. It also ensures that all content is accessible and visible to any user within your project.
Imagine streaming your favorite television show. You access your preferred streaming service and choose season 2 from a total of 15 seasons. Within season 2, there are 24 episodes. Similarly, in a project, a piece of content can function like a season of a TV show, where multiple episodes are grouped under one season. In this context, multiple files can be grouped together under a single piece of portfolio content.
📘 Instructions
Follow the step-by-step instructions below to learn how to efficiently utilize the batch upload feature for managing file-type content within your projects.
Upload Files
Navigate to your project space. Click on the Add Content button:
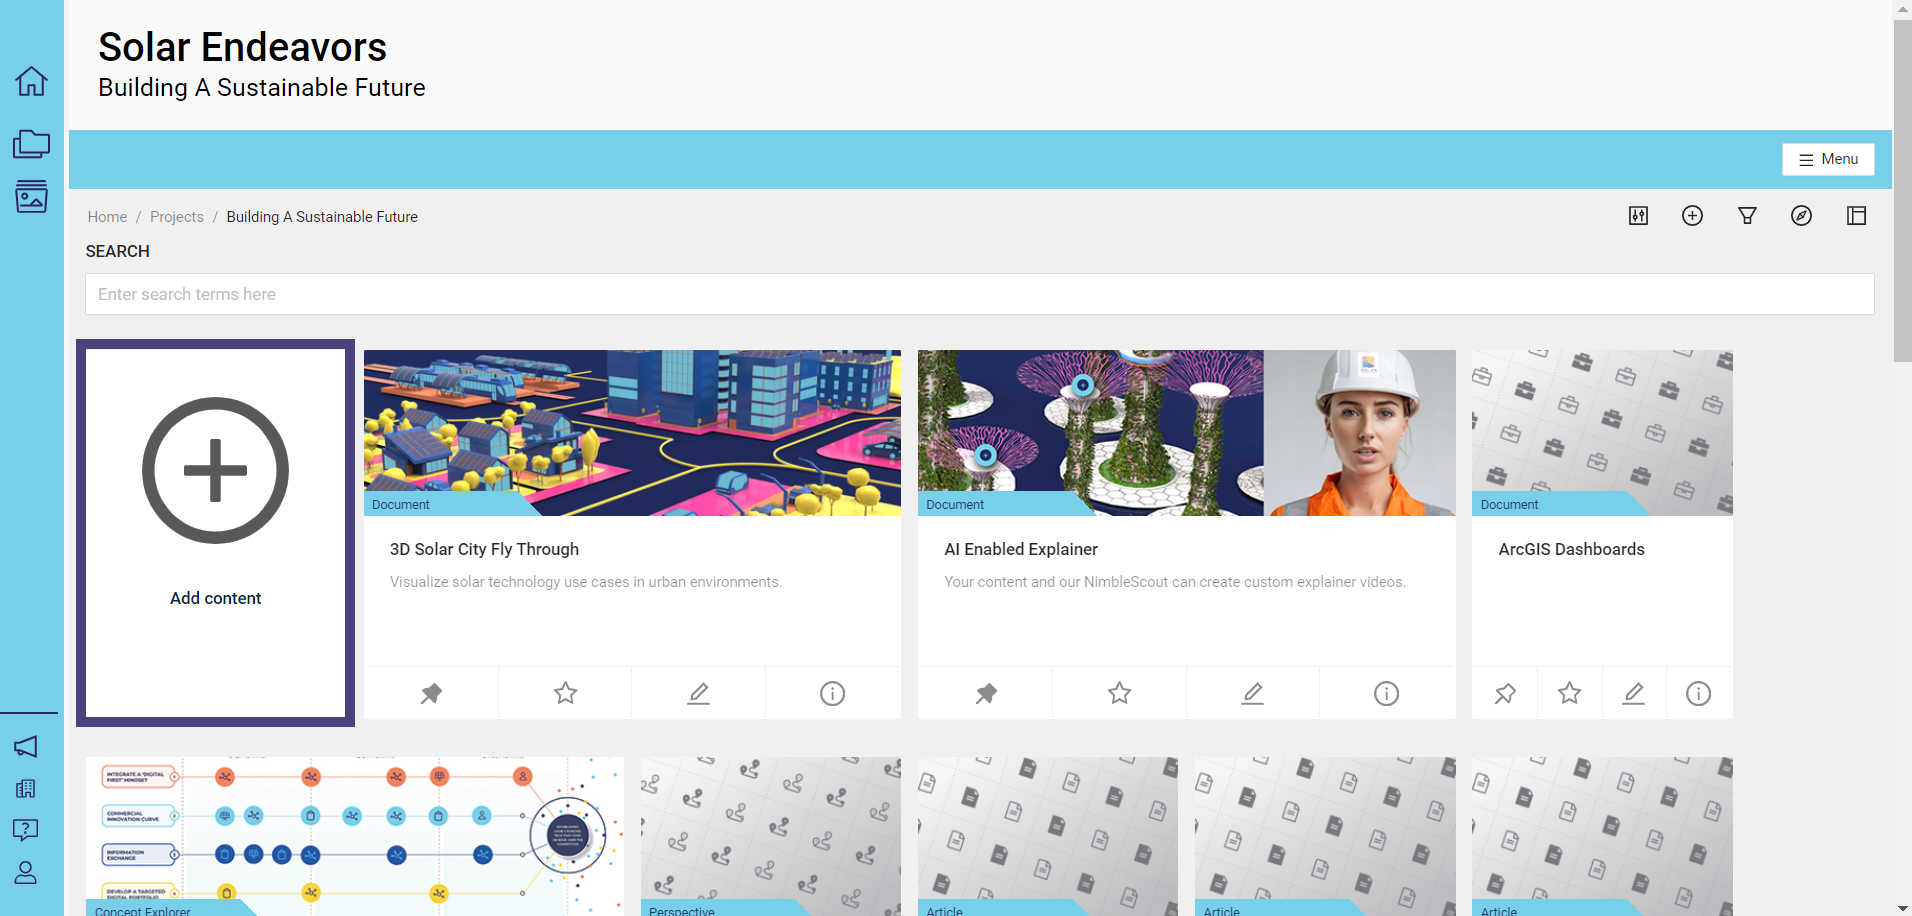
If you have curator, create, or edit permissions, you will have the option to add content within your project space. These capabilities are determined by the specific permissions granted to each user within the context of their project.
Select Files:
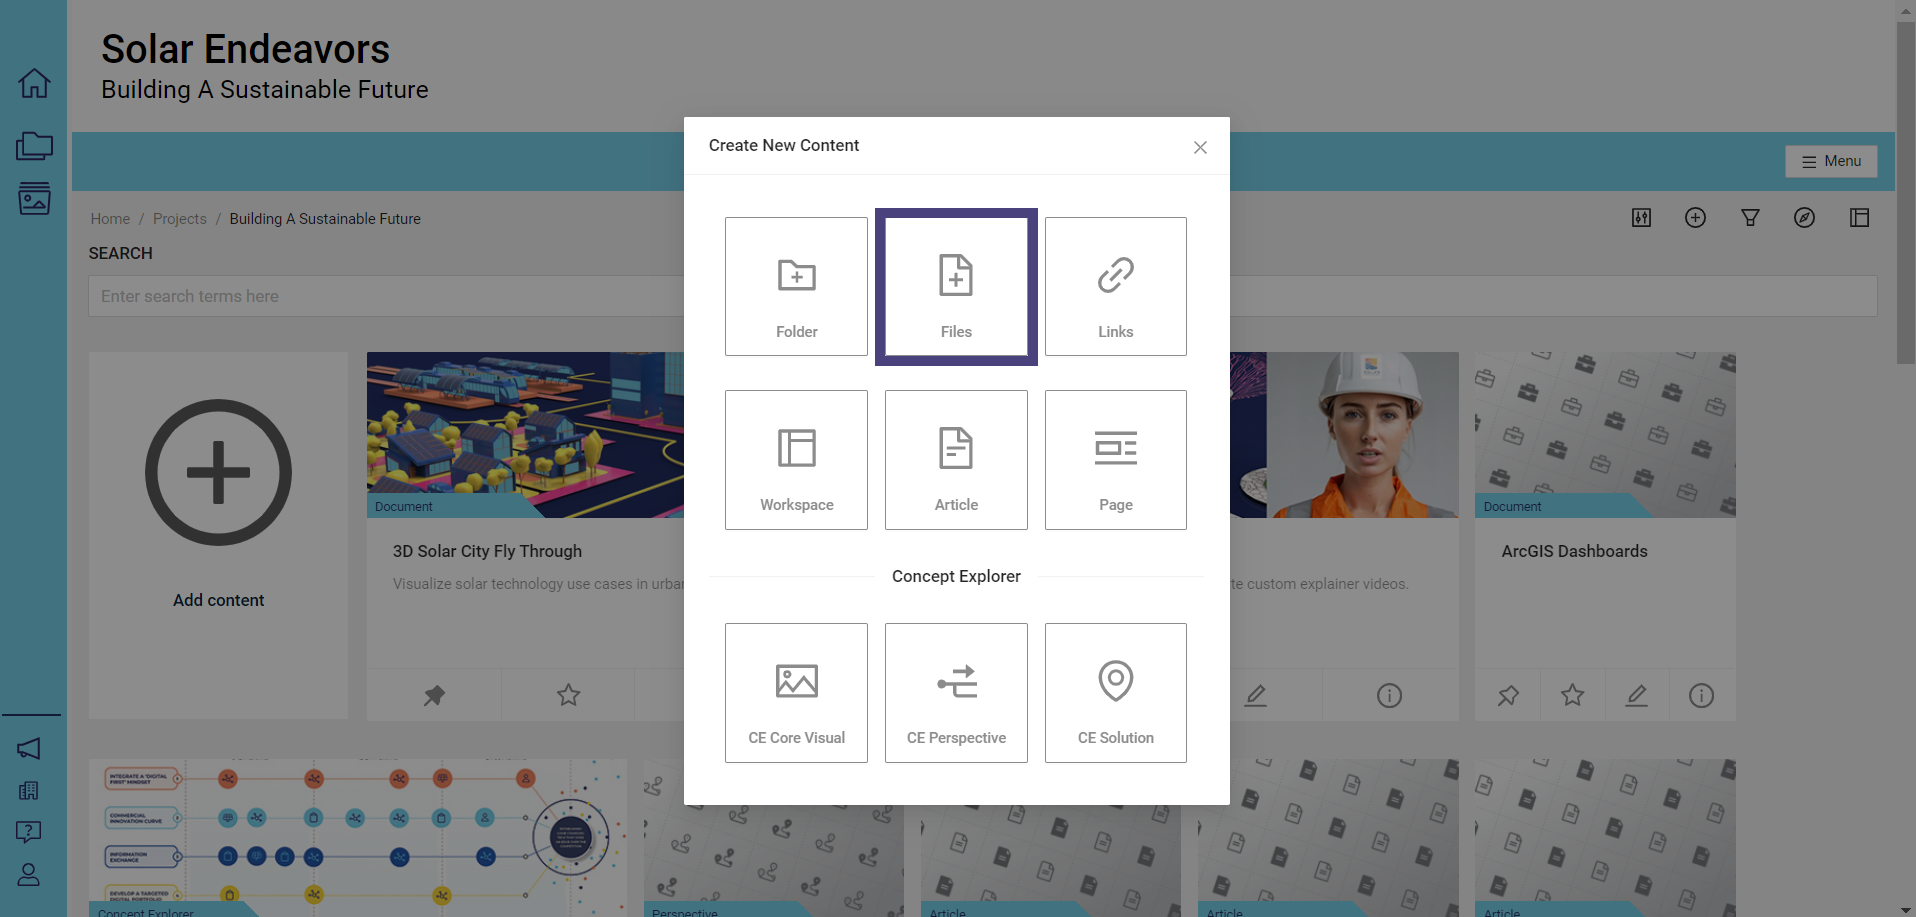
The express flow for files appears and contains two parts: (1) Basic Information and (2) Additional Files. Fill in the Basic Information and click Next:
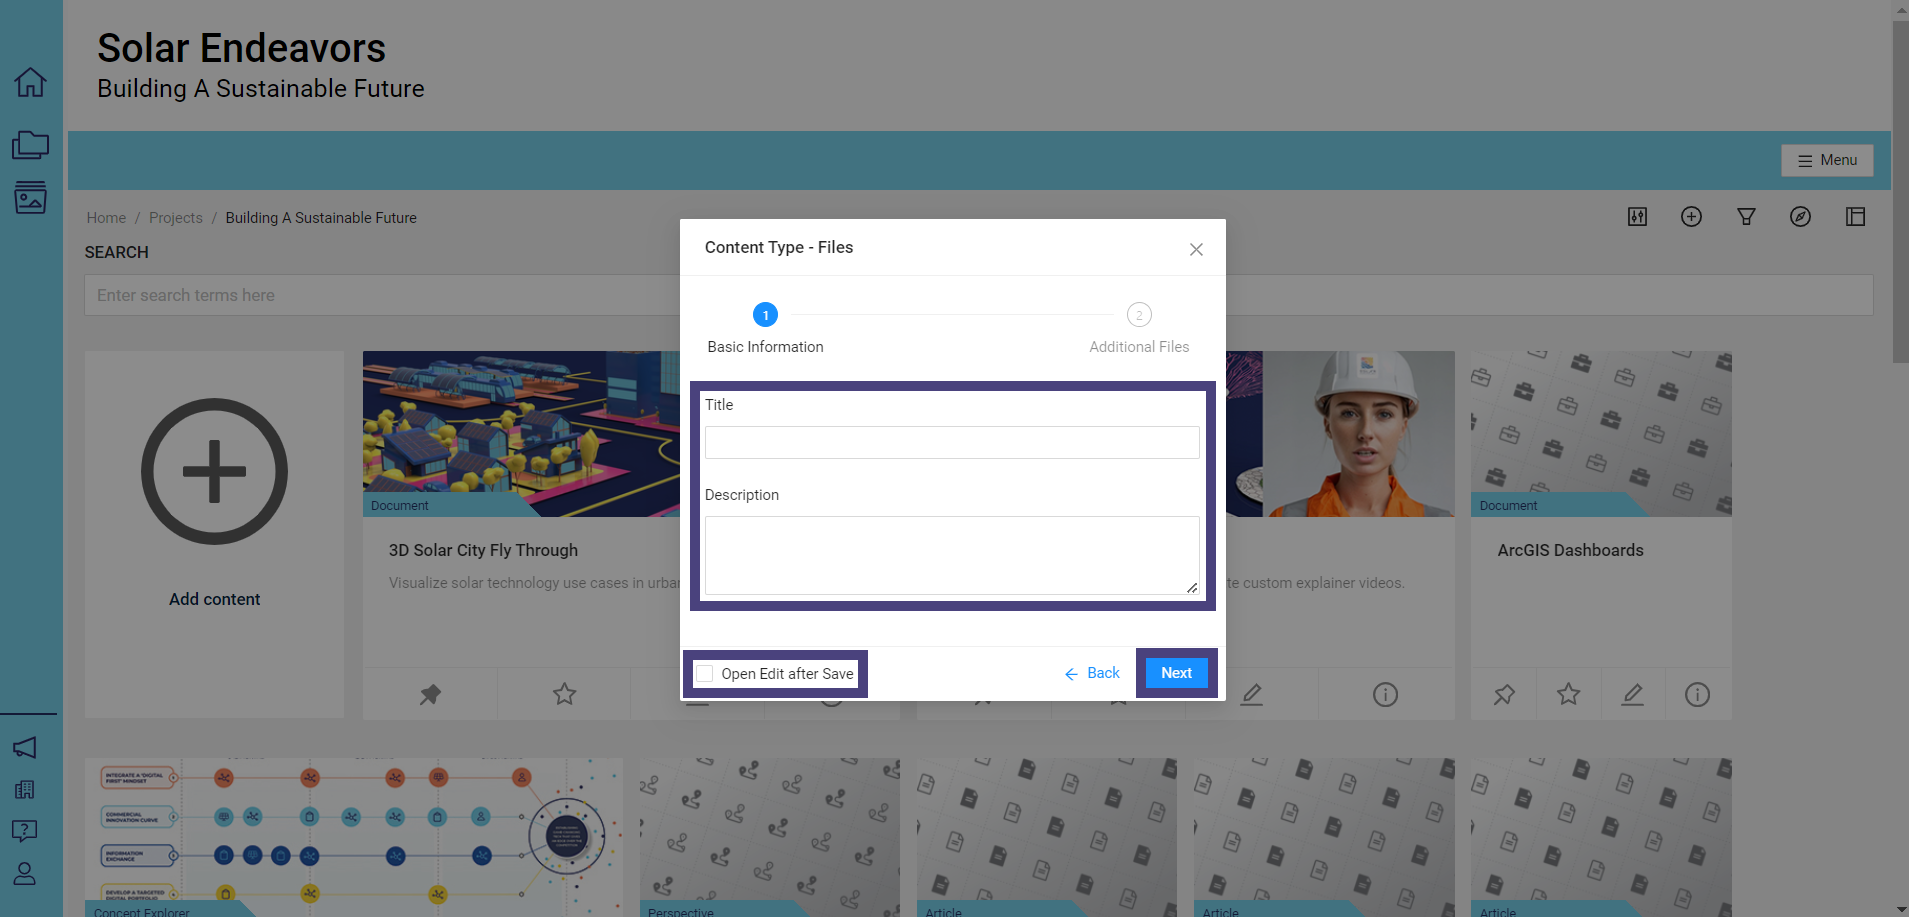
Title: Enter the title for the new content.
Description (Optional): Provide a description for the new content.
Open Edit after Save: Allows you to edit specific elements. After saving, the edit view will automatically open for both the create and edit flows.
Click on the box labeled Click or drag file to this area to upload. This will open your computer’s file explorer, allowing you to select the files you want to upload.
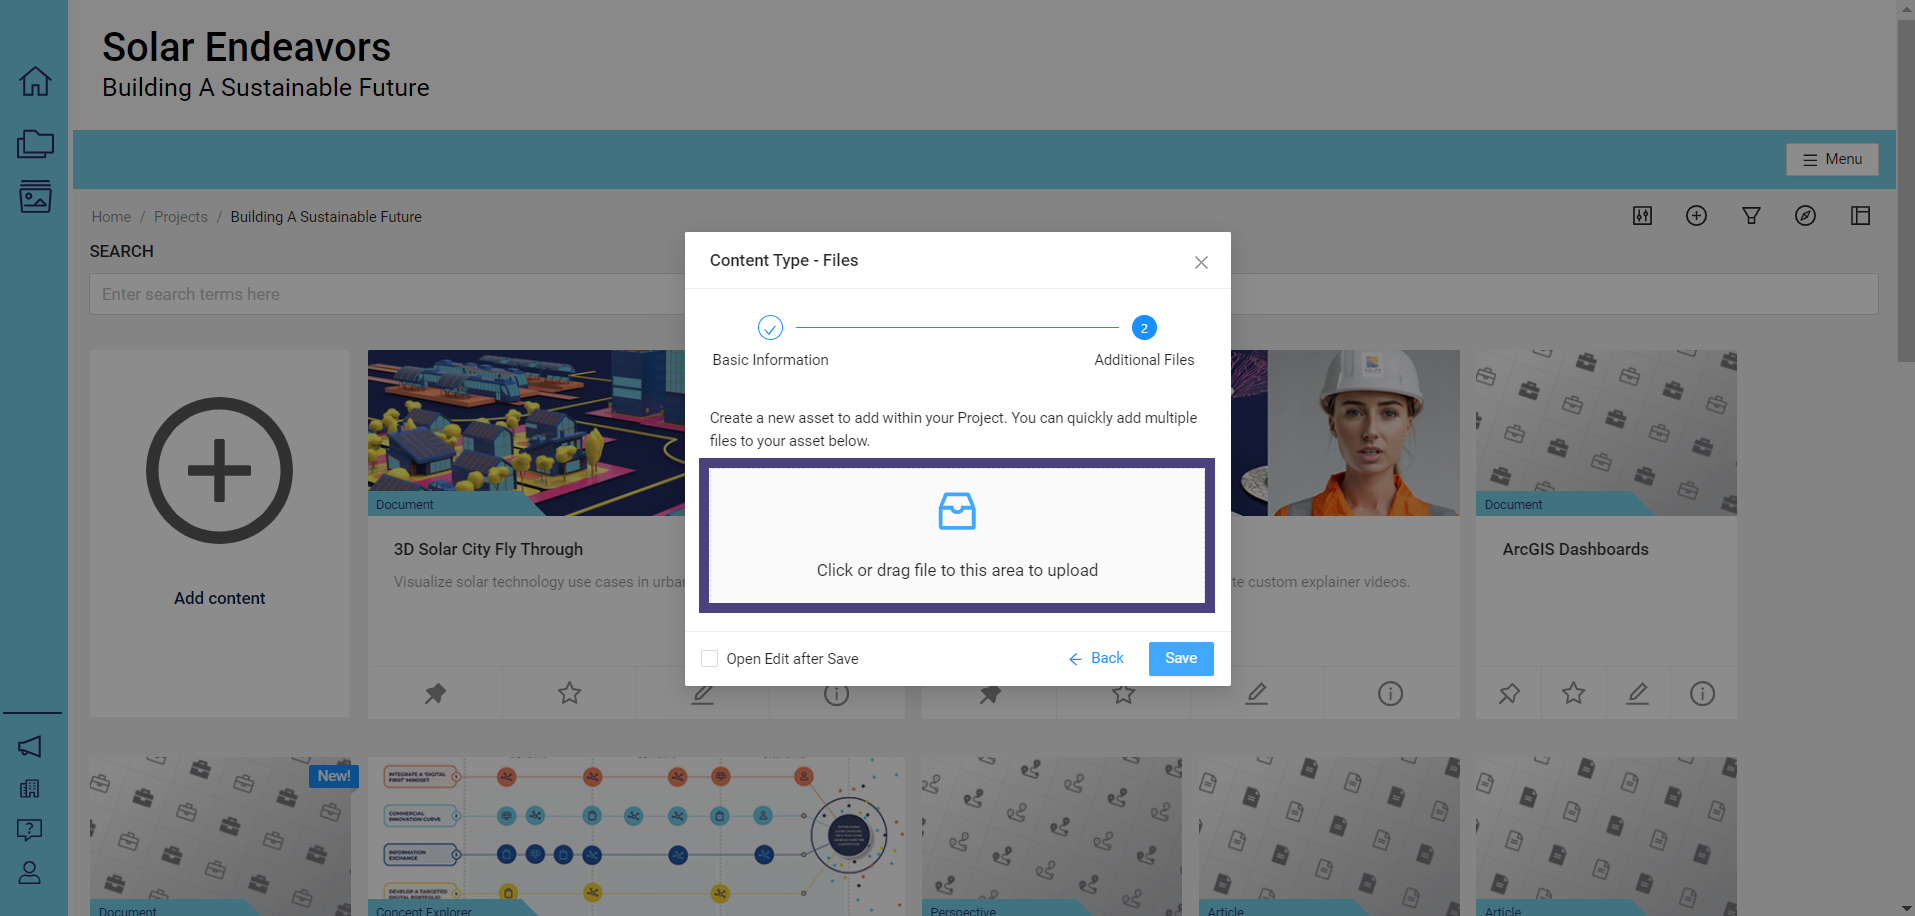
Once you have finished selecting your files, they will appear under the File Name section. Then, click on Save to create a new piece of content with the specified titled and your uploaded files.
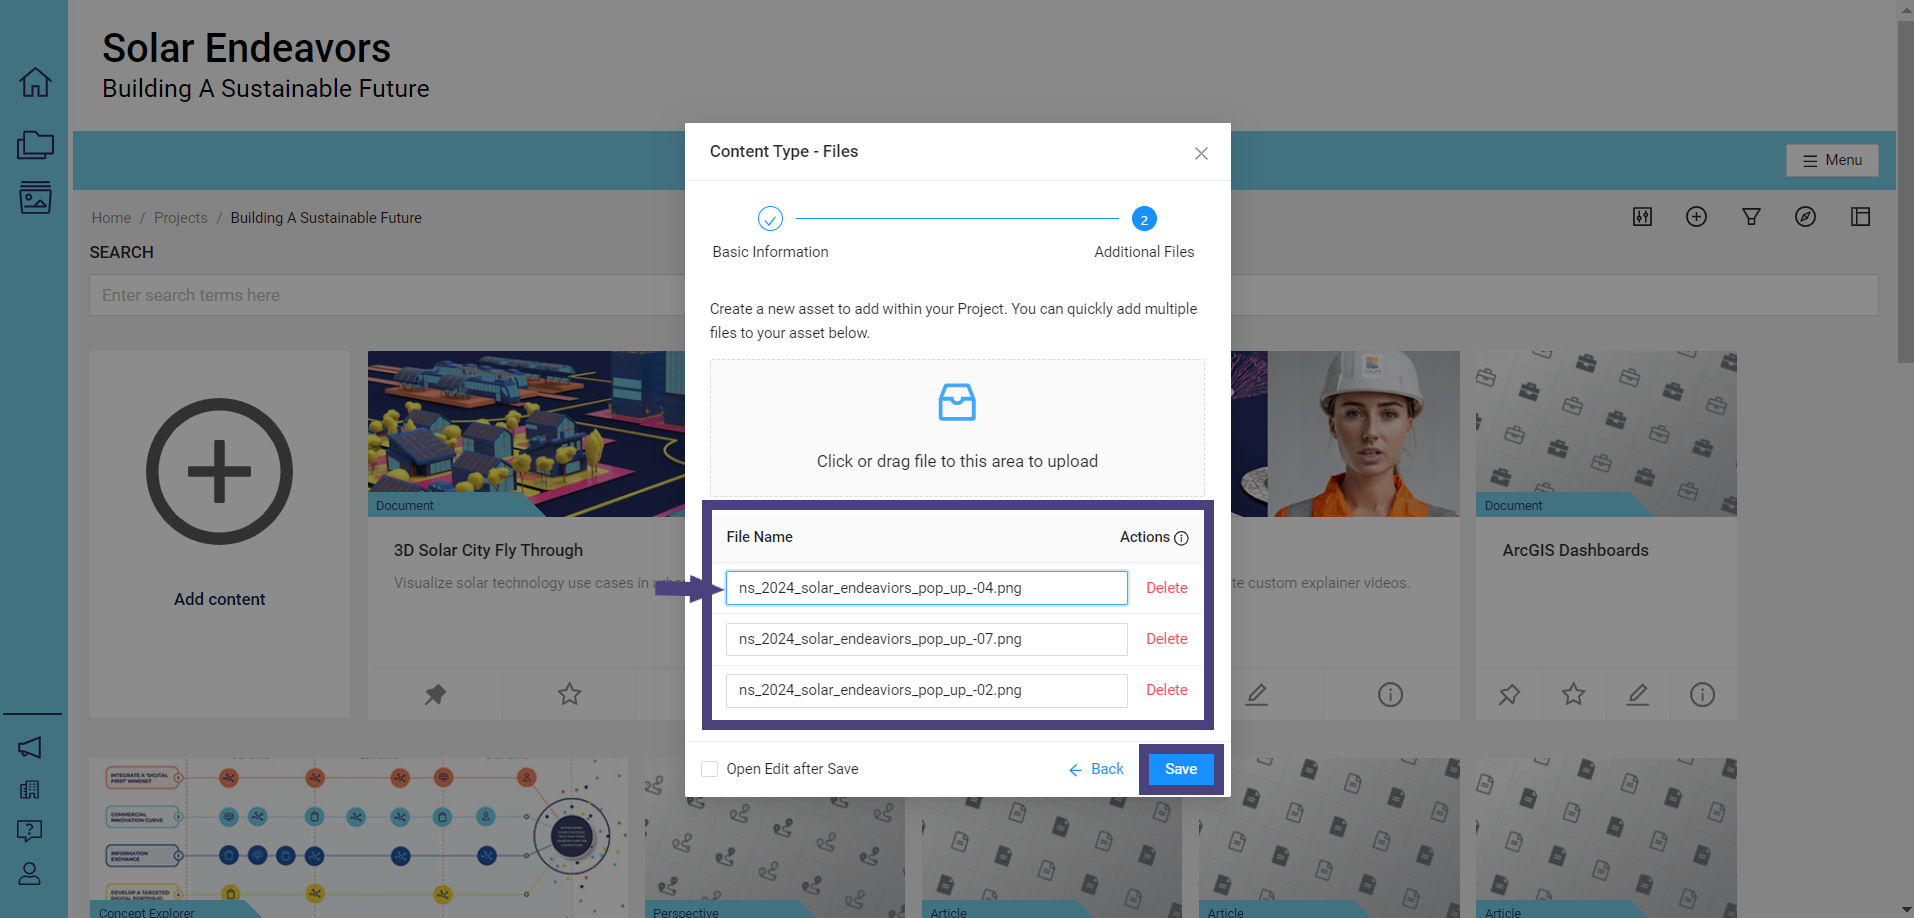
Once your files have been added, you can edit their titles. The file name becomes an editable field, allowing you to change it by clicking on it.
Access Your Uploaded Files
To access your uploaded files, click on the new piece of content. The files are set to preview and will be listed in the order they were added:
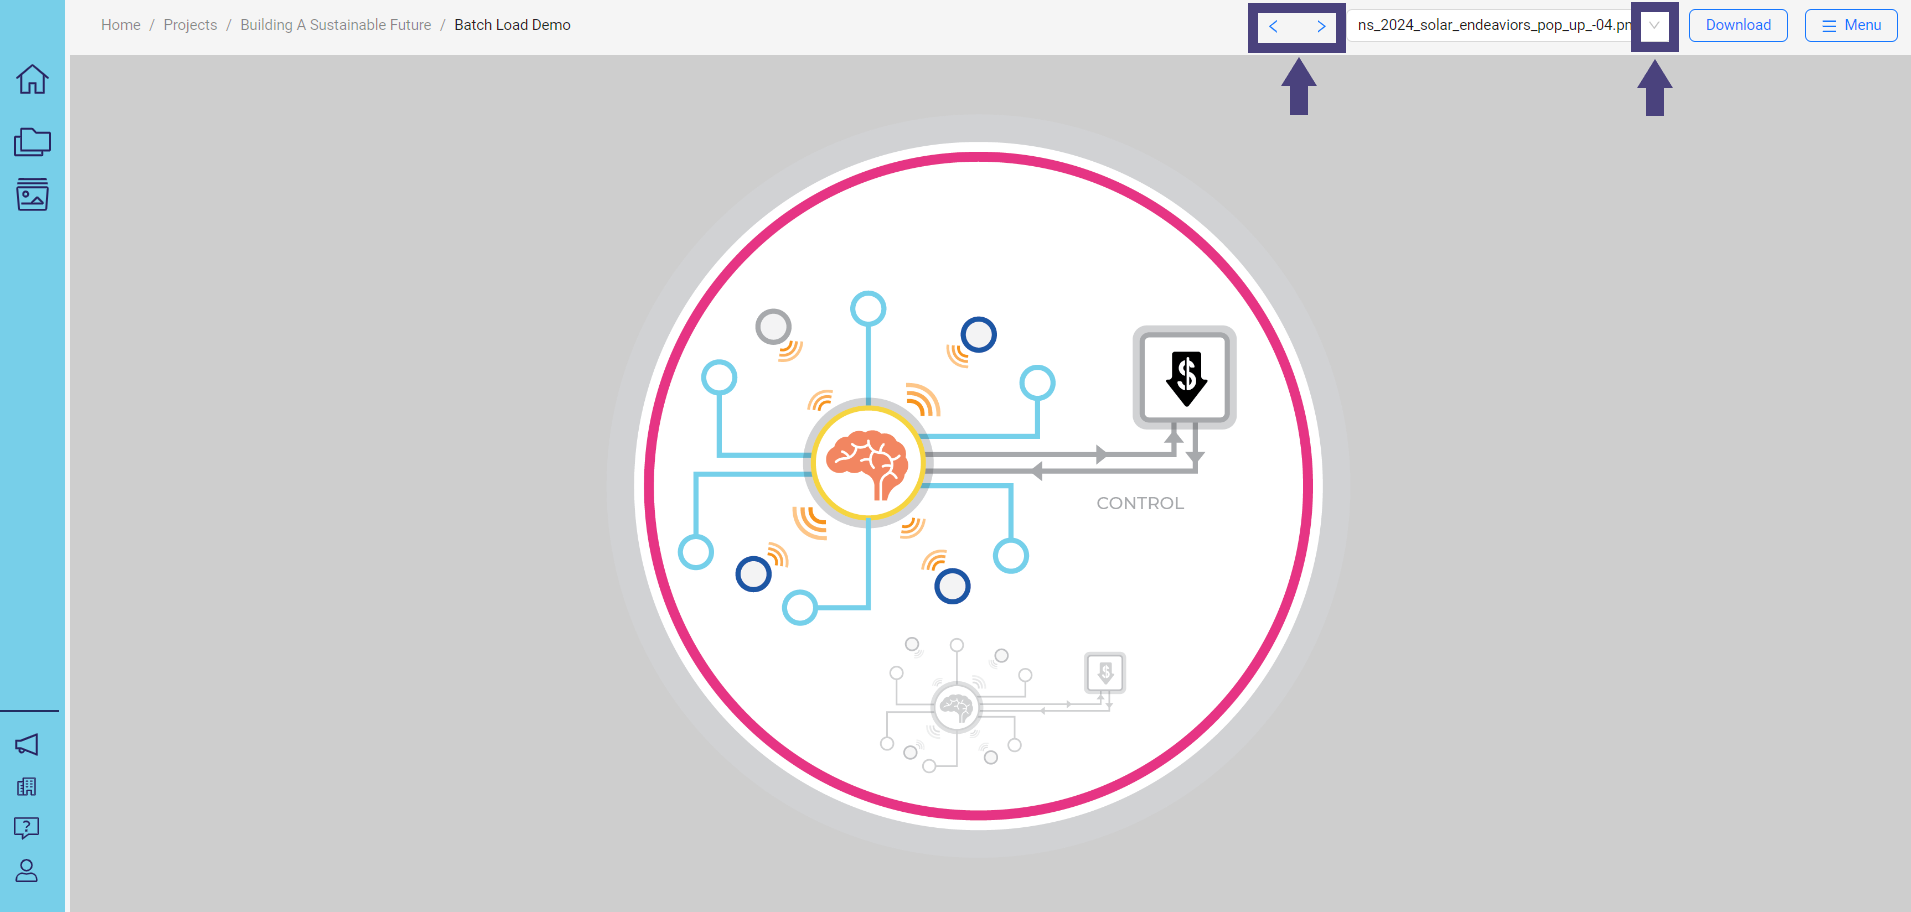
To view a different asset or resource, use the dropdown menu to select the desired item or use the directional markers to navigate through the assets that were uploaded.
Audience | Public |
Section | NimbleStory Basic |
Status | Rough Draft |
Applies to | NimbleStory 3.0 and higher |
Next Review Date | Nov 2022 |
| Version | Date | Comment |
|---|---|---|
| Current Version (v. 1) | Jul 16, 2024 21:41 | @a user |
