NimbleStory Review Mode
📔 Overview
This article provides instructions on adding new elements to the review log. It details the process of reviewing specific assets or content, capturing feedback, documenting the process, and obtaining approvals for final deliverables that require signoff from customers, partners, or other stakeholders.
📘 Instructions
Follow the step-by-step instructions below to learn how to effectively use the new elements in the review log.
Access Review Mode
Go to your project and access your asset.
Once in your asset, click on the Menu button and select Review Mode:
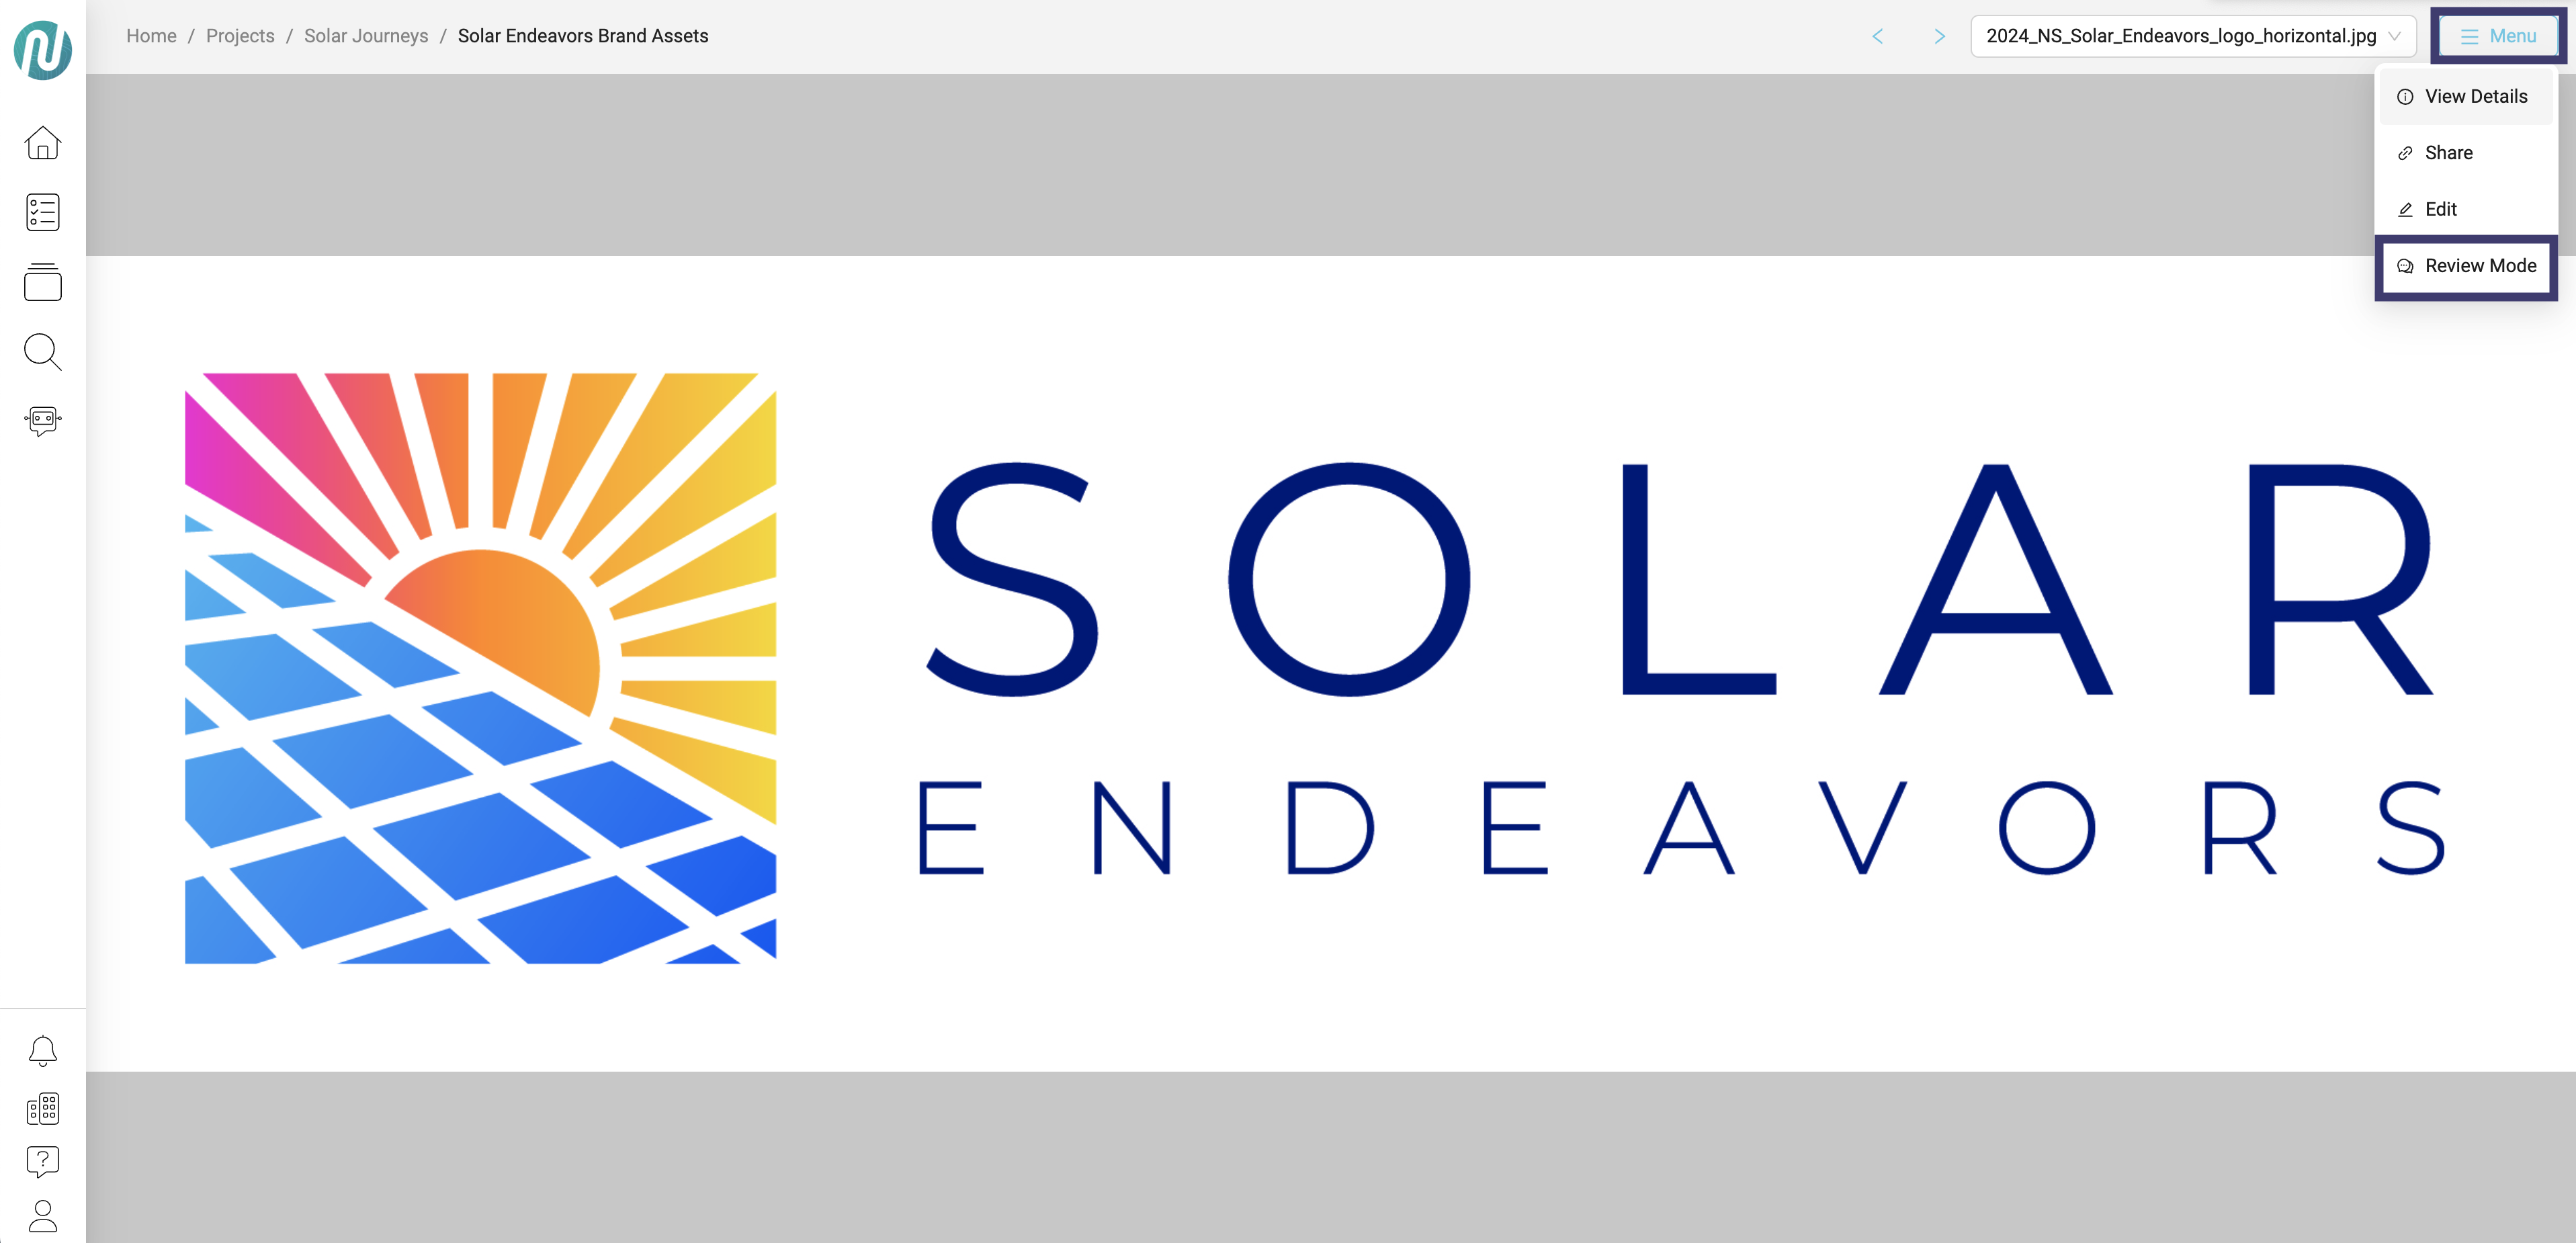
Your access to Review Mode will depend on your permissions.
Adding Comments
There are 3 types of comments that can be placed on a specific asset: (1) Pinpoint, (2) General feedback, (3) Markup.
Comment details:
Pinpoint:
This feature allows you to add a note to a specific area of information.
General feedback:
This feature allows you to provide overall feedback that is not tied to a specific area or location on the asset, but is associated with the asset and documented accordingly.
Markup:
This feature allows you to add specific commentary and highlight or point to certain elements on your asset.
The Comments Engine is designed to be contextual to each asset or piece of content. If you switch to a different asset, the comments will not appear unless they are specific to that selected asset.
Pinpoint:
Click on the area where you want to add a comment, fill in the Start Writing box and then click on the arrow below your comment. A blue ring will appear around the content where you can add a pinpoint comment:
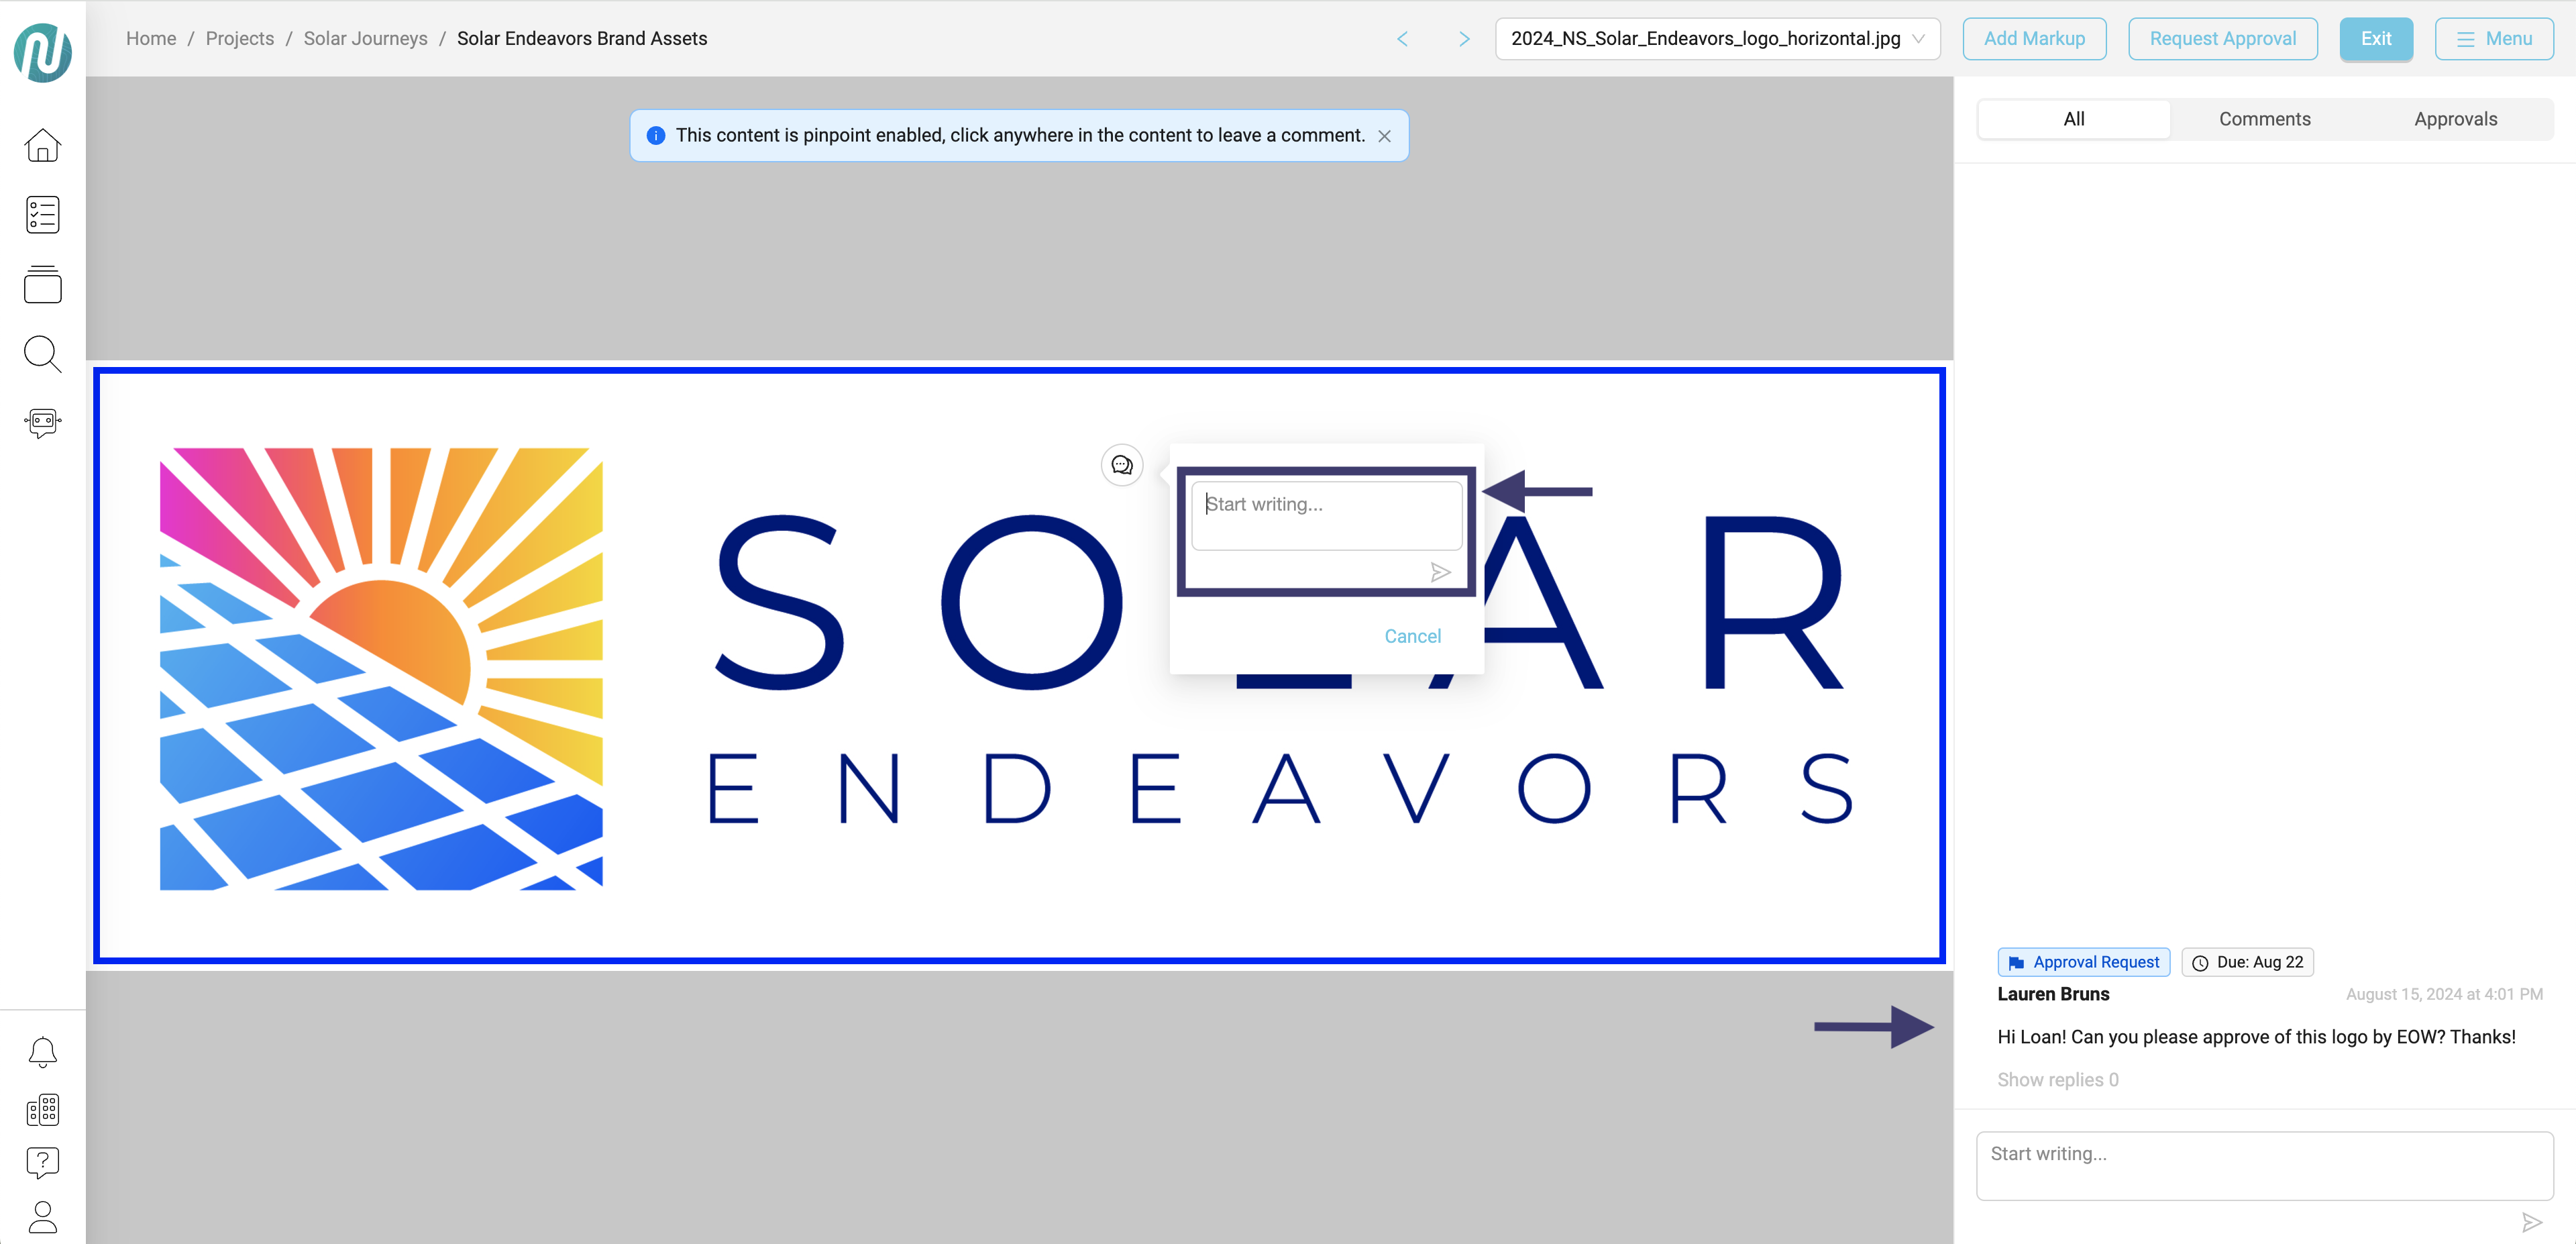
The position of the pinpoint comment will be anchored by its X and Y coordinates.
The comment will be displayed in the Review Log on the right.
General feedback:
At the bottom right side, enter your comment in the Start Writing box, then click on the arrow below your comment:
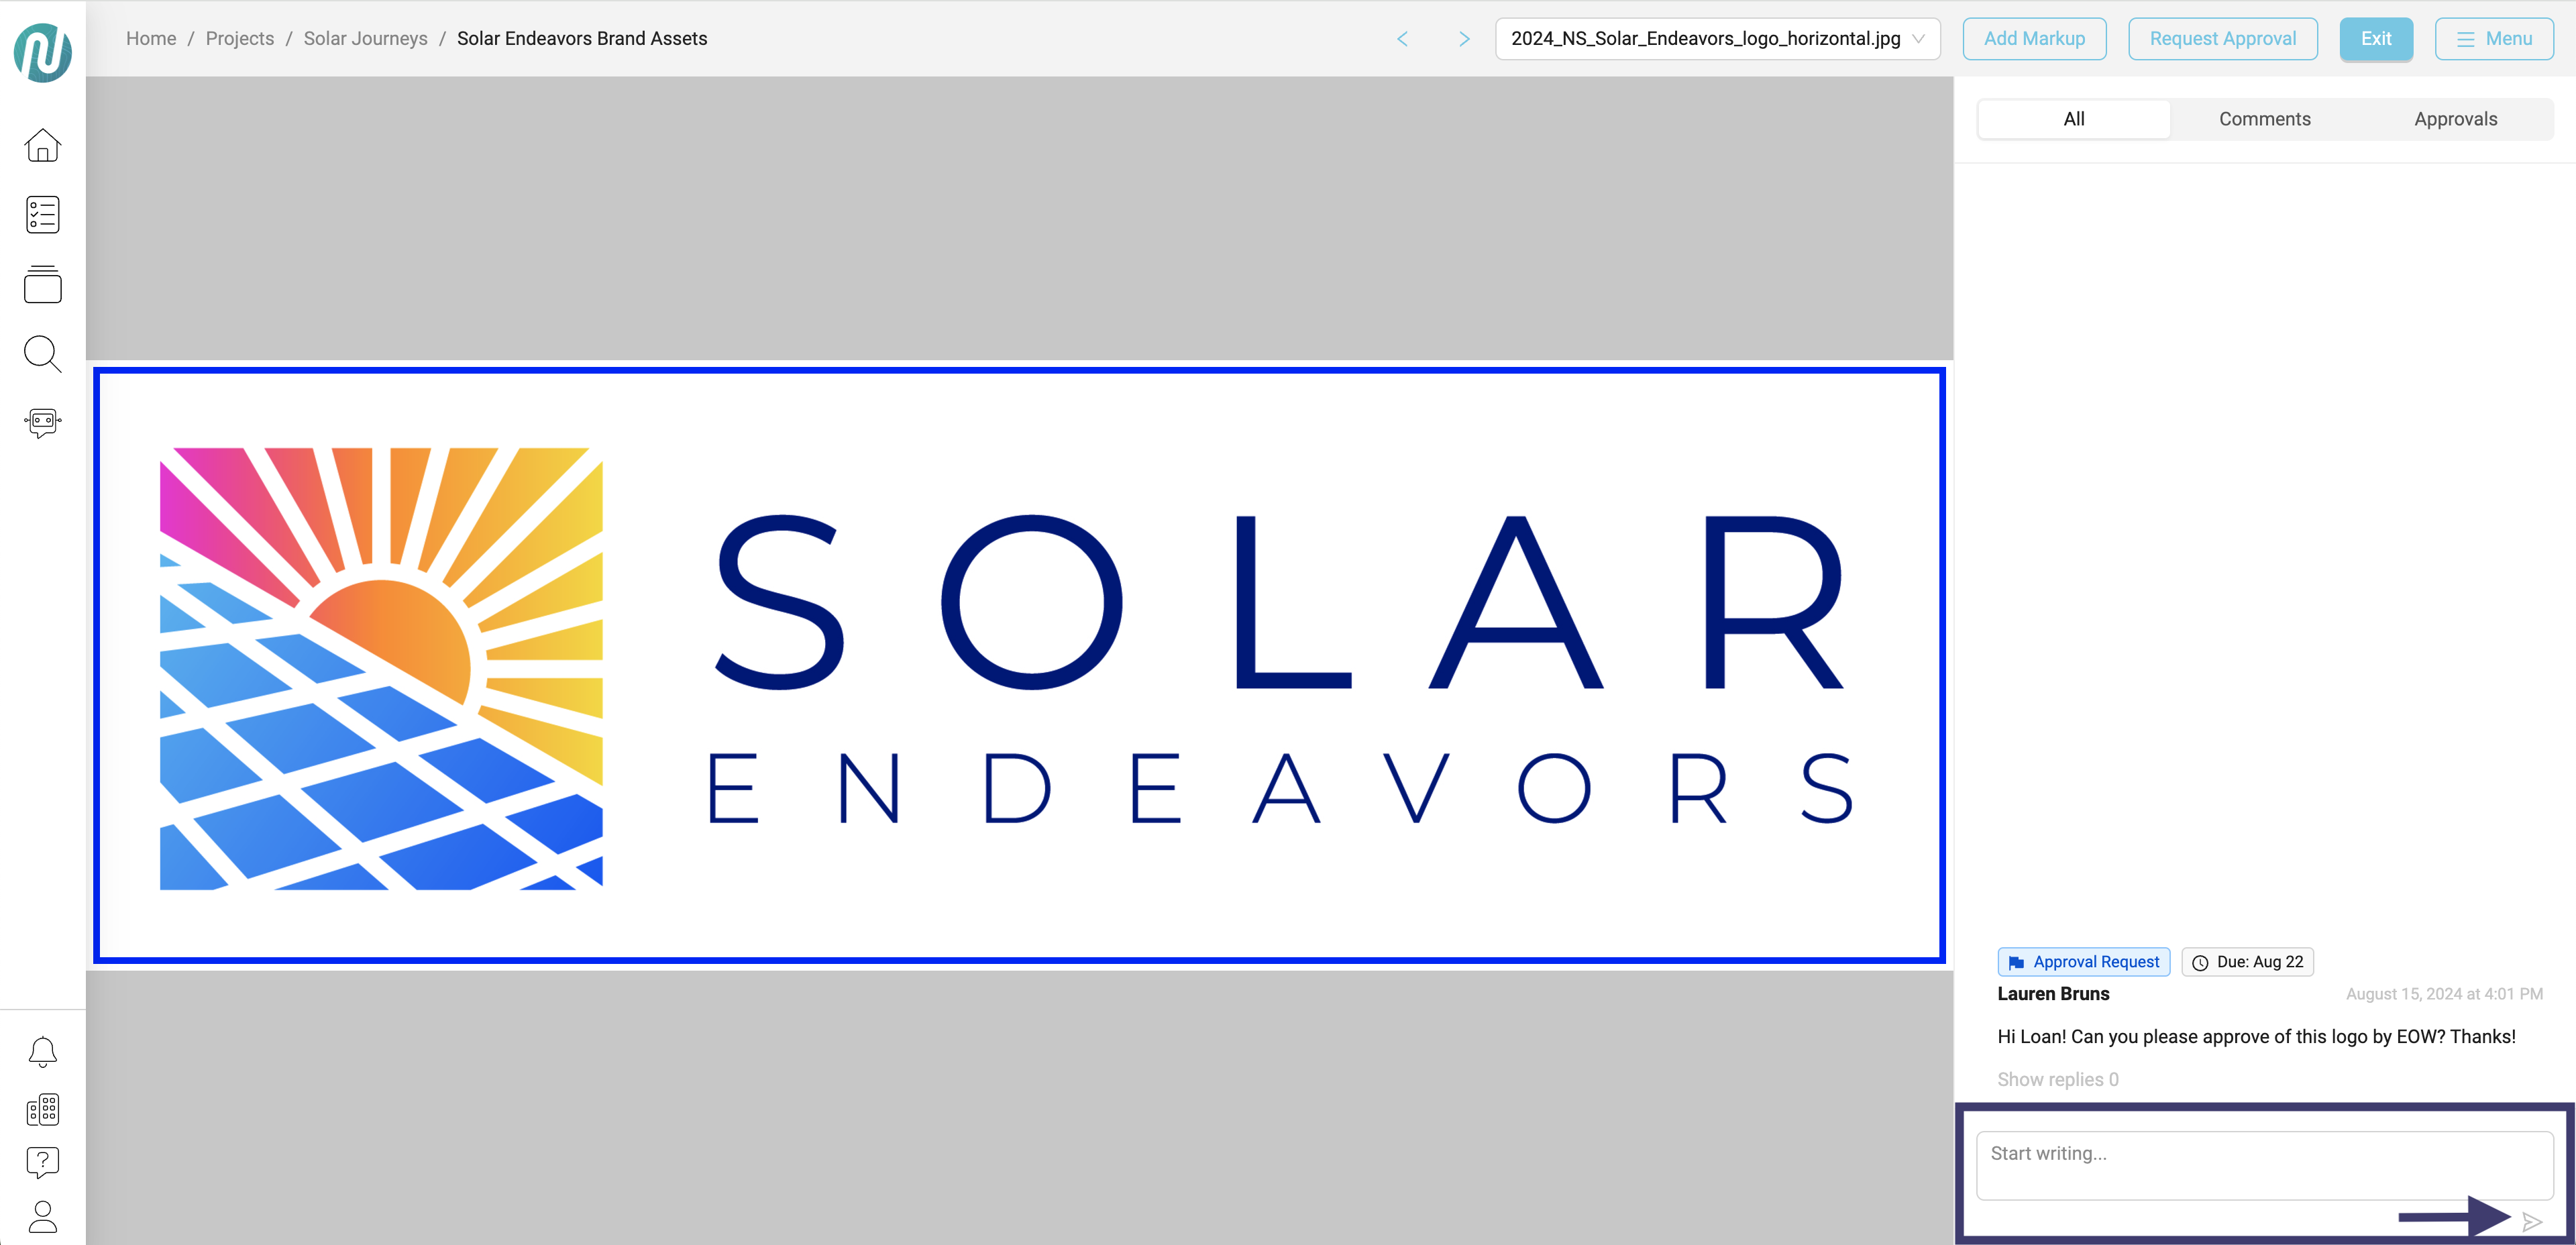
Your general feedback comment is not linked to any specific area of the asset, but will be associated with the asset as a whole.
The comment will be displayed in the Review Log on the right.
Markup:
On the top menu, click on Add Markup:
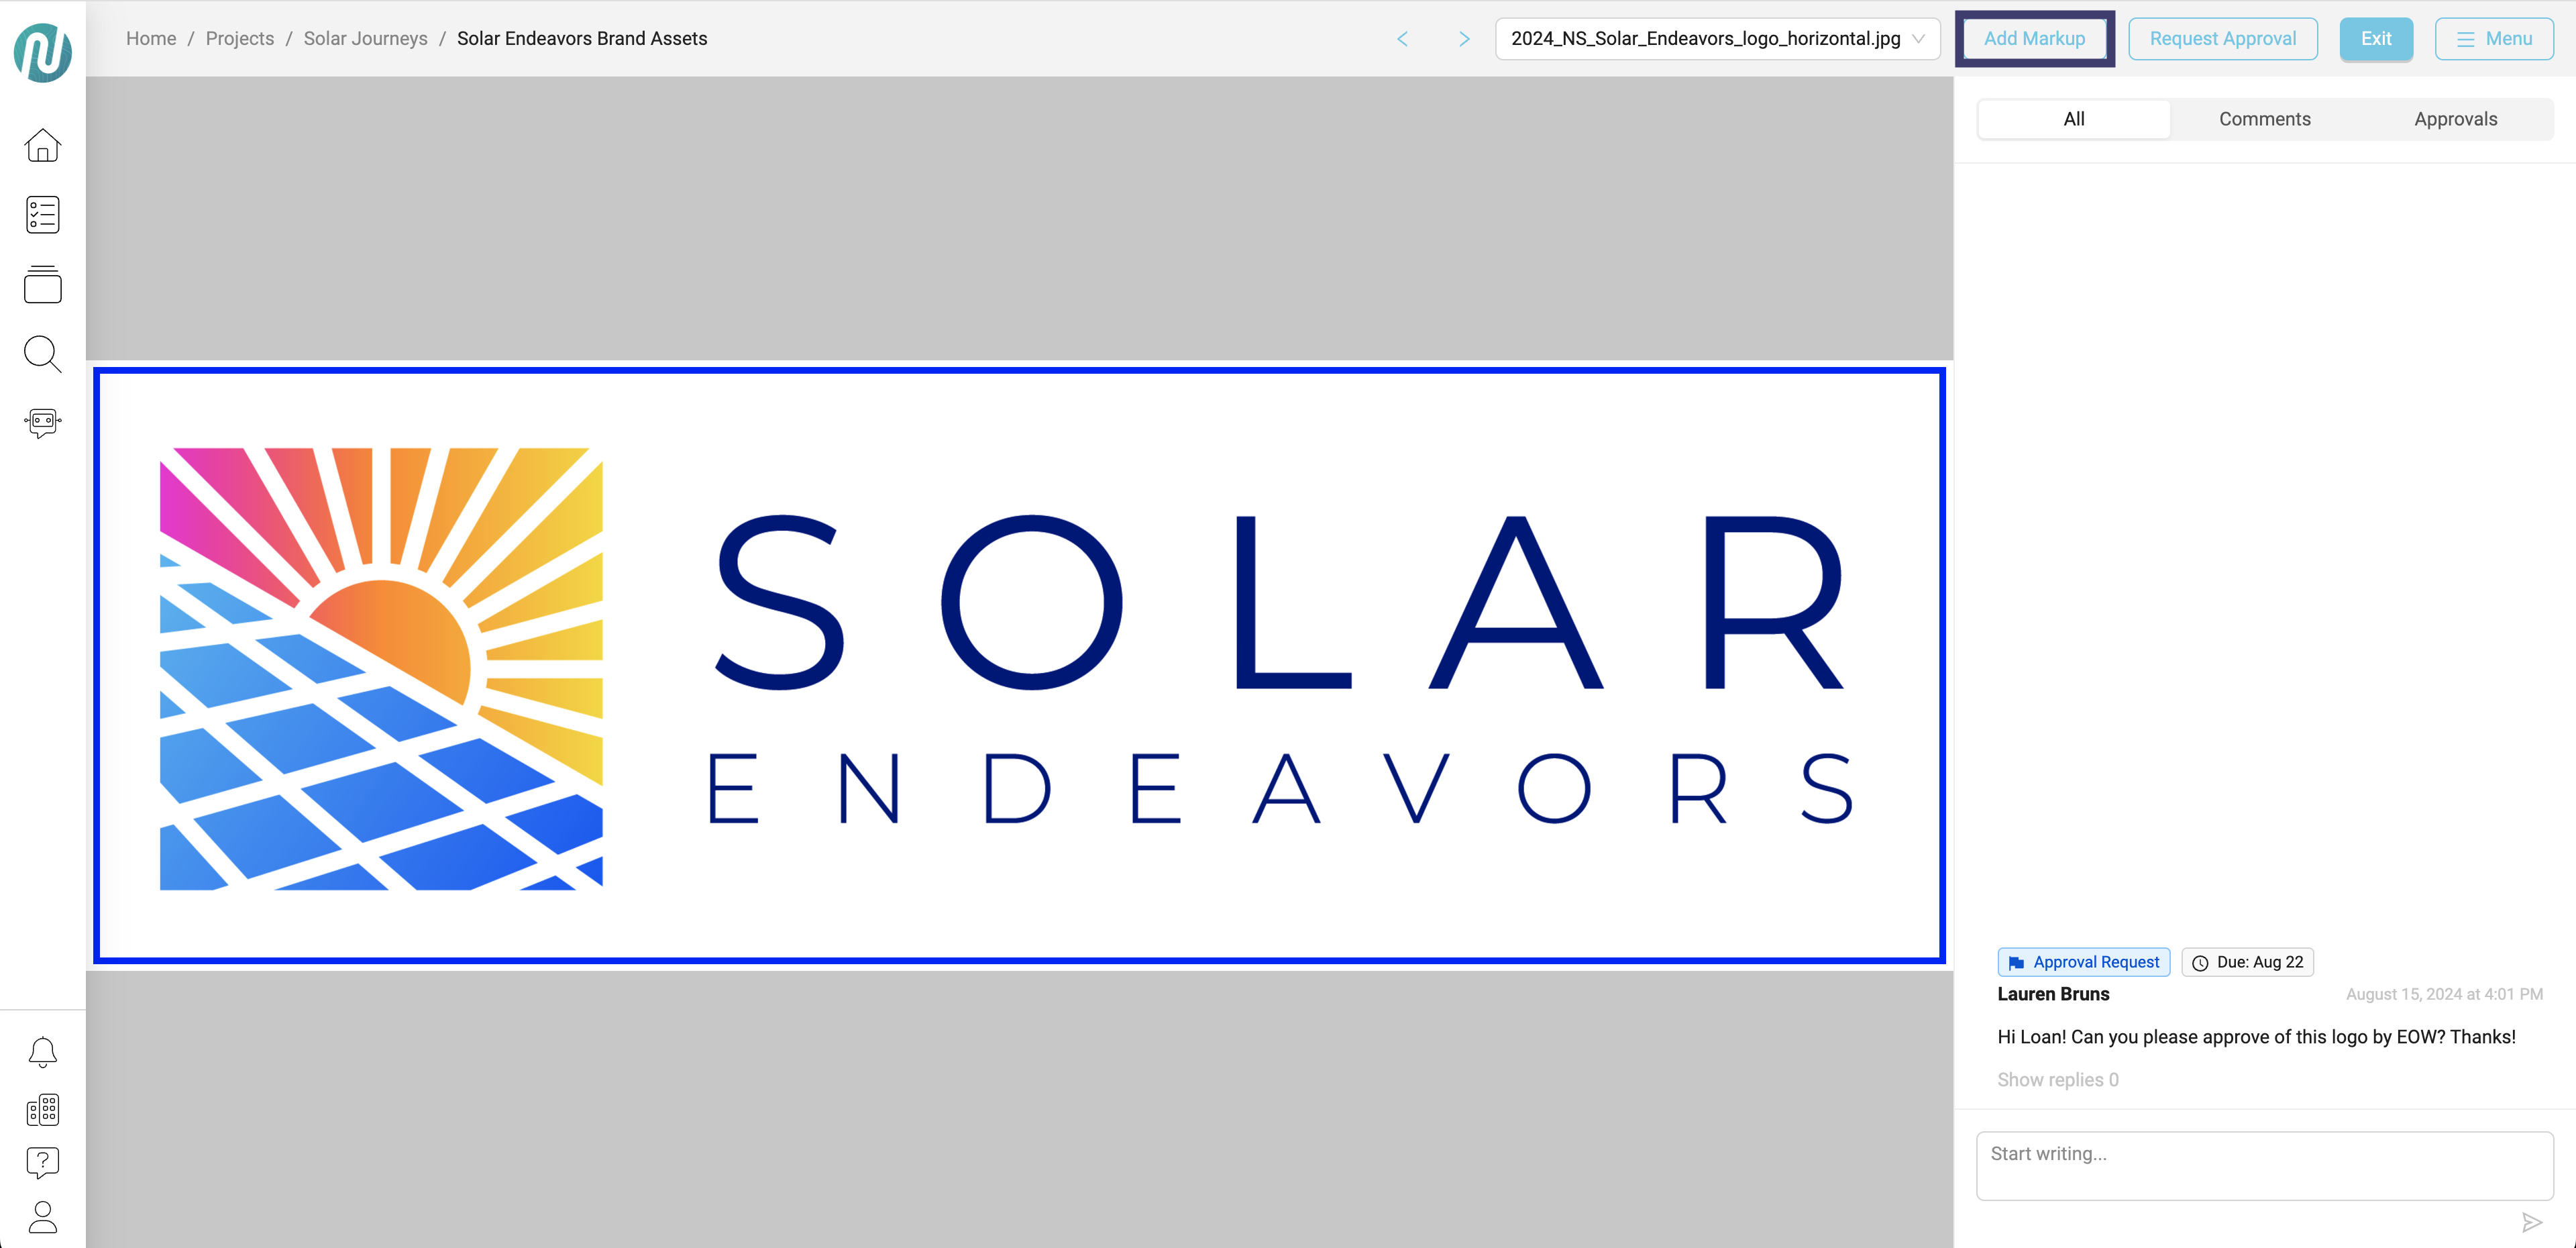
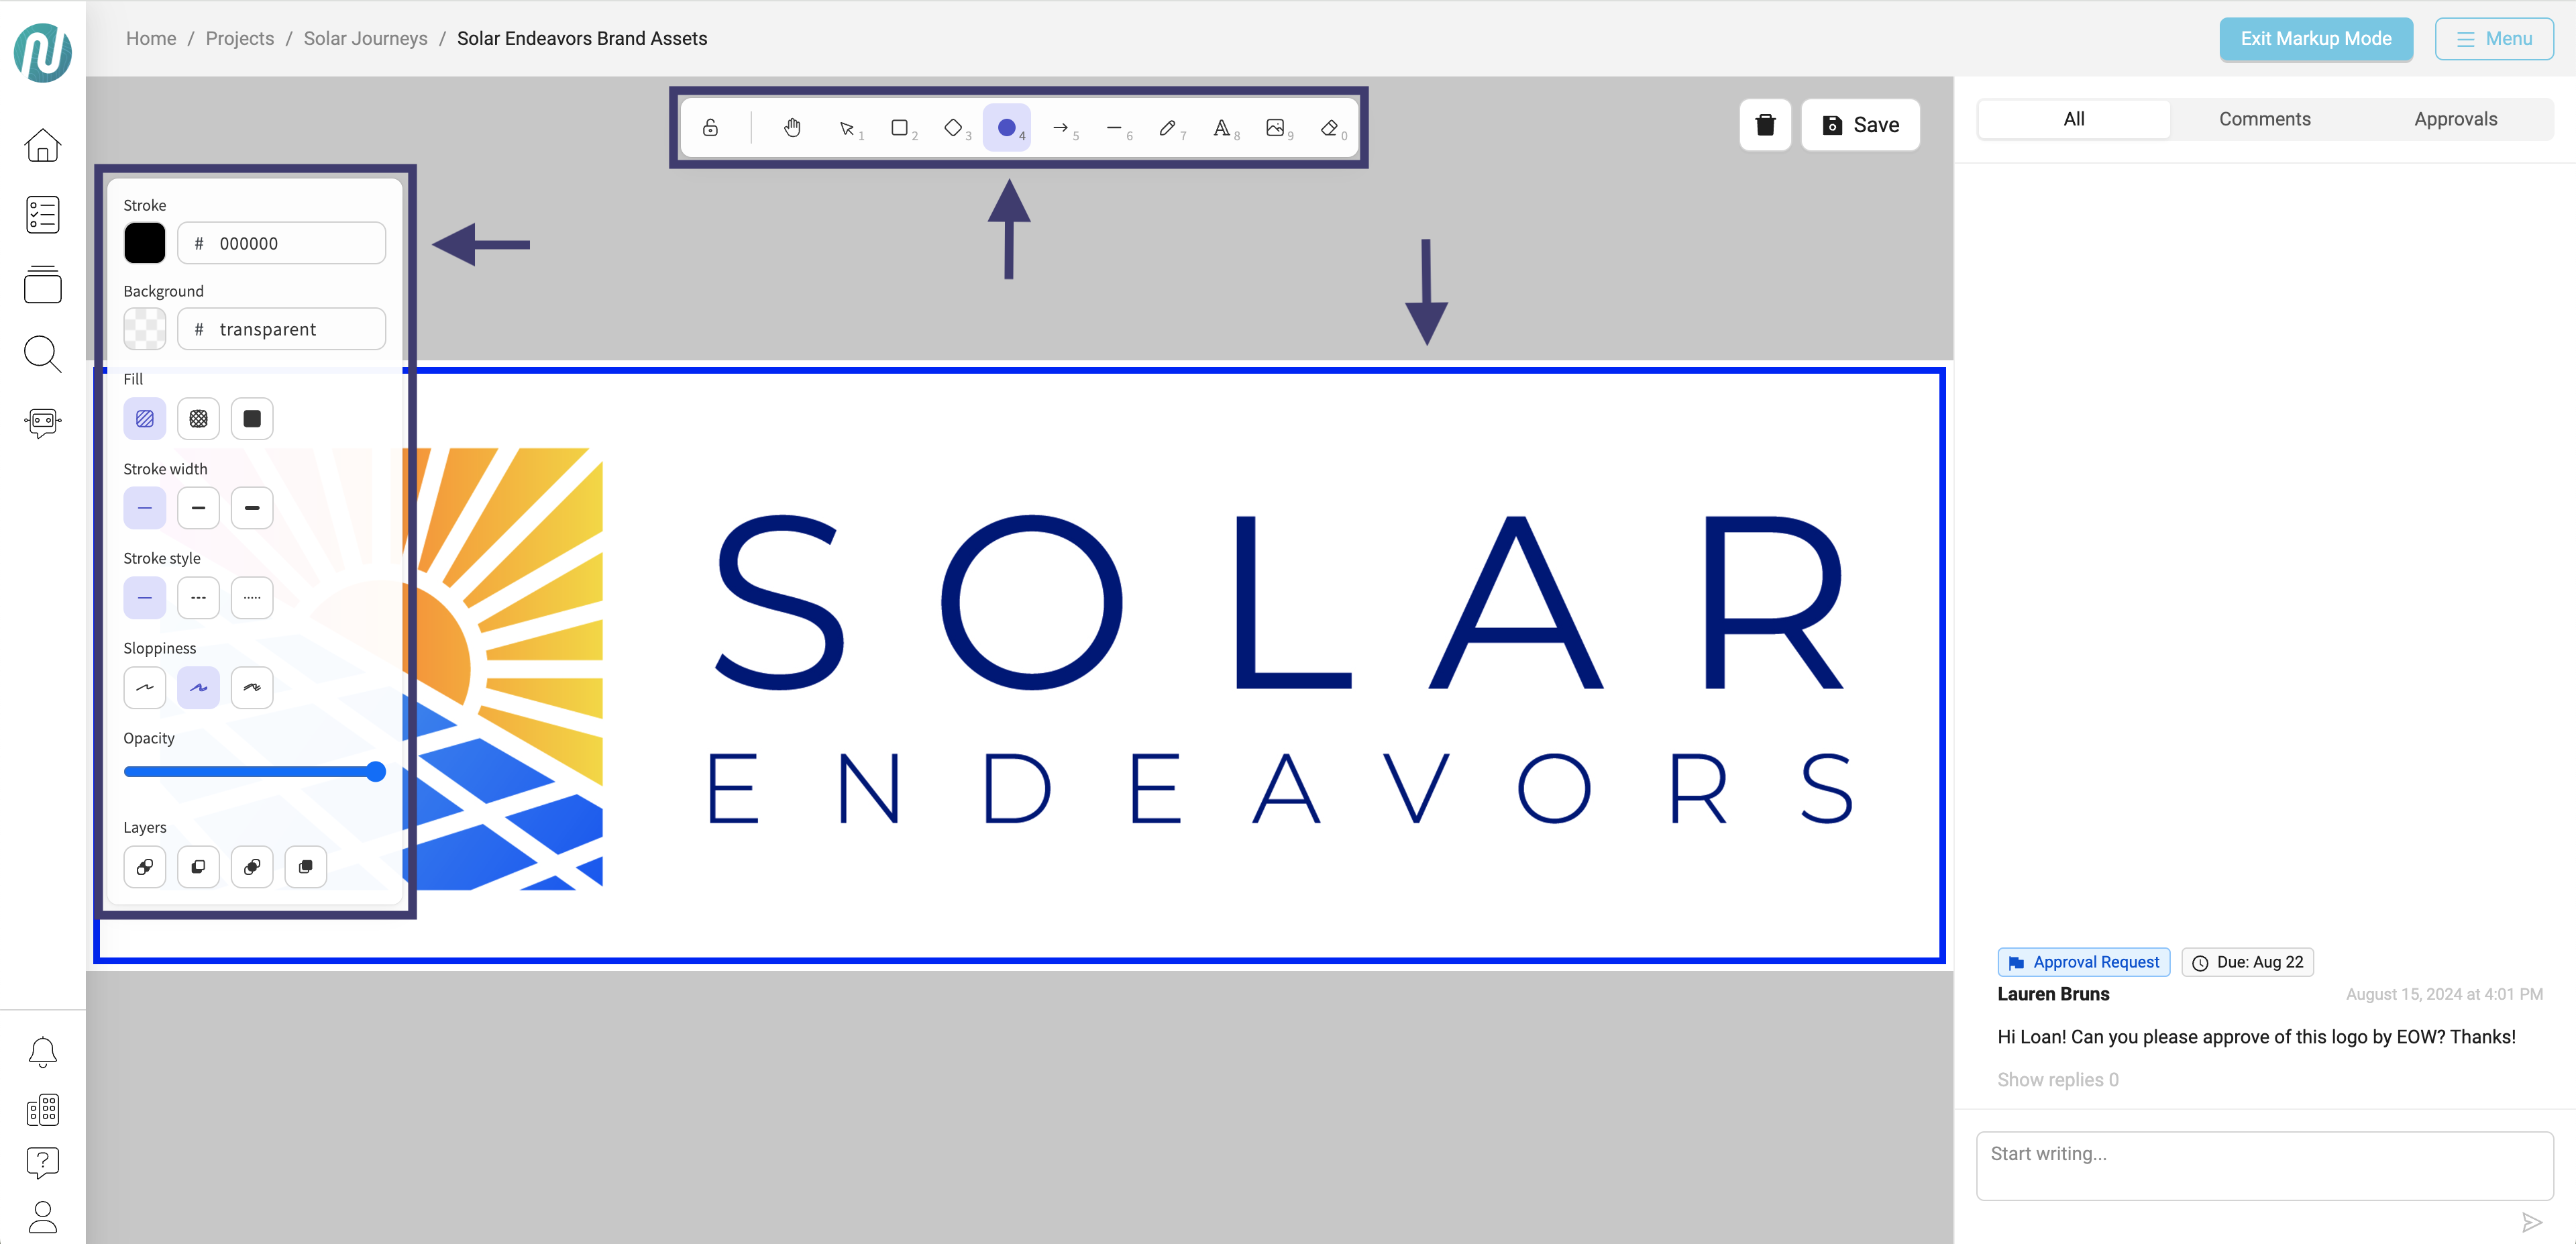
The available markups will appear on the menu bar at the top and a blue ring will appear around the content where you can add your markups. When you select a markup option such as a circle (#4), you are able to draw a circle on your asset and use the control panel on the left to modify options for the circle.
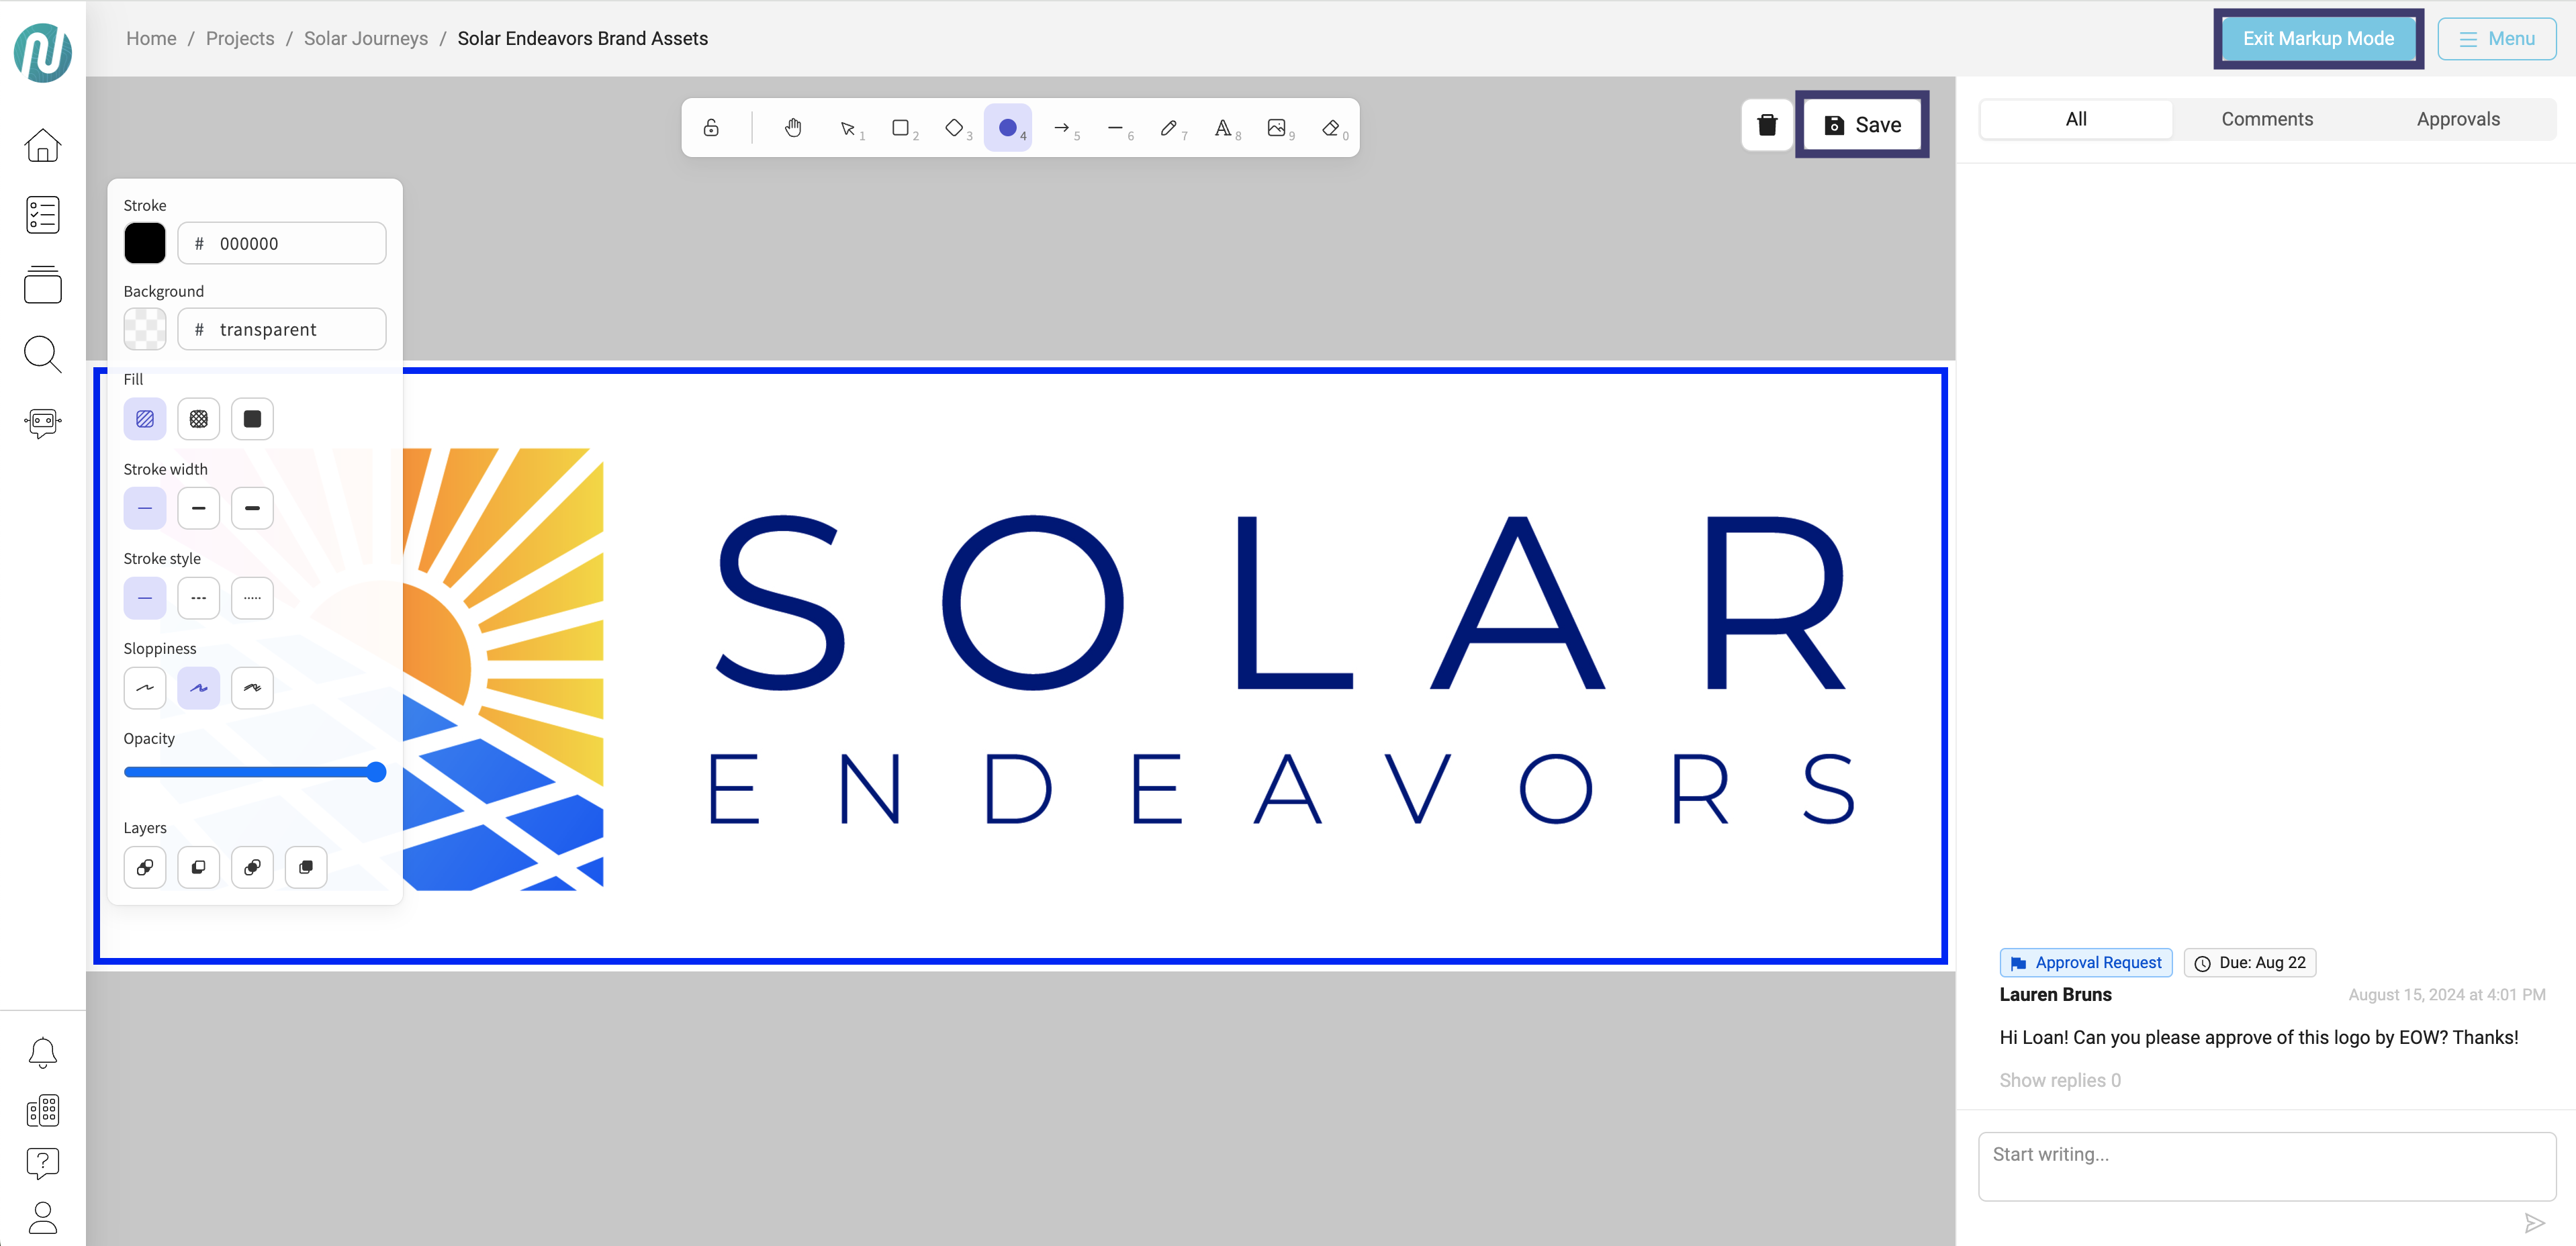
When you have finished your markups, click on Save in the upper right corner, then click on the Exit Markup Mode button:
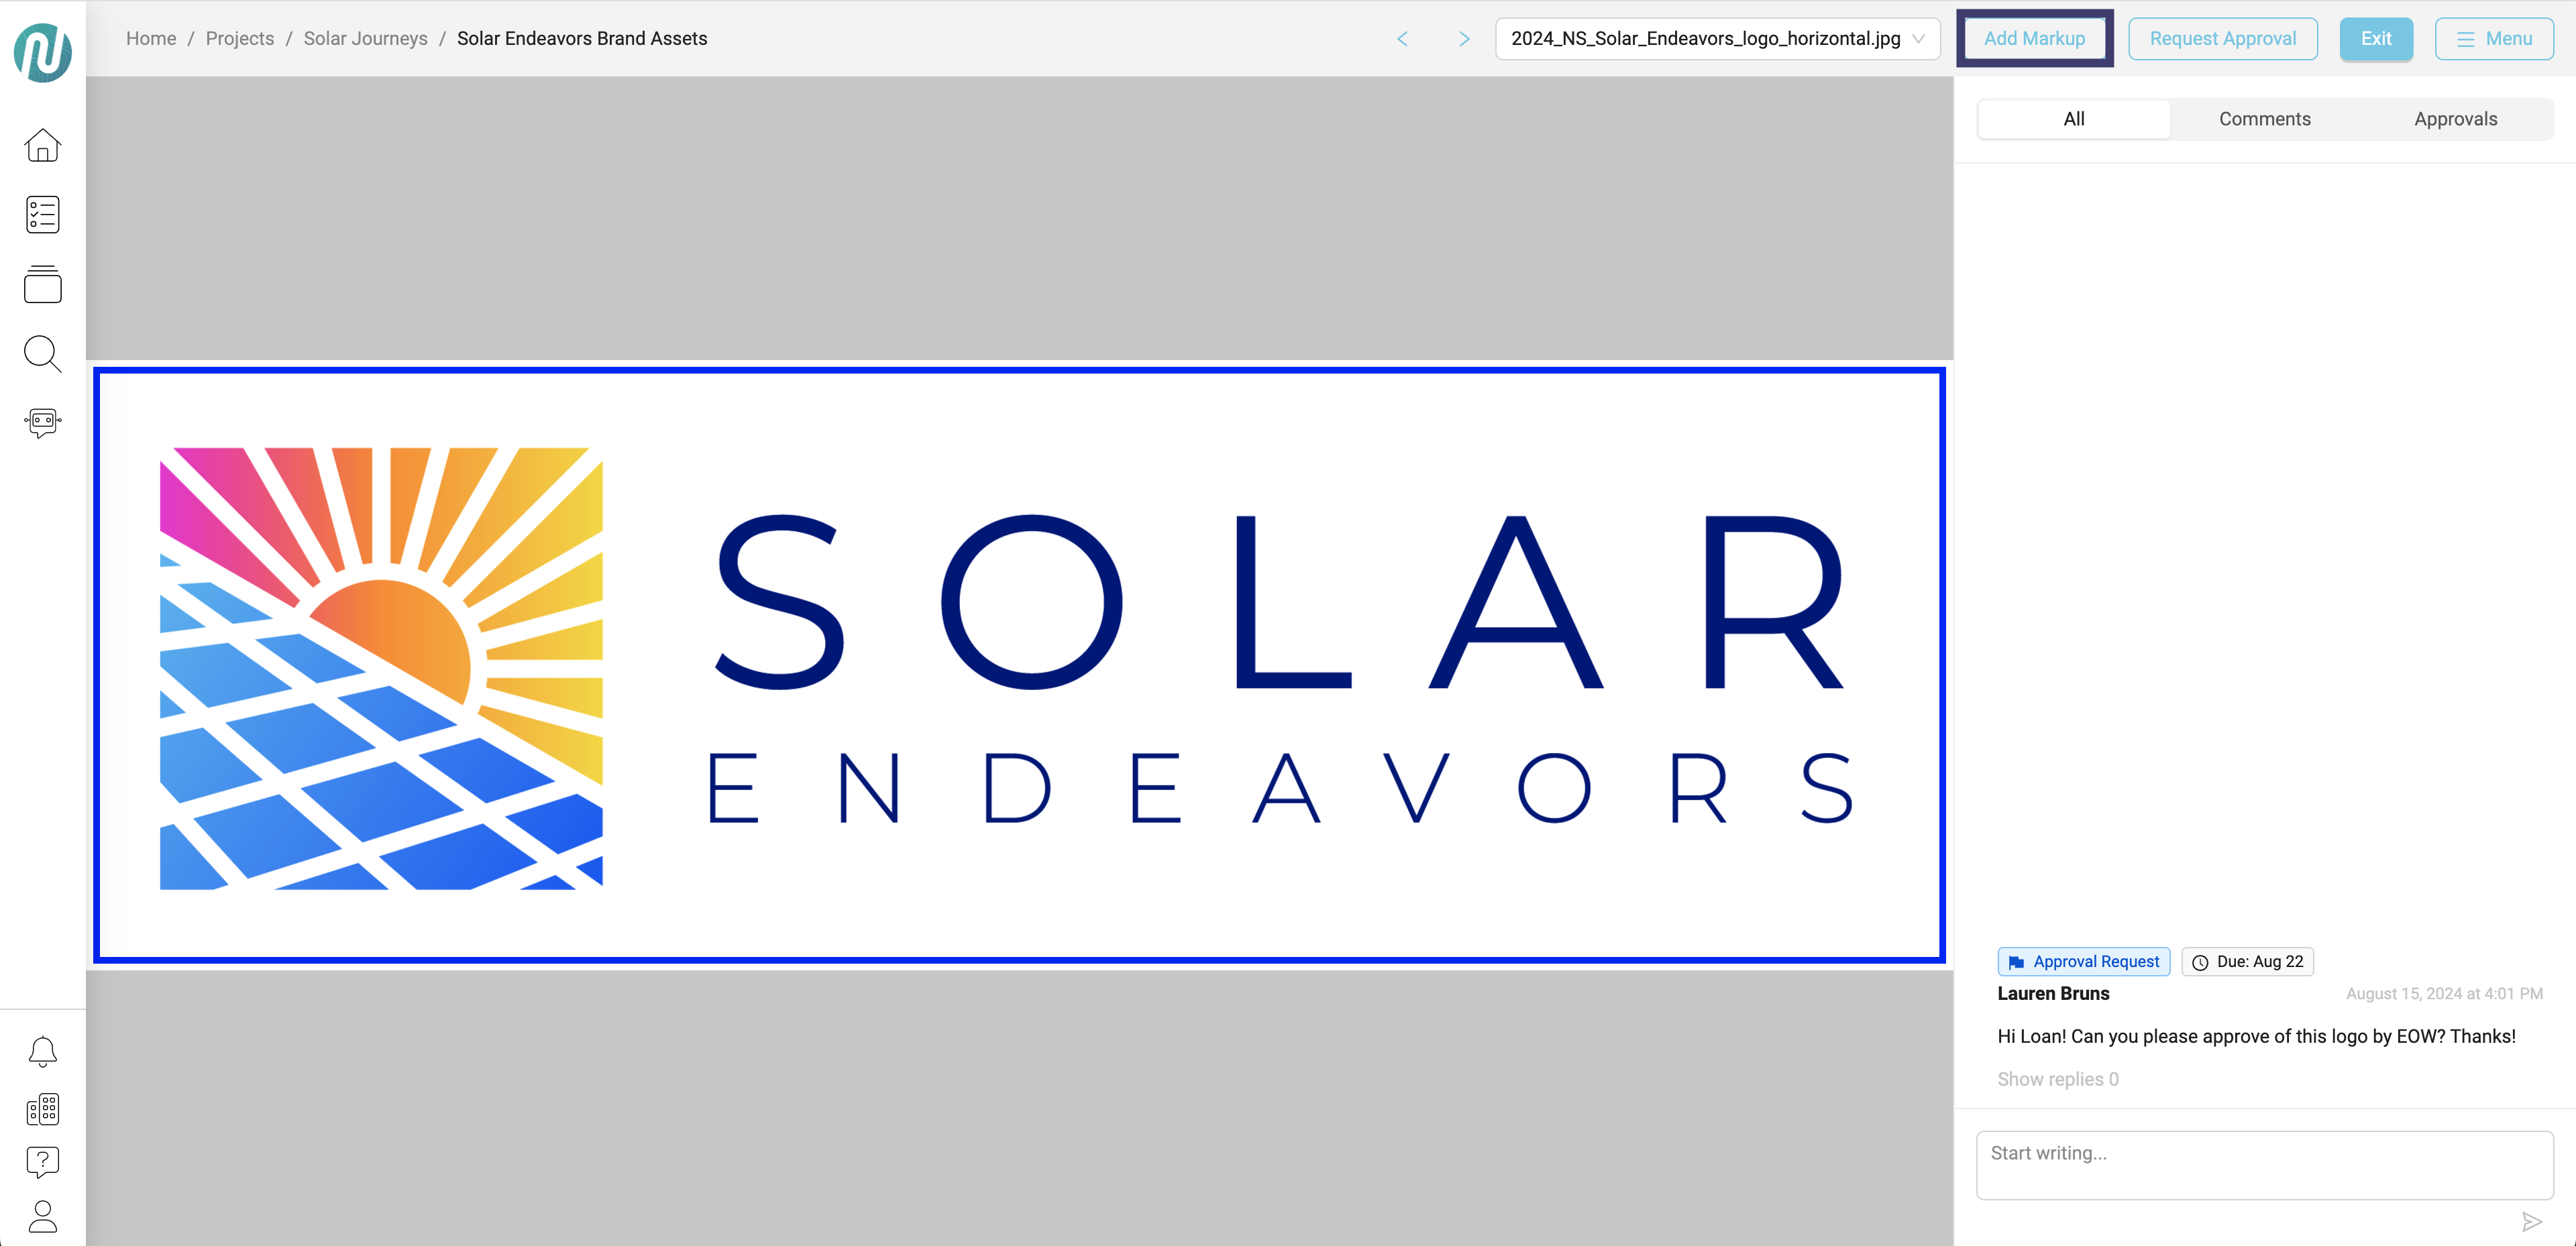
To view your markups after saving your sketch, click on Add Markup. This will allow you to view, edit, and update your markups.
Resolve/Delete a Comment
As a user and creator, you can delete or resolve comments, documenting them for the asset.
Resolve a comment:
To resolve a comment, click on the check mark. It will turn green in the Review Log and, if it was a pinpoint comment, it will also show a green check mark within the comment, indicating that it has been resolved.
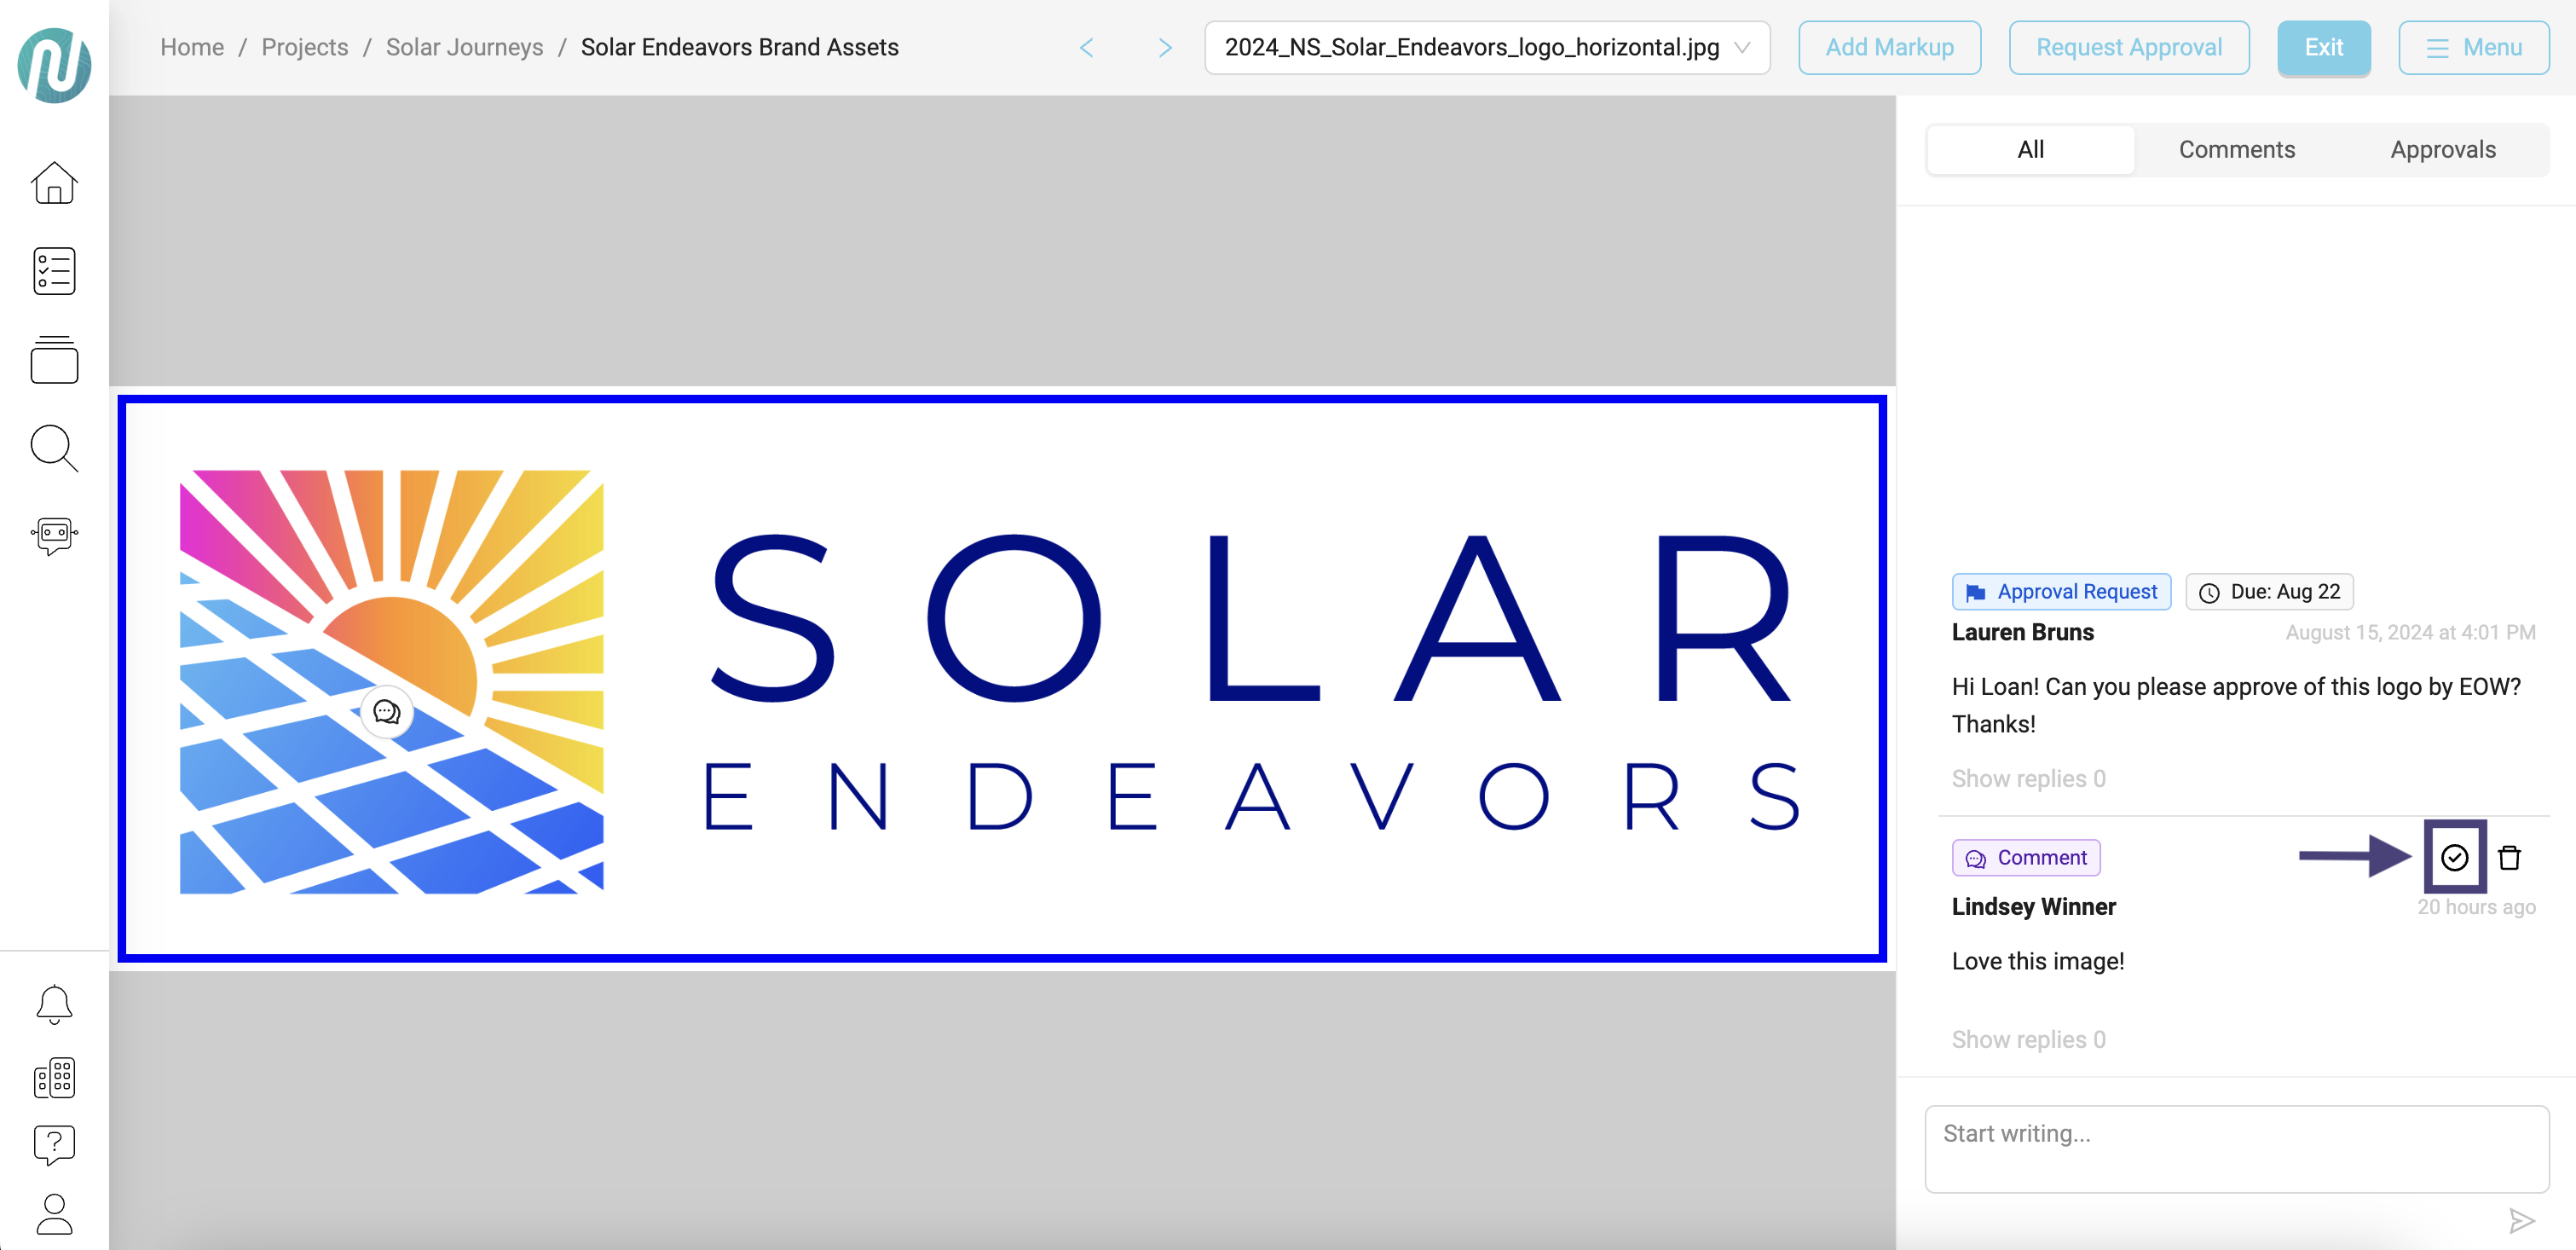
Delete a comment:
To delete a comment, click on the trash can icon:
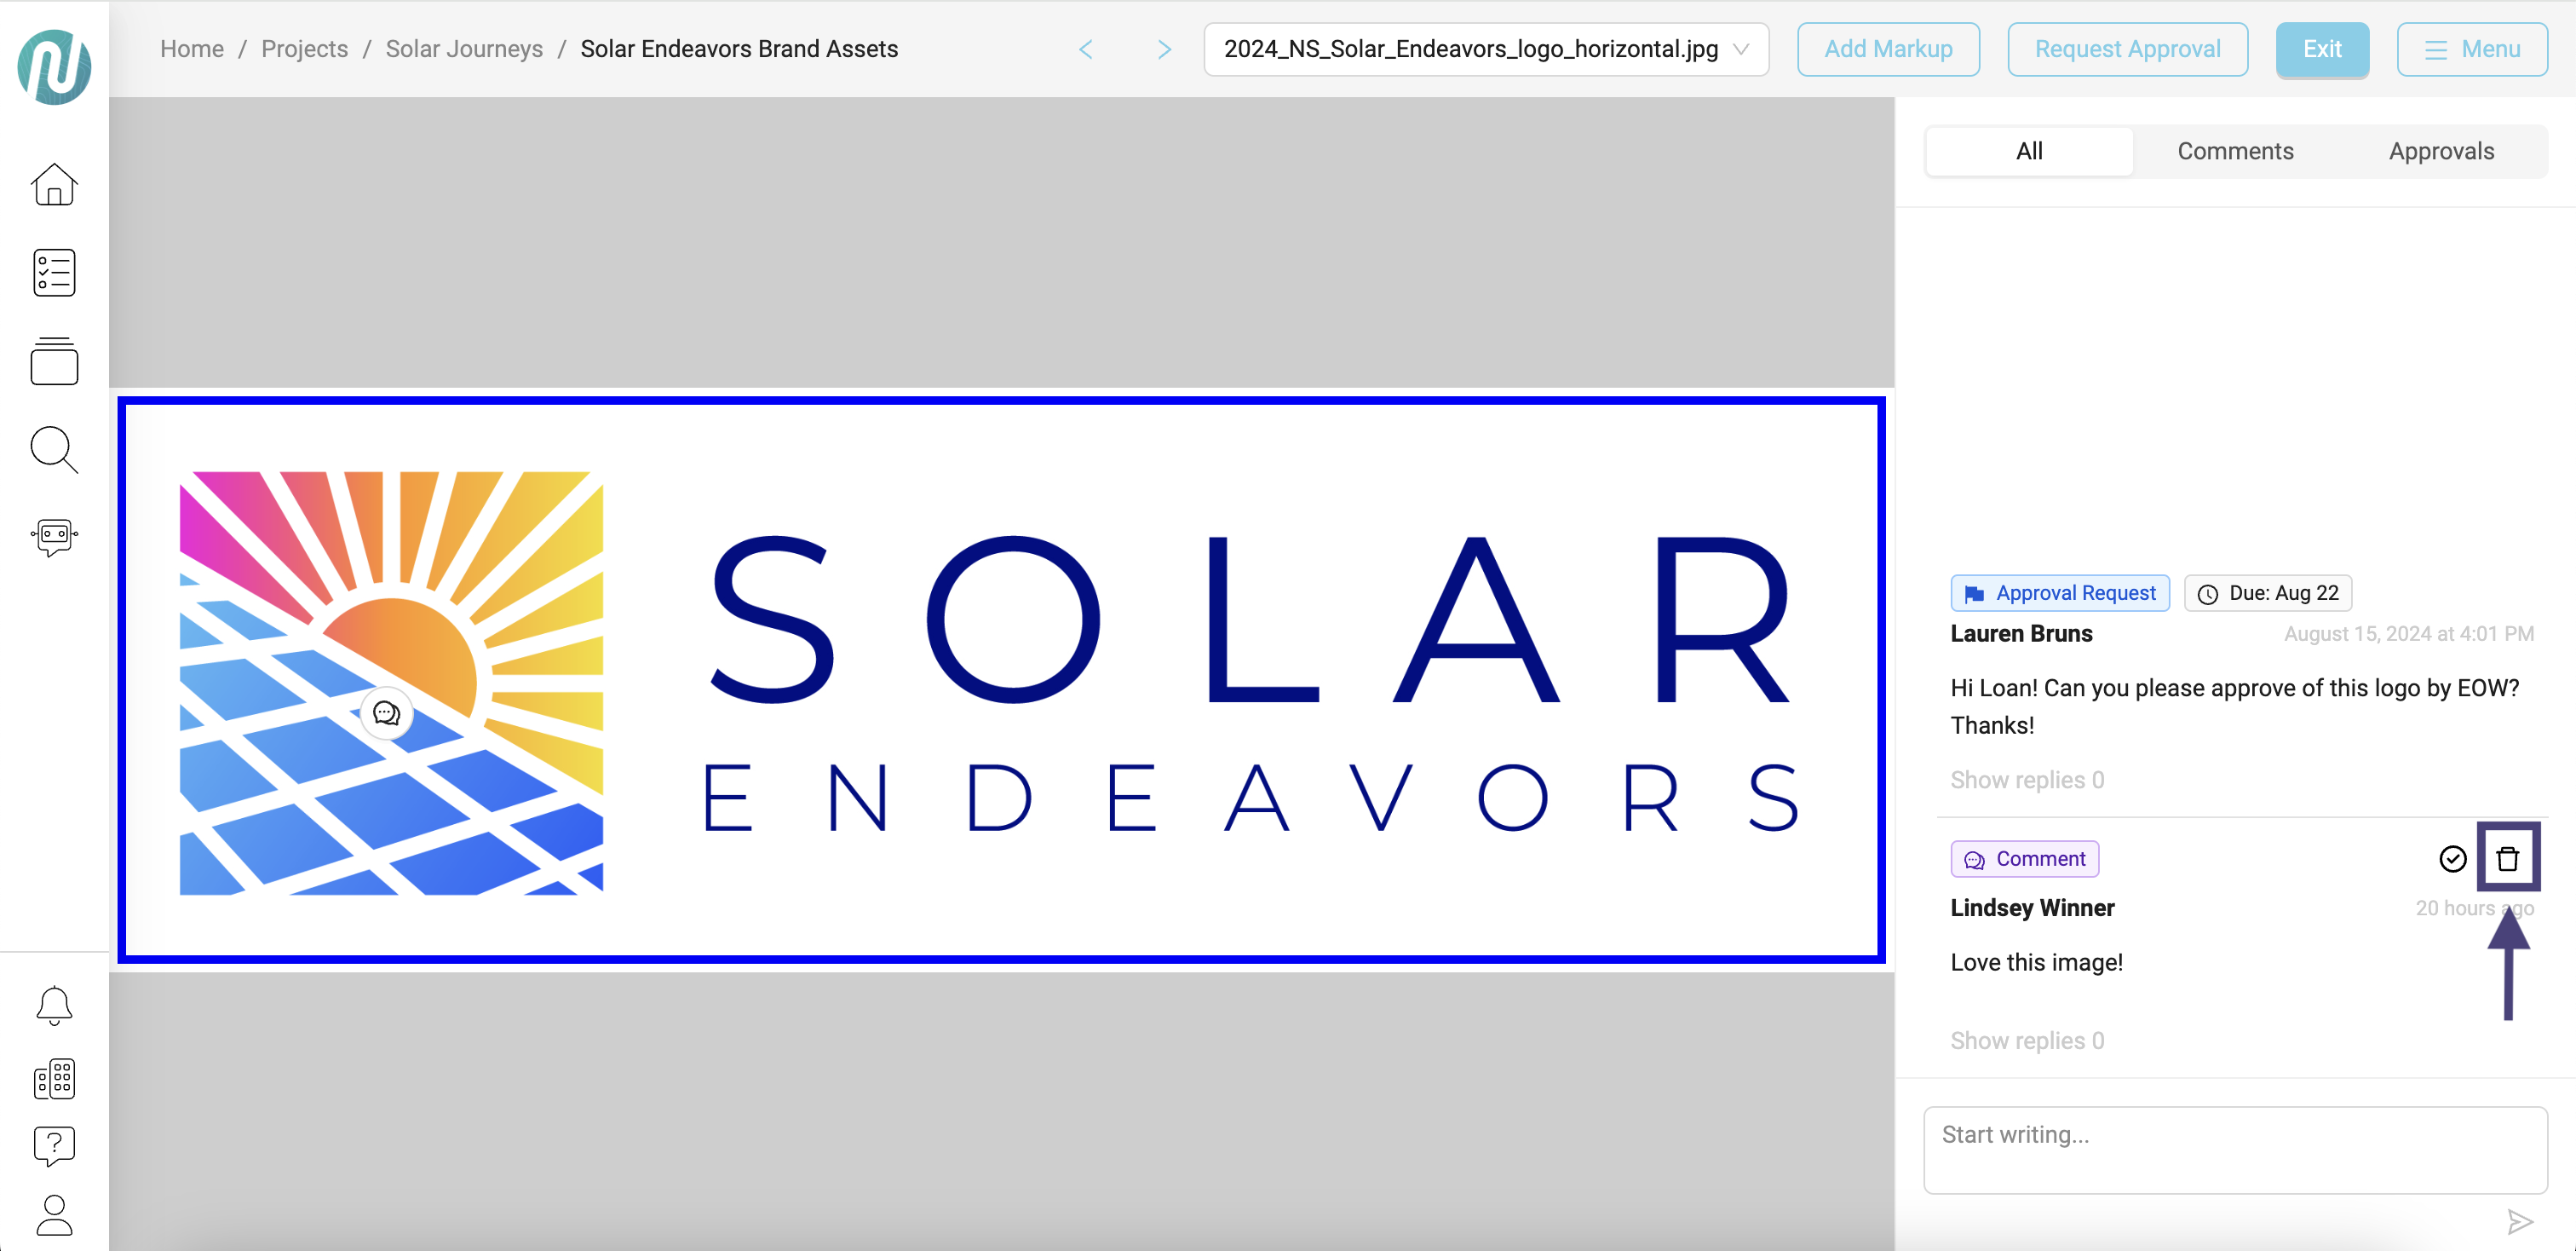
When you delete a comment, it will be removed from the Review Log on the right.
Request an Approval
Click on Request Approval to initiate an approval request:
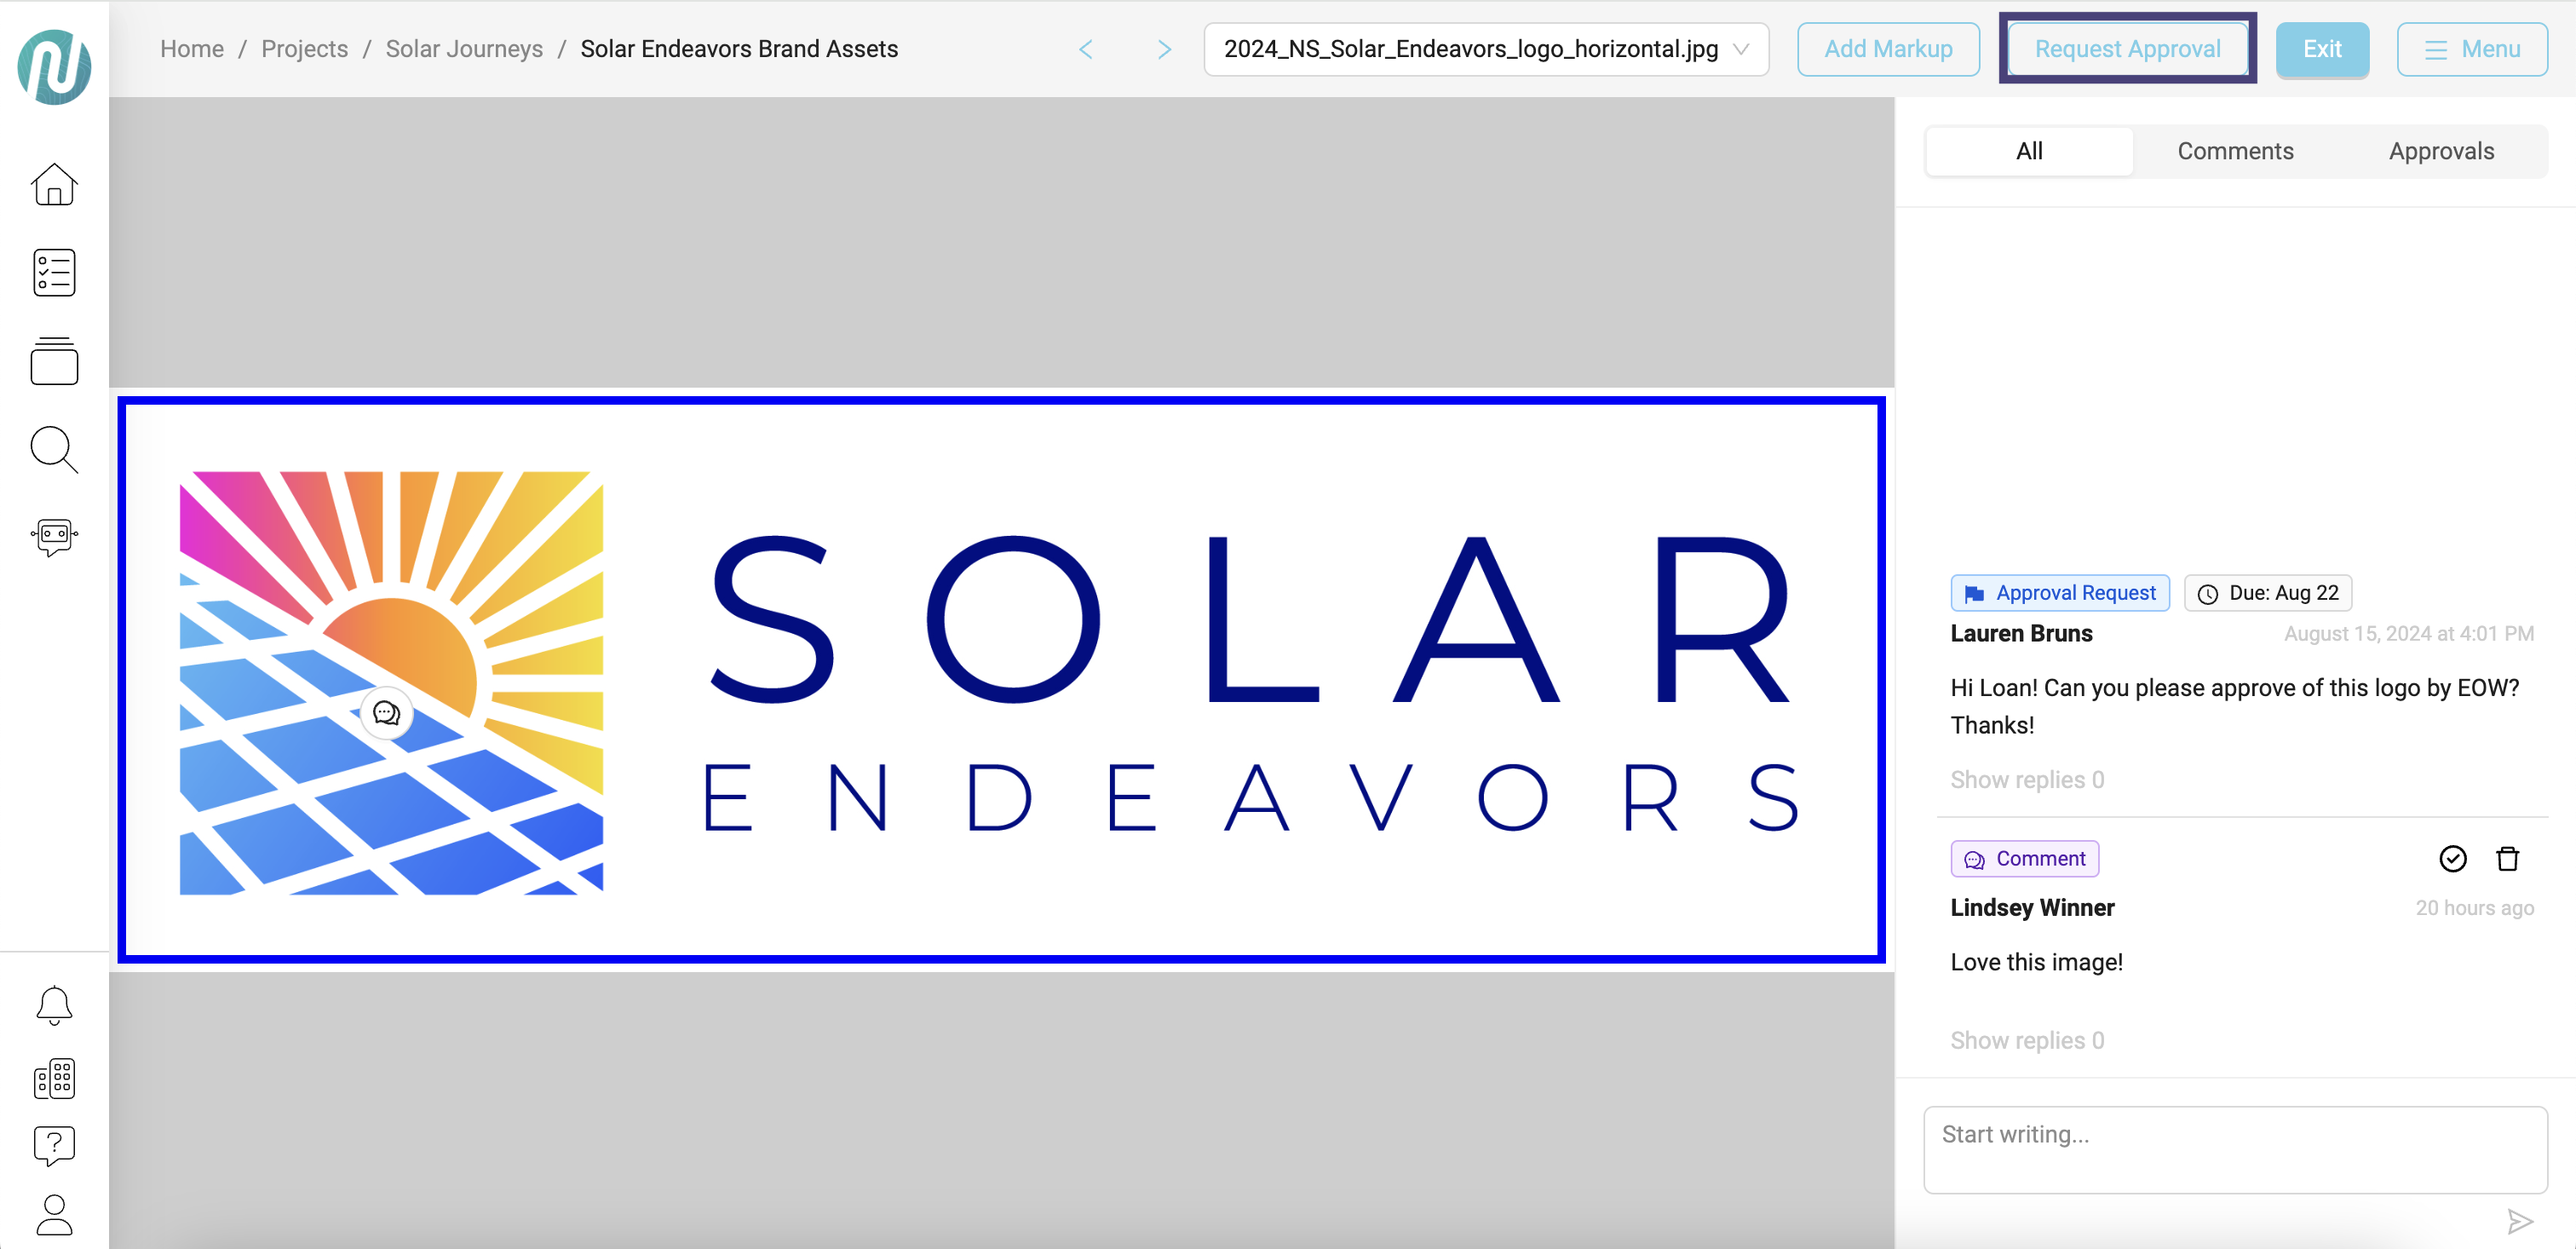
When the Request Approval window appears, click on the down arrow in the box under Add a Reviewer to select a user. Then, fill in your message and choose a due date. Once you are finished, click on Send.
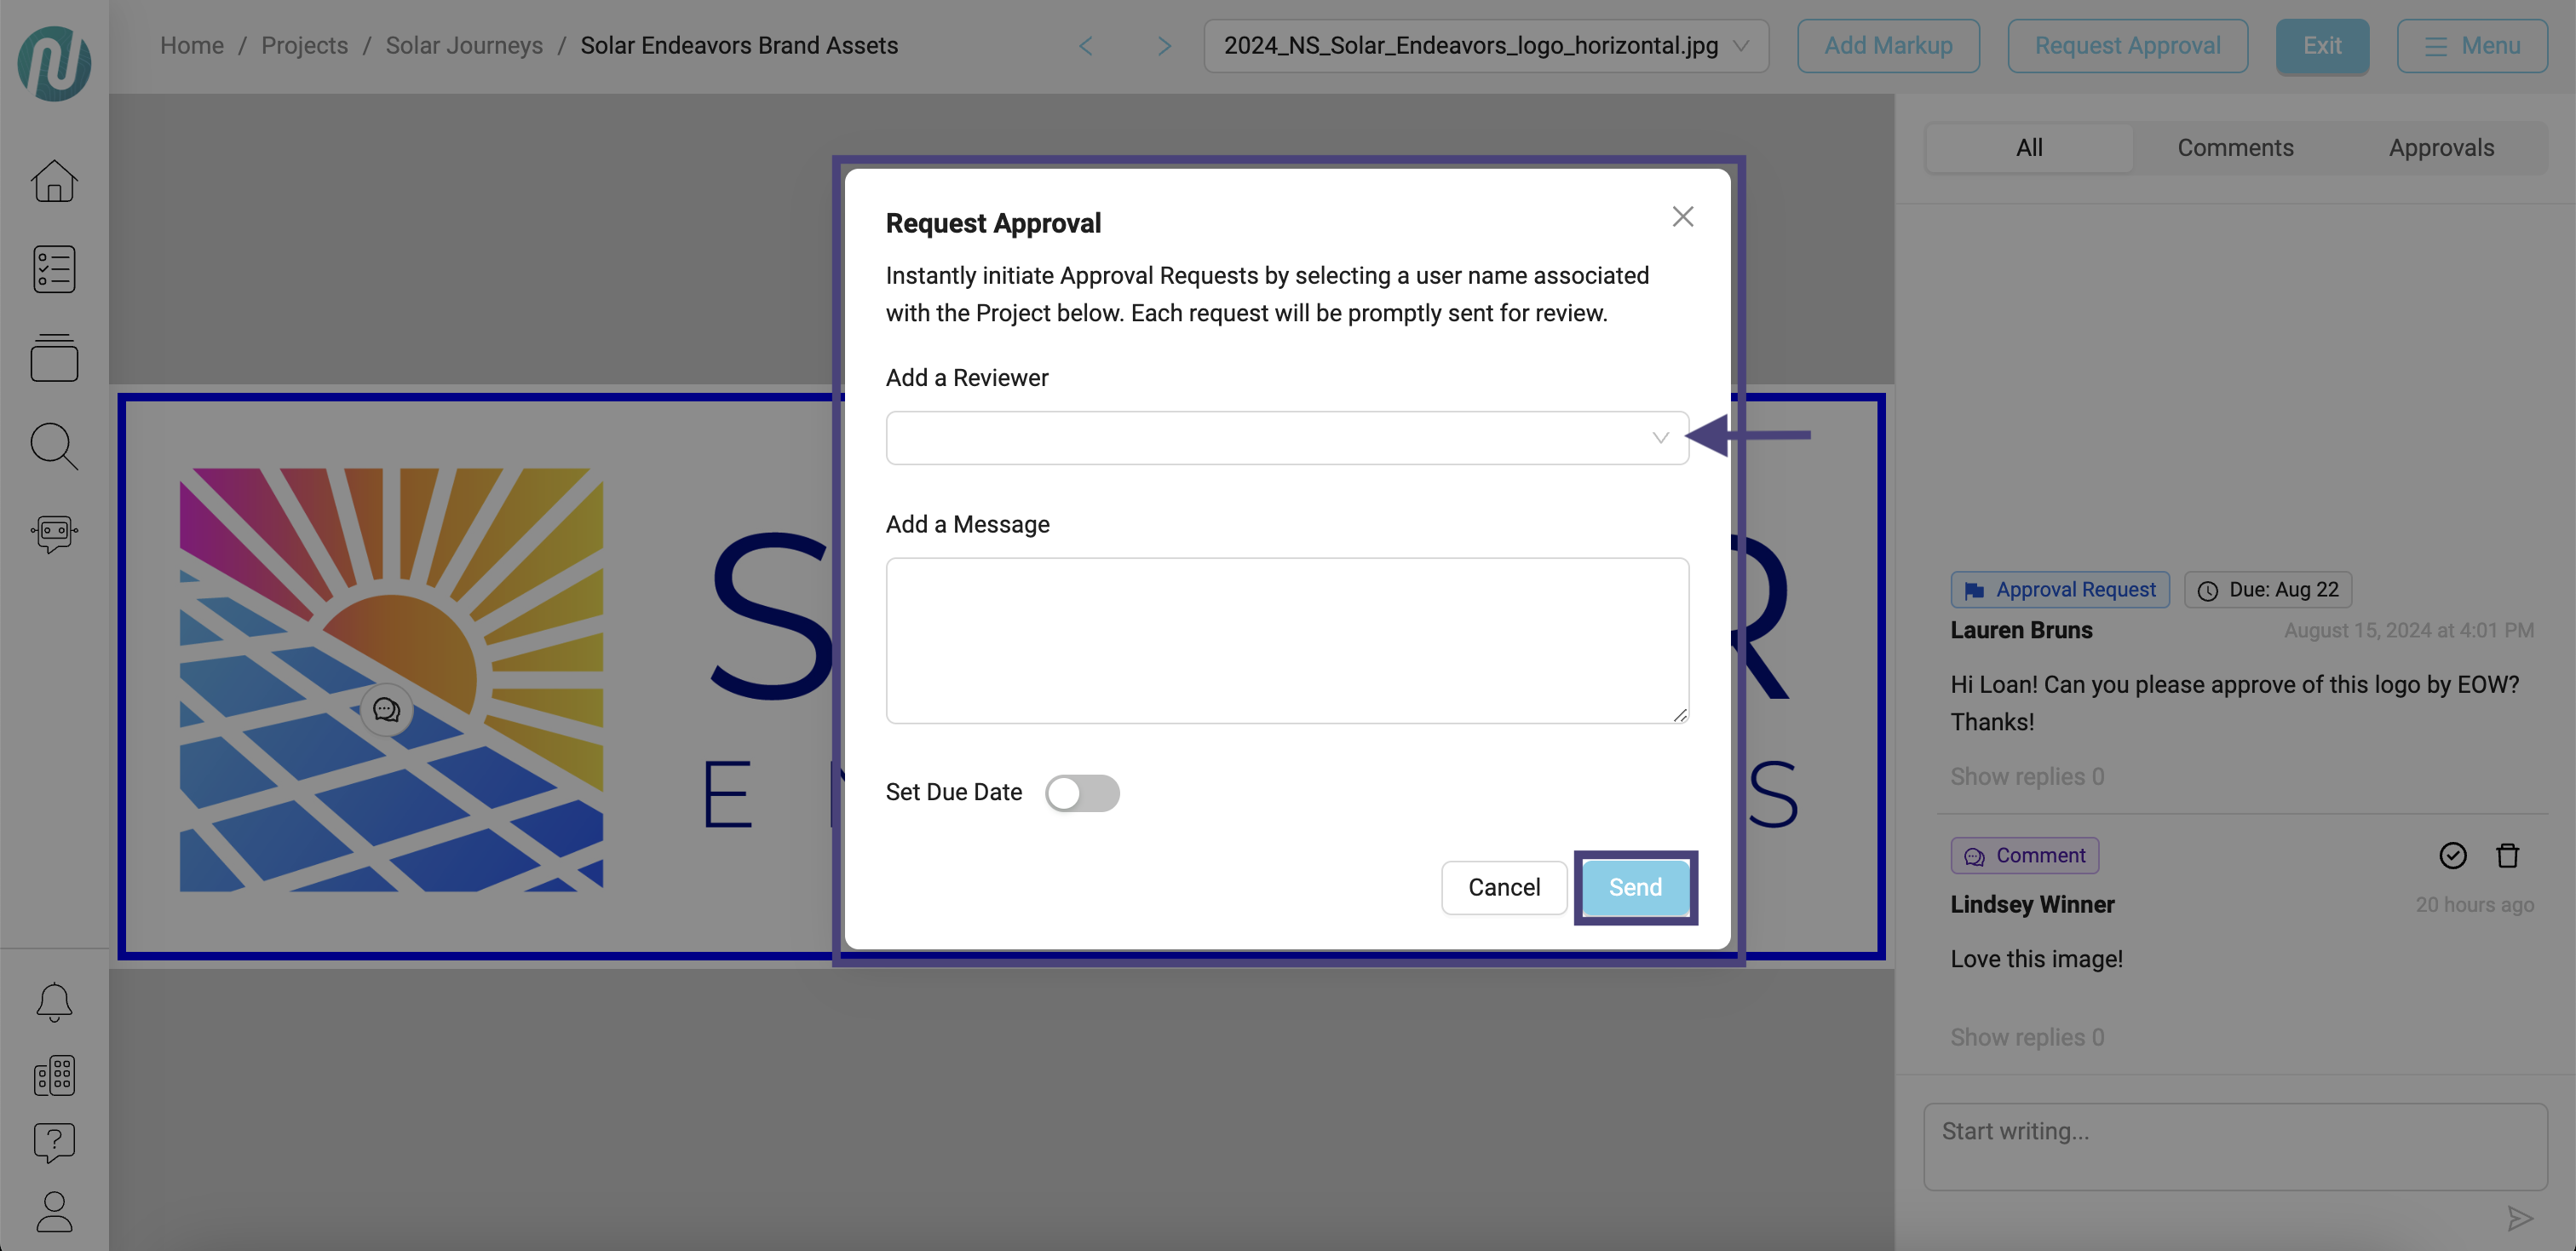
The approver will receive an email notification, provided they are a member of the organization and project.
You can assign multiple approvers to a piece of content.
The new approval request will be displayed in the Review Log.
Approve/Reject an Approval Request
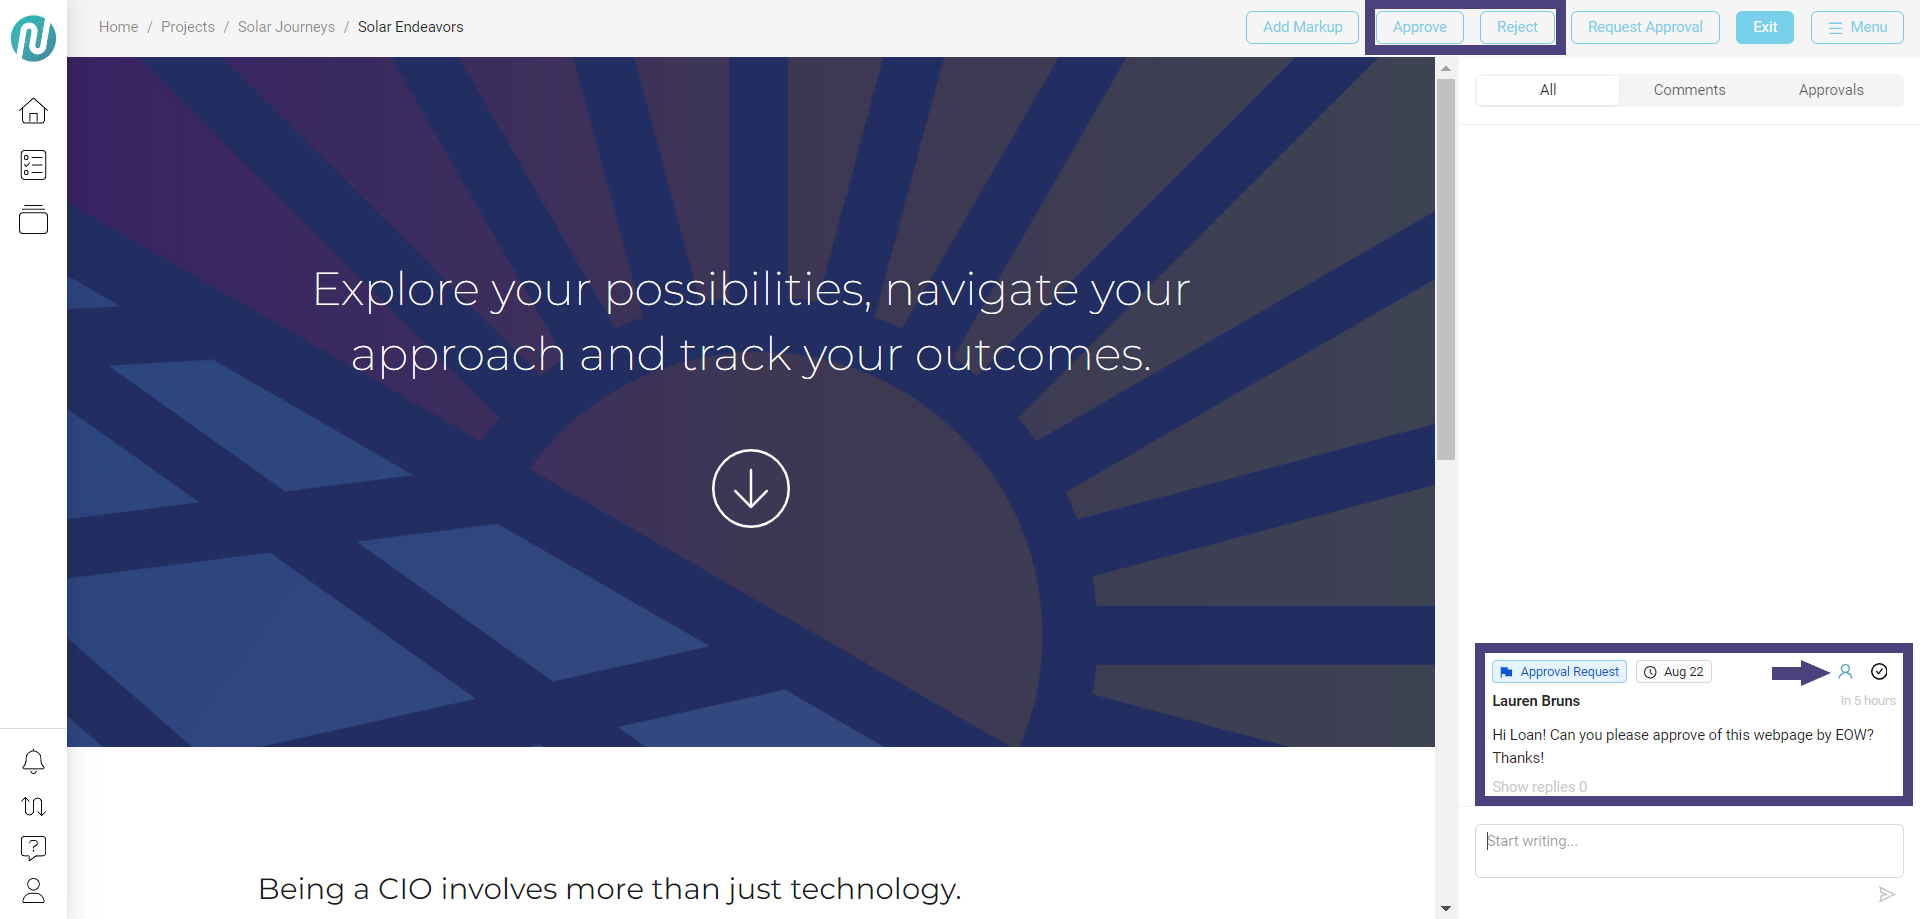
In Review Mode, the approver will find the Approve and Reject buttons at the top. Approvals will show up in the Review Log.
UPDATE
In the example above:
Lauren Bruns is the creator of the approval request.
Hovering over the person icon on the right will show the assignee of the approval request.
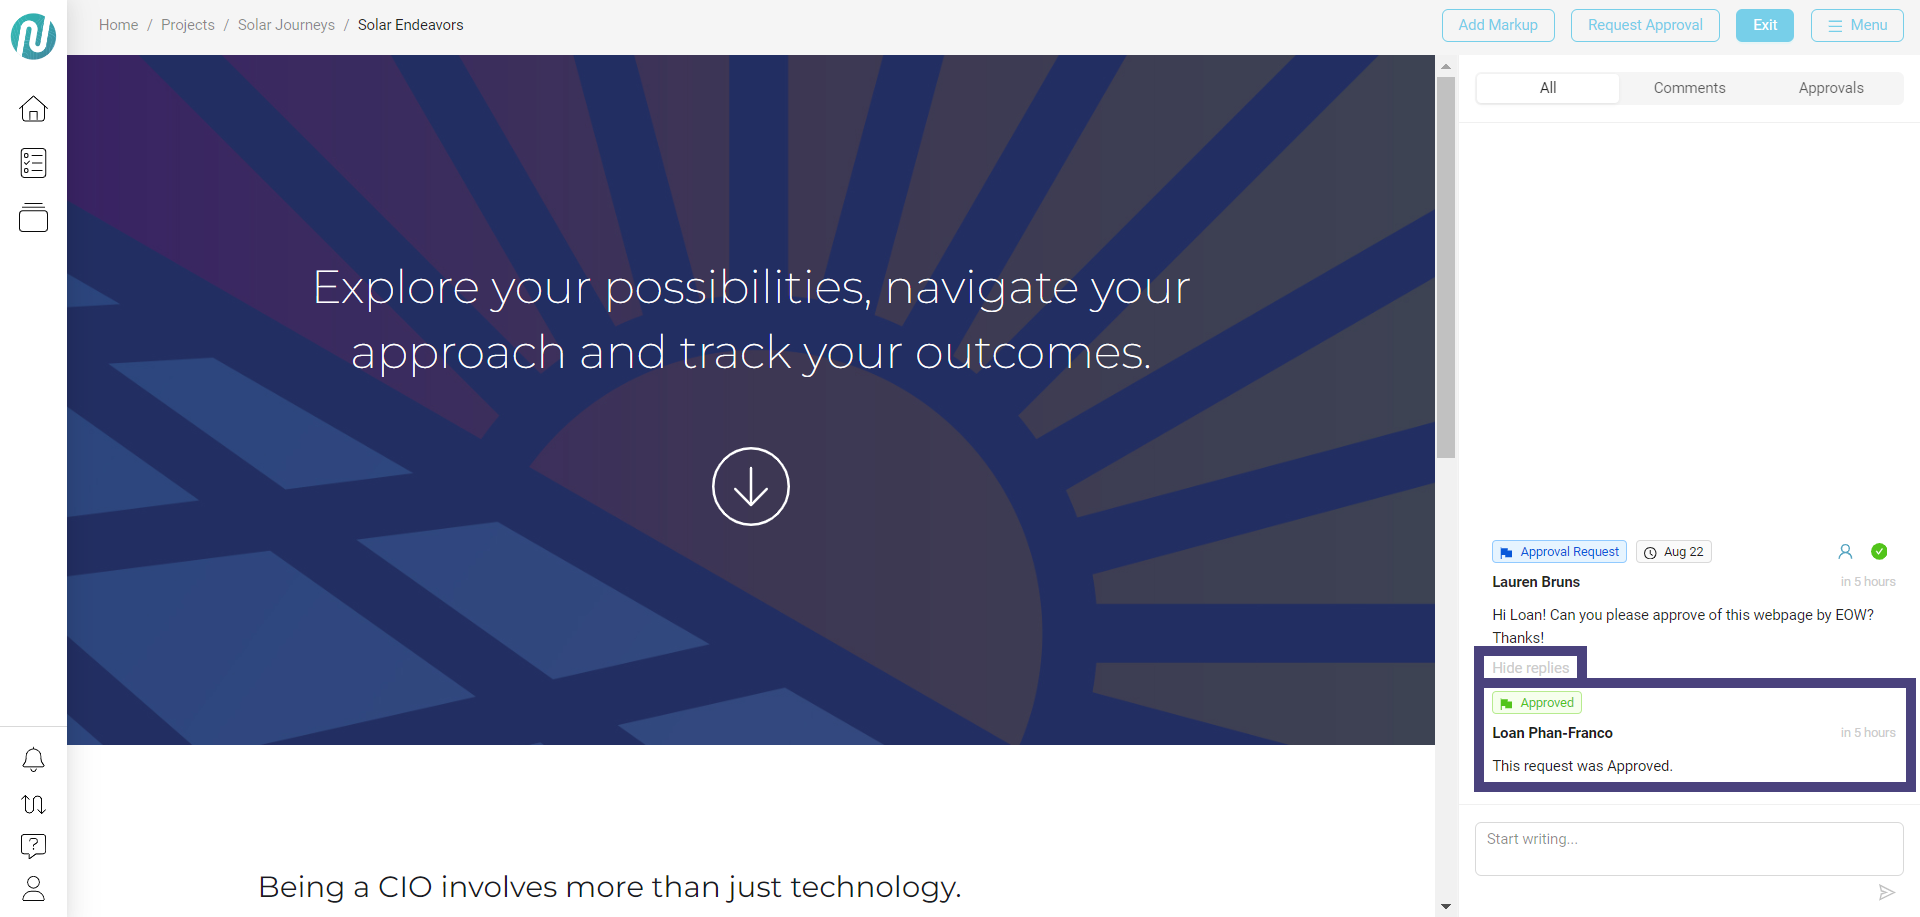
Once an approval has been either approved or rejected, you can view the status by clicking on Show replies or hide the status by clicking on Hide replies under each approval request. In the example below, the request was approved:
Email Notifications
The following guidelines outline the notification actions taken in review mode, ensuring that the right participants are notified during each stage of commenting, replying, and approval processes.
When a Comment is Created, an email will:
Notify all users tagged in the comment.
When a Comment Receives a Reply, and email will:
Notify the user who made the original comment that is being replied to.
Notify only the users tagged in this specific reply (applies only to users tagged in the reply itself).
When a Request Approval is Created, and email will:
Notify the user designated for review or approval.
Notify all Project Admins associated with the project.
When a Request Approval is Resolved (Approved or Rejected), and email will:
Notify the user who initially submitted the approval request.
Notify all Project Admins involved with the project.
Audience | Public |
Section | NimbleStory Basic |
Status | Rough Draft |
Applies to | NimbleStory 3.0 and higher |
Next Review Date | Nov 2022 |
| Version | Date | Comment |
|---|---|---|
| Current Version (v. 9) | Dec 12, 2024 14:53 | @a user |
| v. 8 | Nov 07, 2024 17:09 | @a user |
| v. 7 | Nov 05, 2024 20:40 | @a user |
| v. 6 | Nov 05, 2024 20:39 | @a user |
| v. 5 | Jul 17, 2024 22:50 | @a user |
| v. 4 | Jul 17, 2024 22:47 | @a user |
| v. 3 | Jun 14, 2024 14:32 | @a user |
| v. 2 | Jun 12, 2024 20:28 | @a user |
| v. 1 | Jun 12, 2024 20:08 | @a user |

