Curate - Workspaces
📔 Overview
With Digital Workspaces, we’ve made it even easier to collaborate, organize, and customize your projects.
Create tailored spaces for specific teams, projects, or initiatives, ensuring everyone has access to the tools and content they need.
Centralize collaboration by enabling team members to share updates, insights, and assets directly within a dedicated Workspace.
Simplify navigation with organized layouts and quick access to all the materials relevant to your ongoing efforts.
📘 Instructions
Follow the step-by-step instructions below to learn how to create Digital Workspaces.
Link to External Provider
Click the Add Content button.
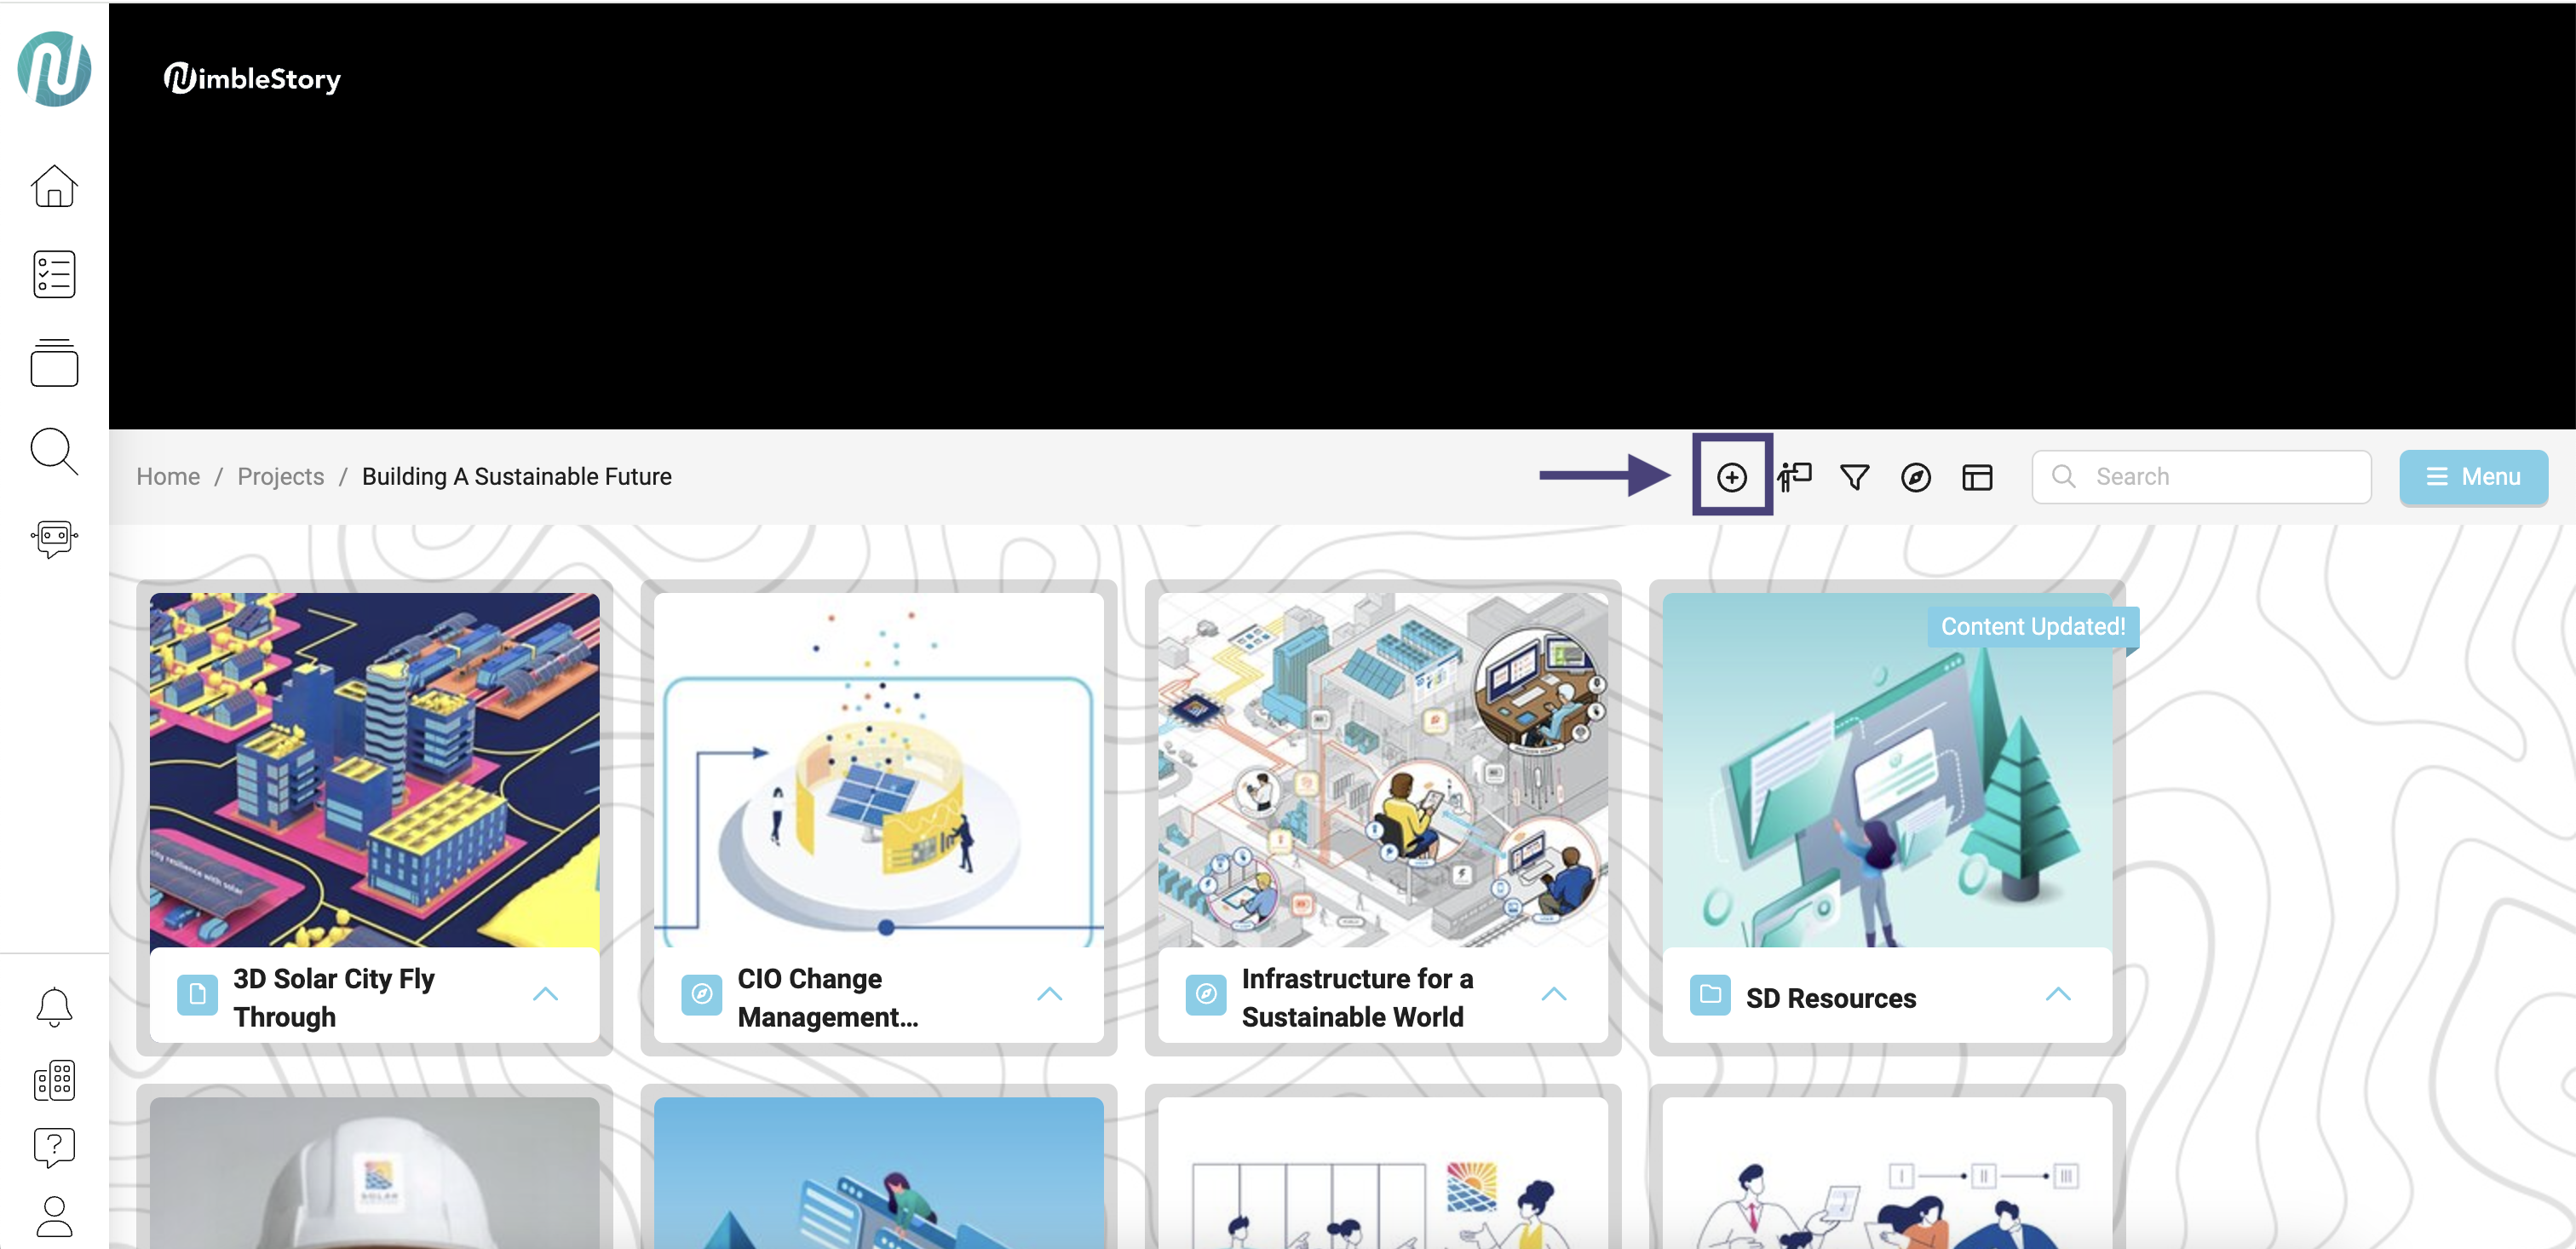
A Content Type Selection modal will appear.
Select Workspace
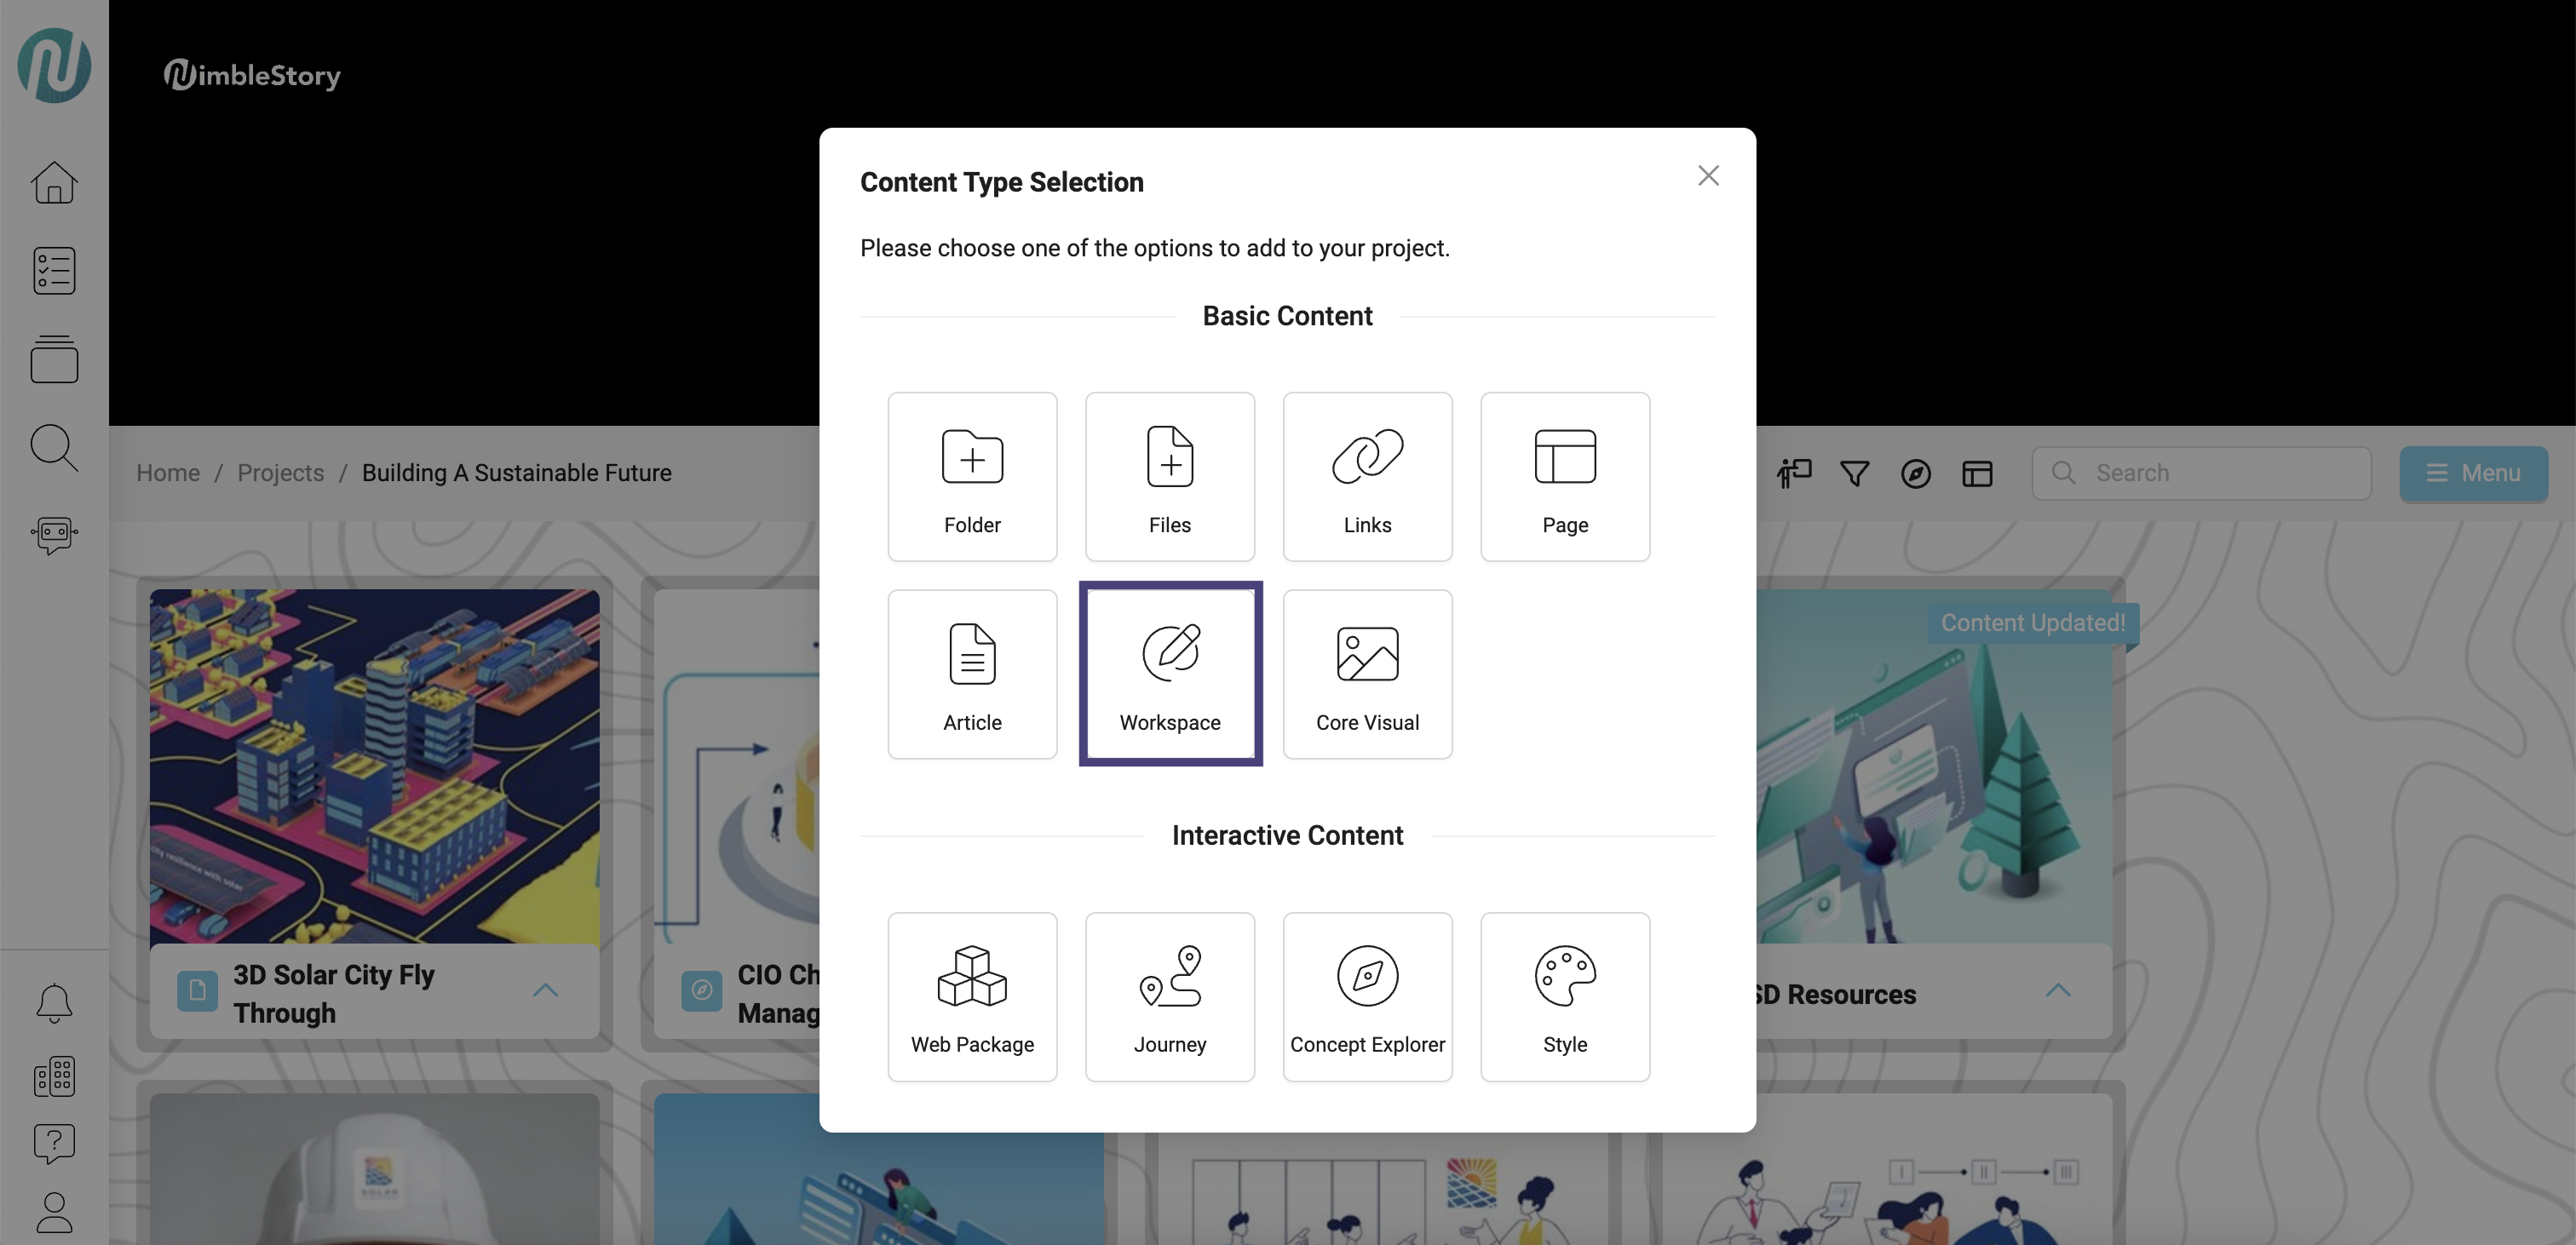
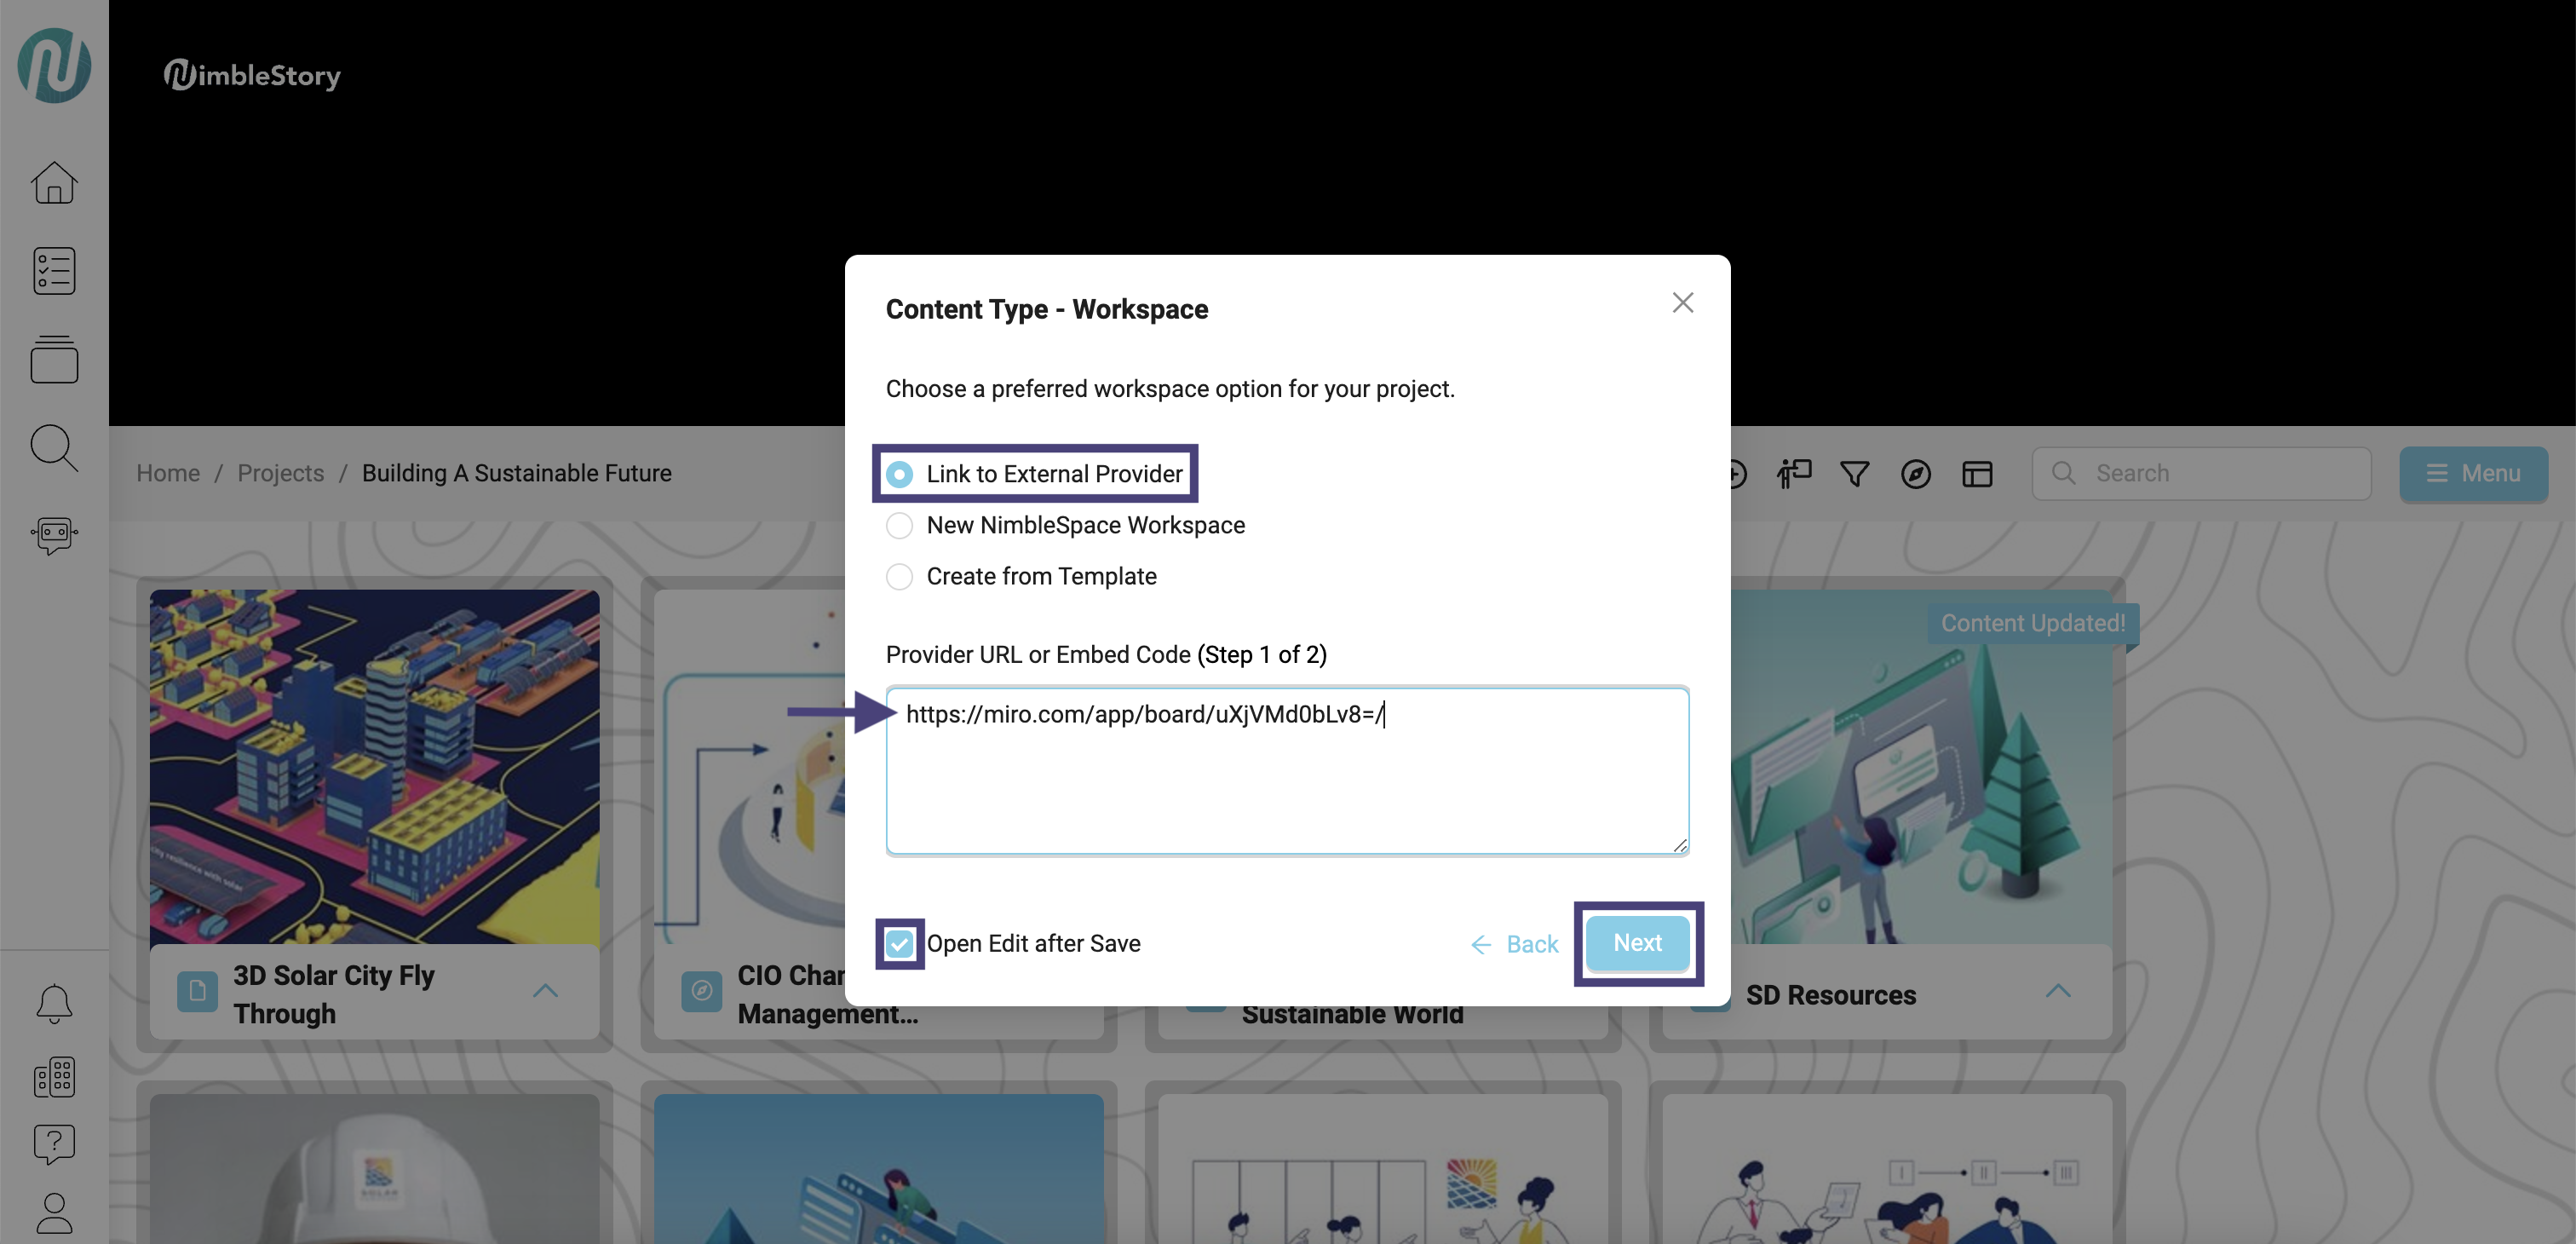
A Content Type - Workspace modal will appear.
Select Link to External Provider
Copy and paste a URL or Embed Code (in this case, a Miro link)
Select Open Edit after Save
Select Next then Save
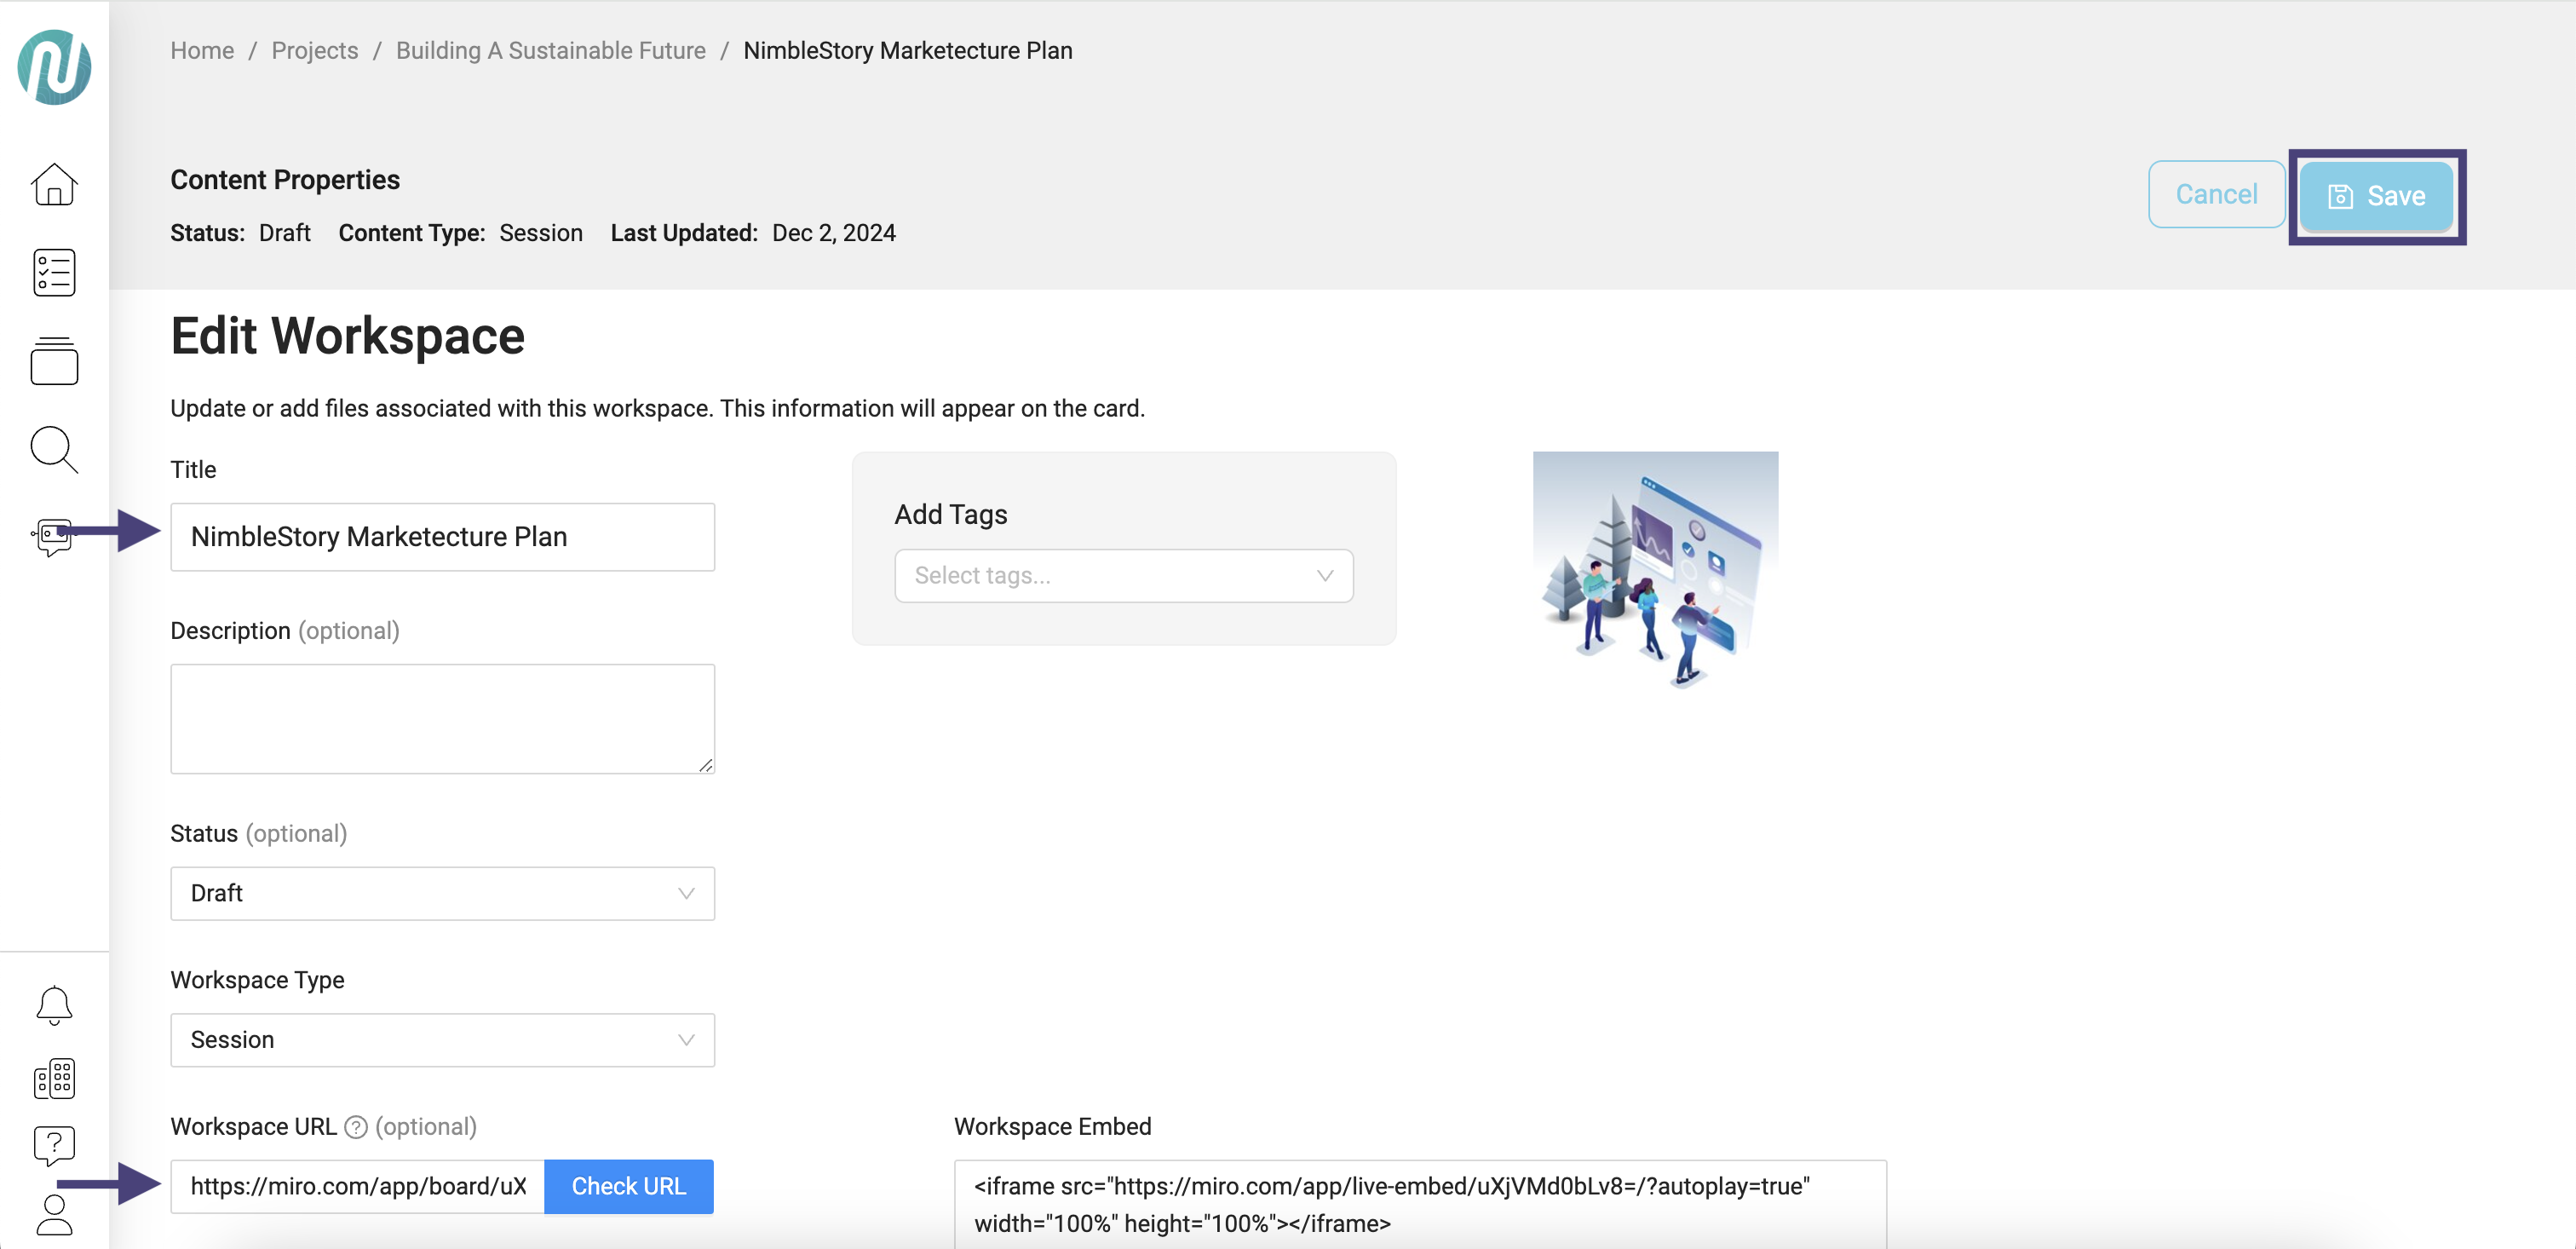
Selecting the Open Edit after Save box will bring you to this screen. Here you can:
Change the title
Add a description
Choose Status of asset
Choose Workspace Type
Update URL
Once desired edits are made, click Save.
After clicking Save, you will be brought to your fully functional Miro Board. Here you can collaborate, organize, and customize your projects.
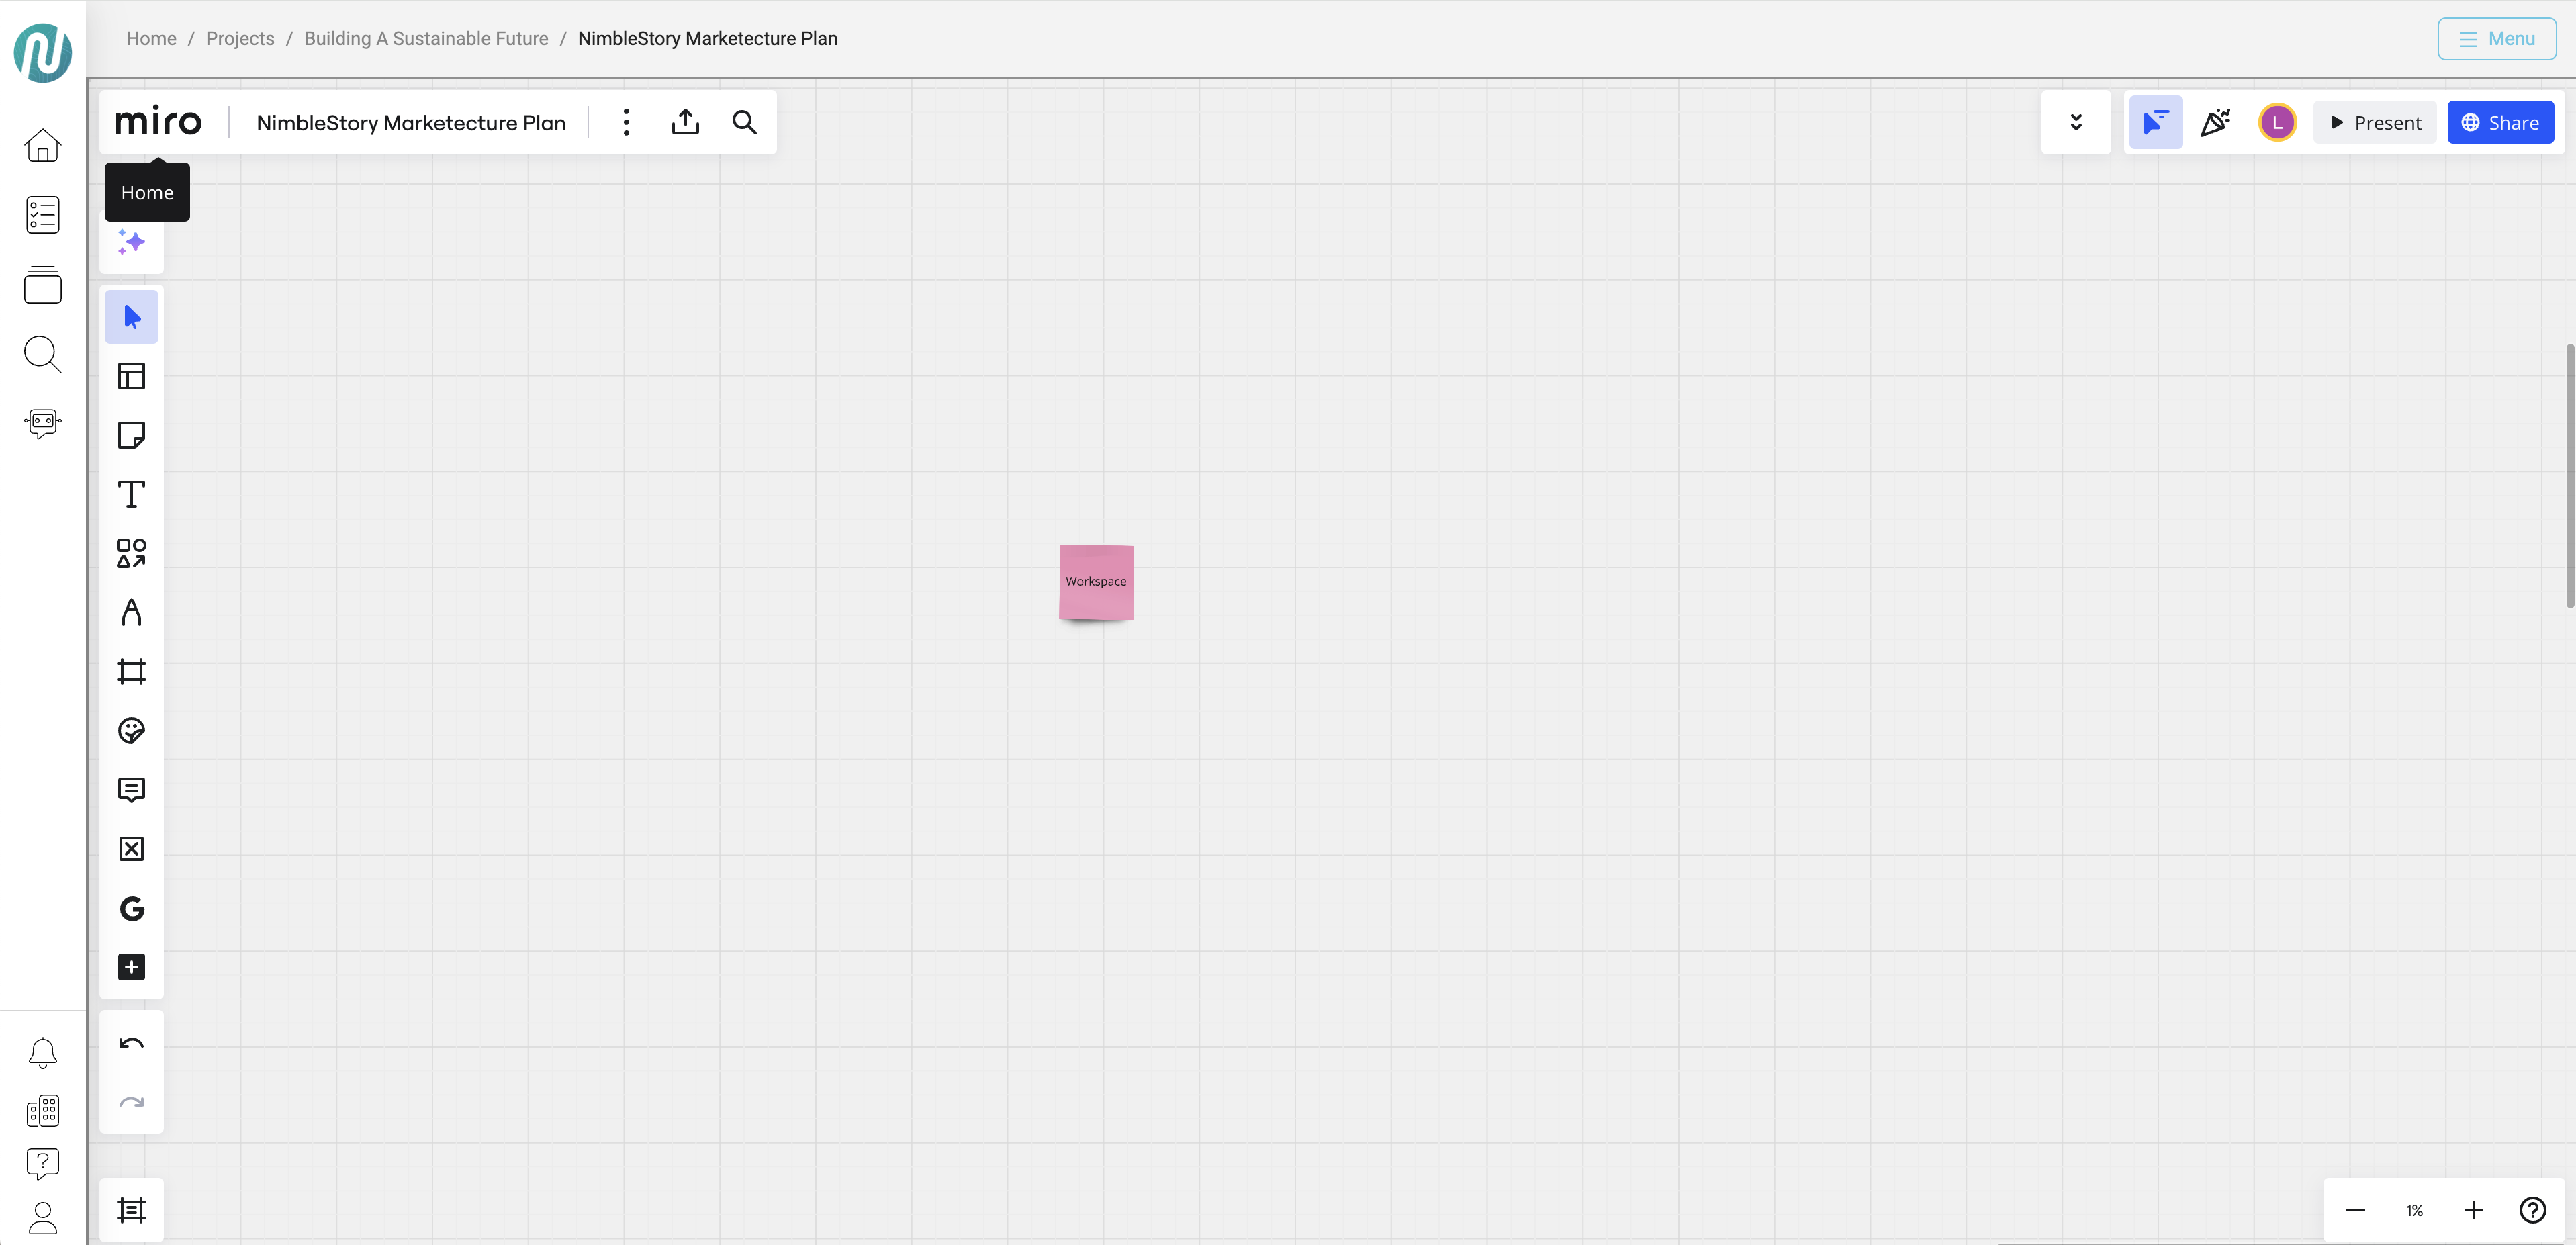
New NimbleSpace Workspace
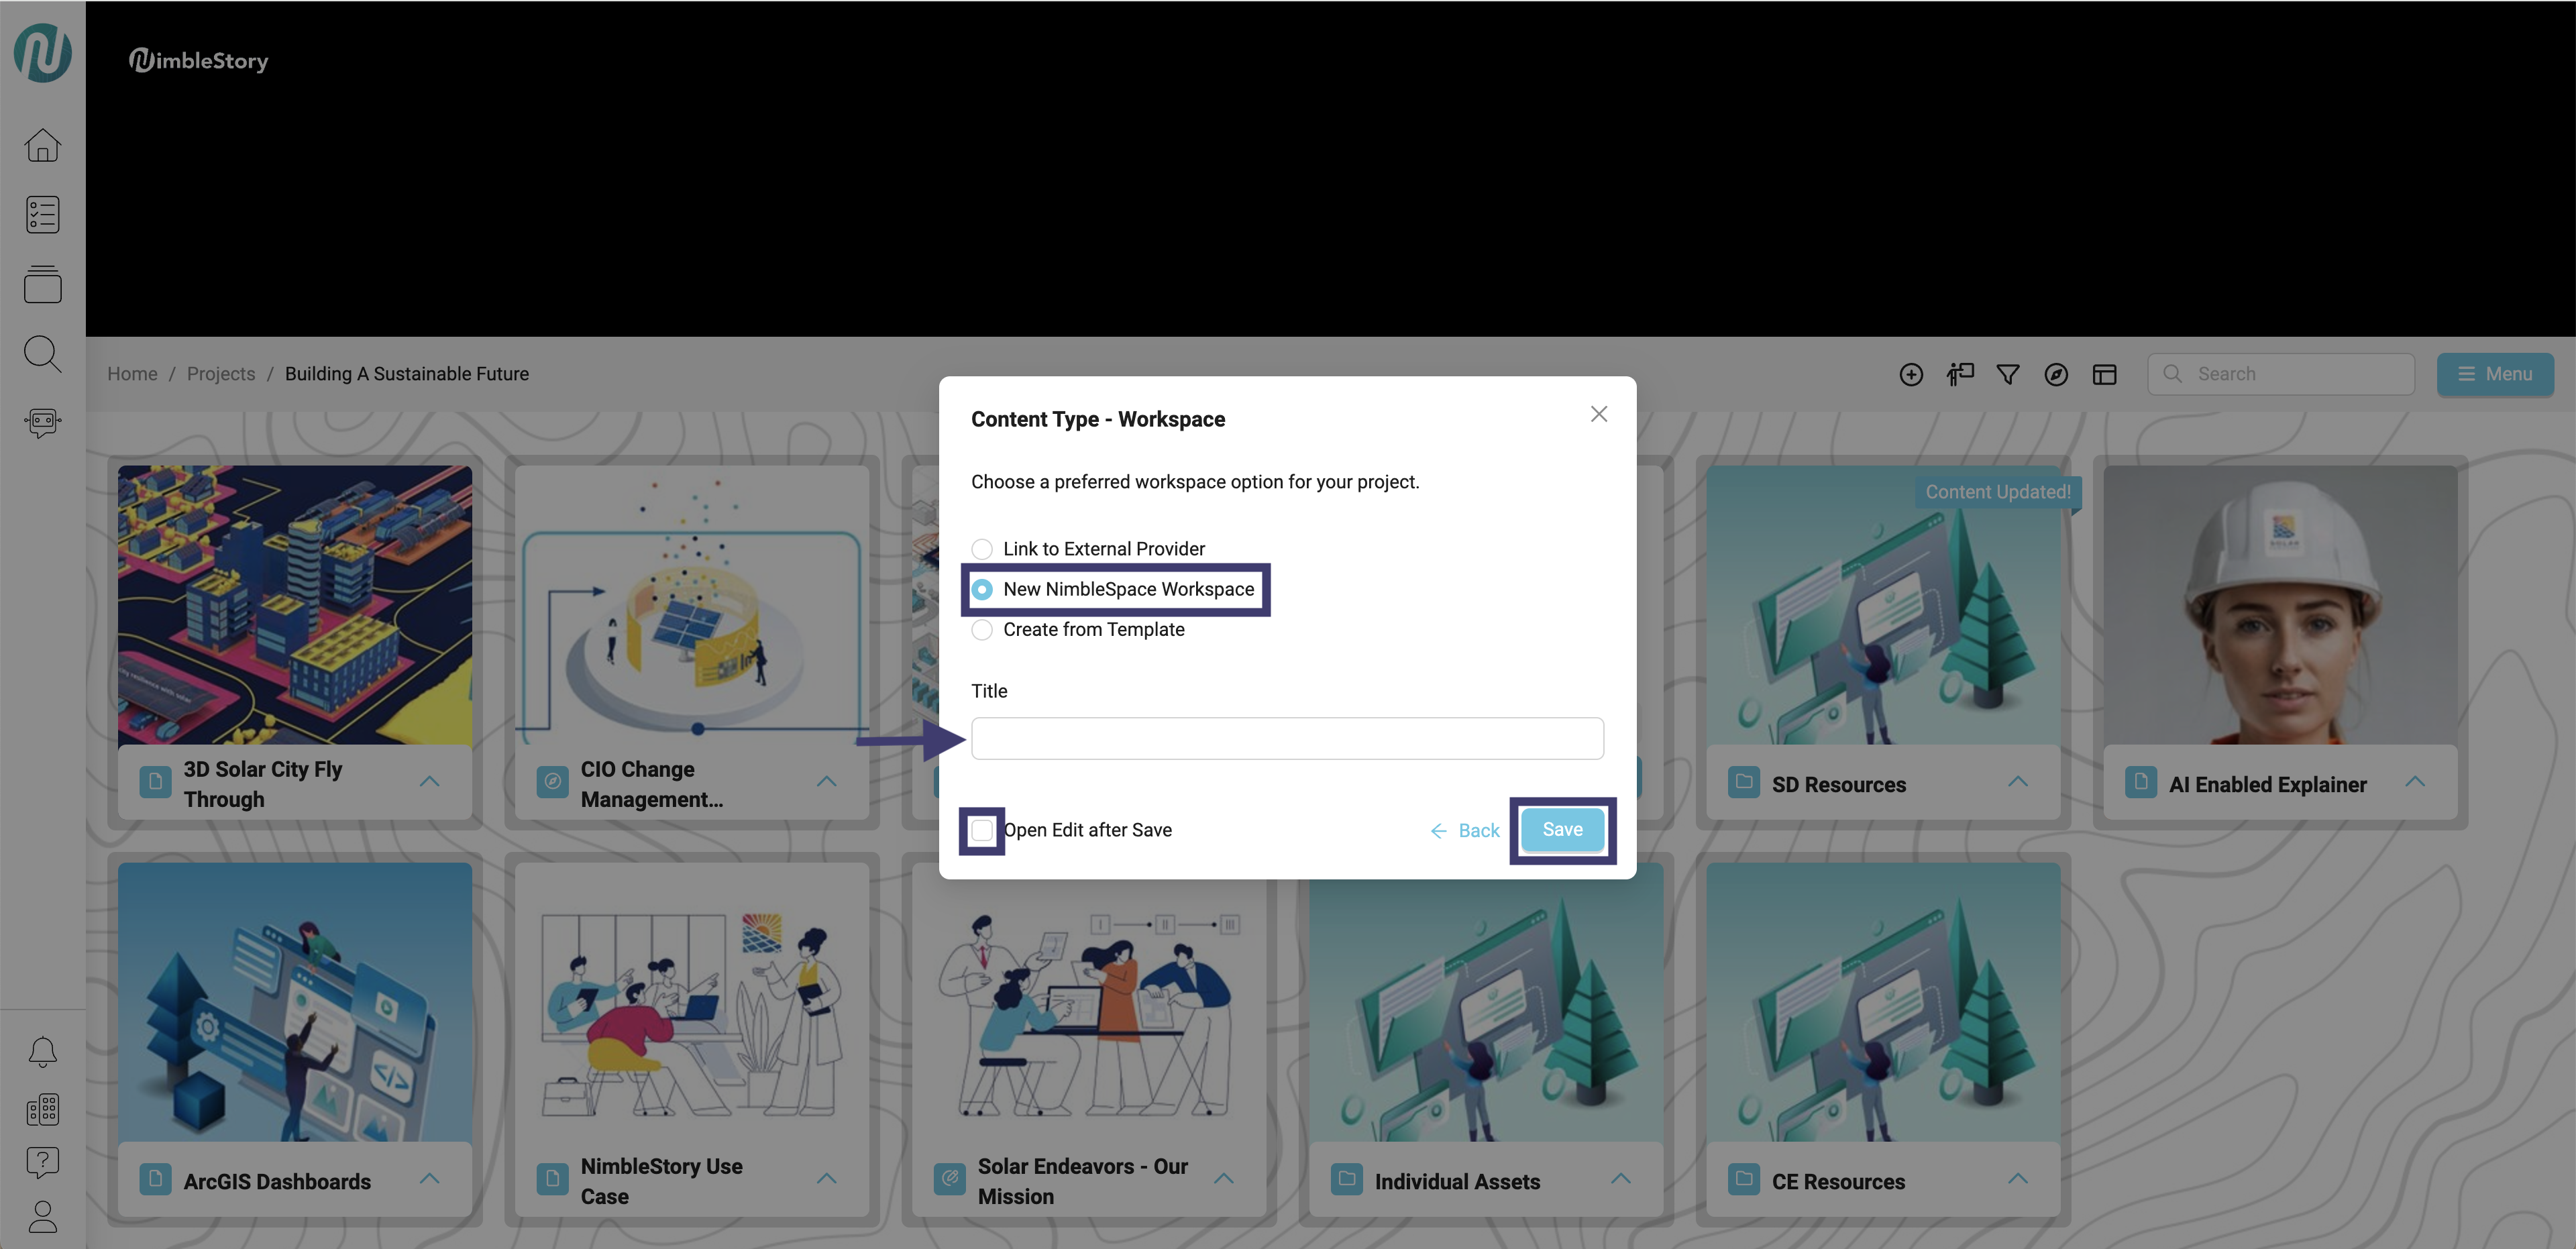
Click the Add Content button.

A Content Type Selection modal will appear.
Select Workspace

A Content Type - Workspace modal will appear.
Select New NimbleStory Workspace
Create a Title for the Workspace
Select Open Edit after Save
Select Save
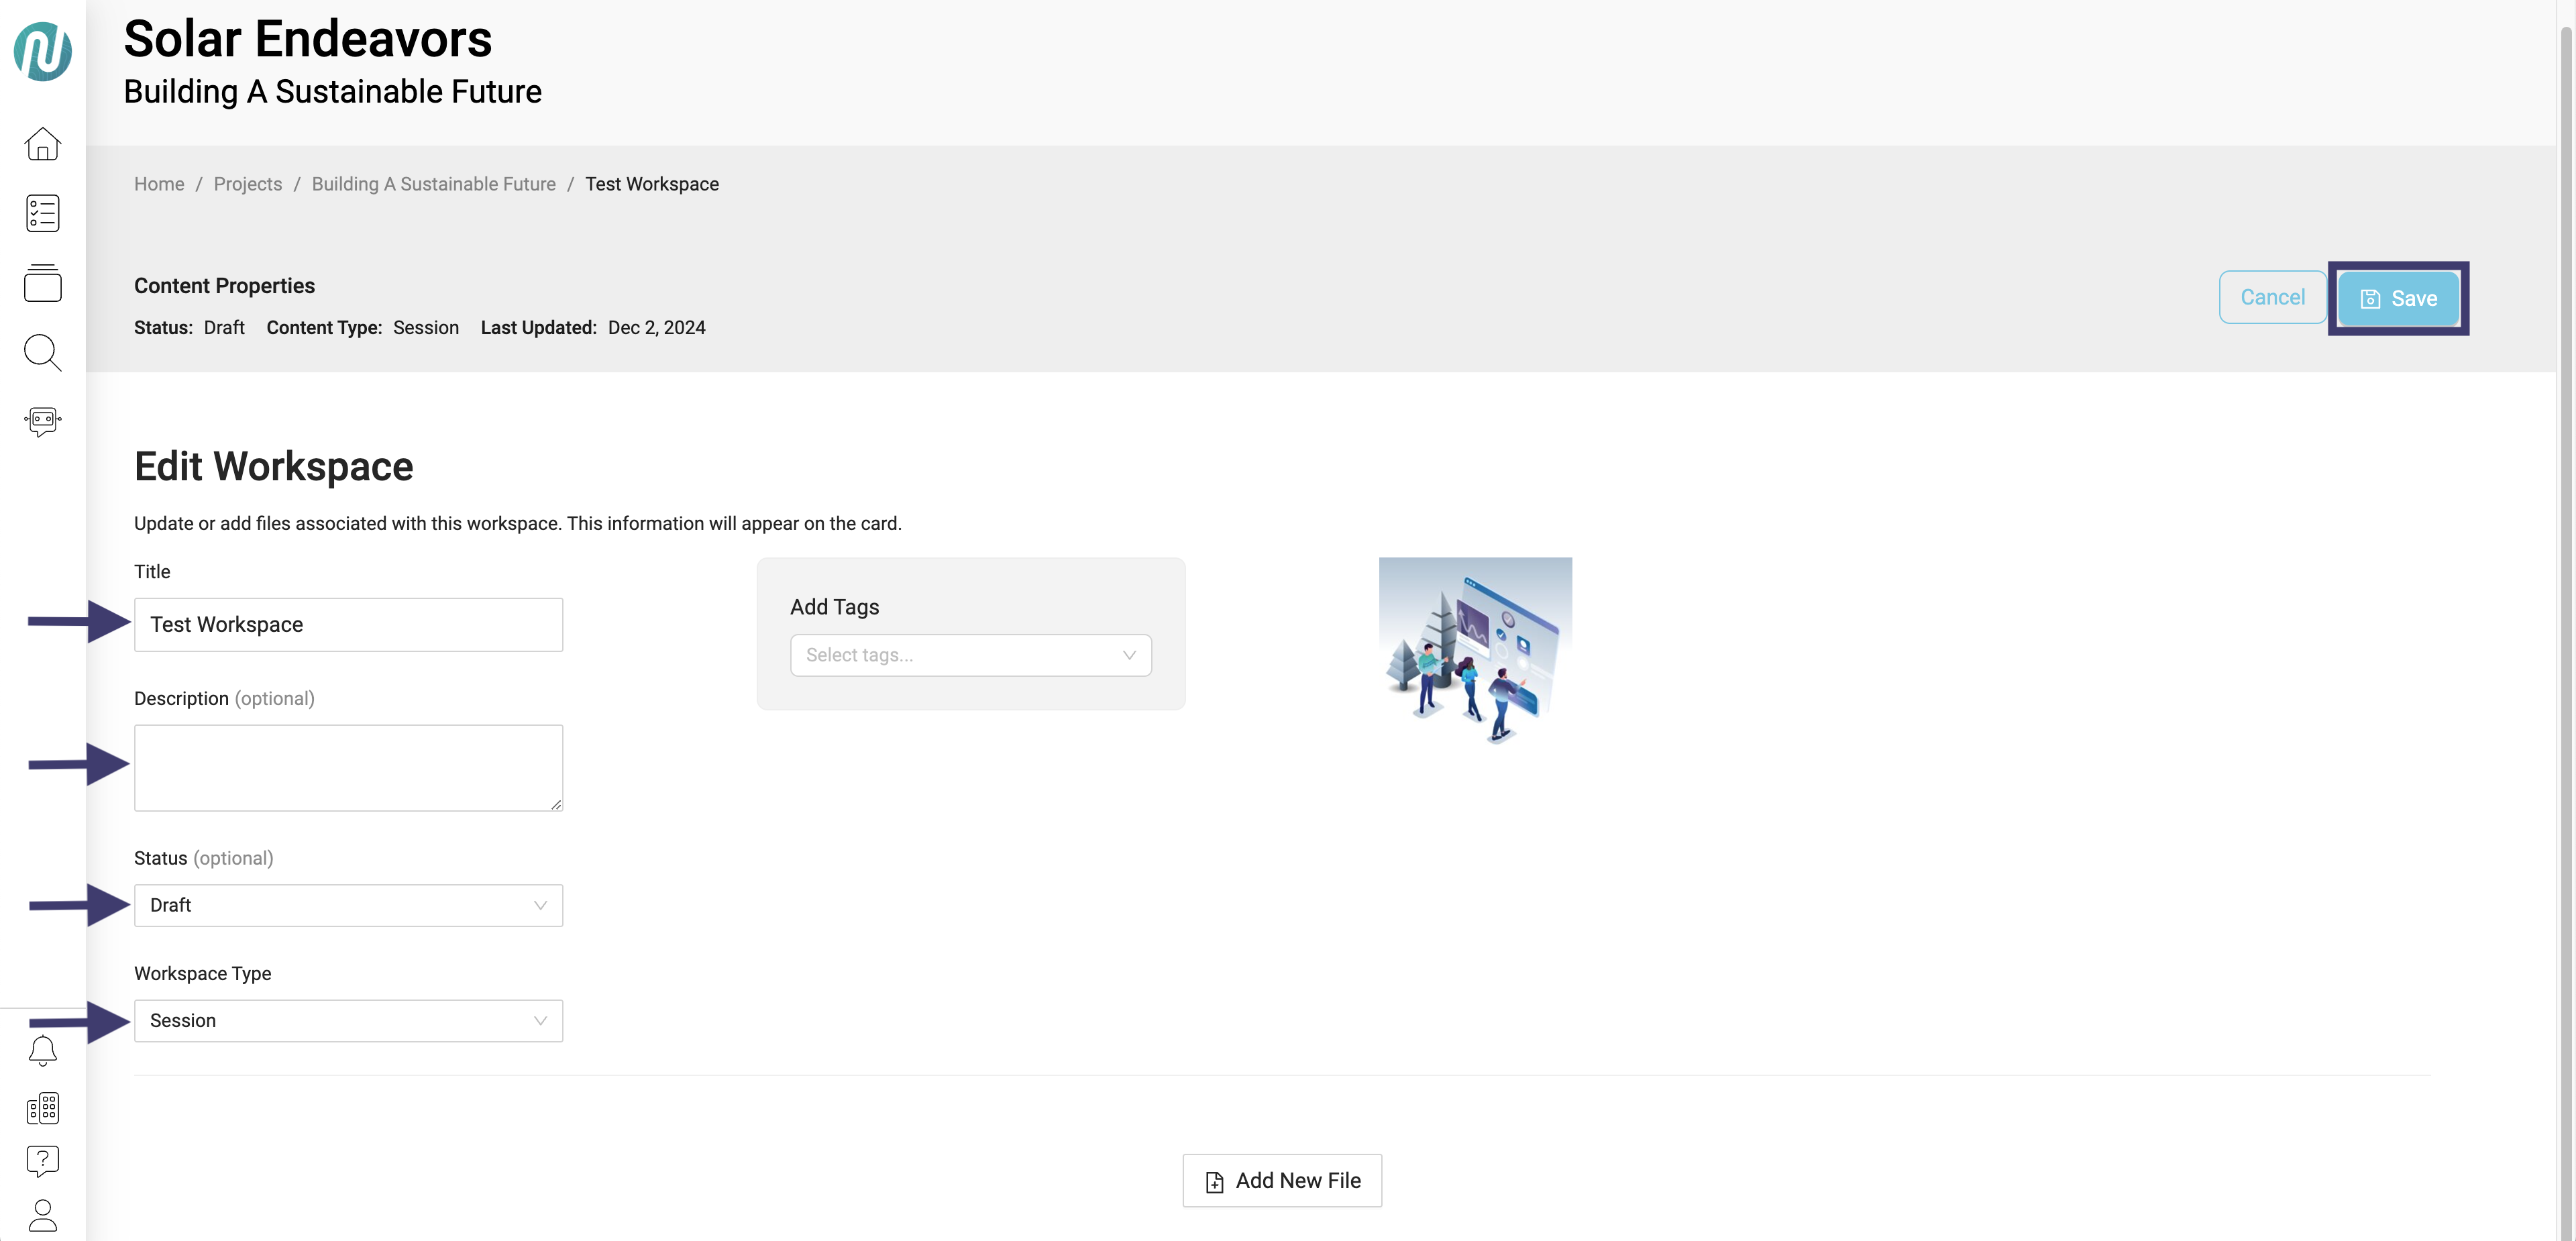
Selecting the Open Edit after Save box will bring you to this screen. Here you can:
Change the title
Add a description
Choose Status of asset
Choose Workspace Type
Once desired edits are made, click Save.
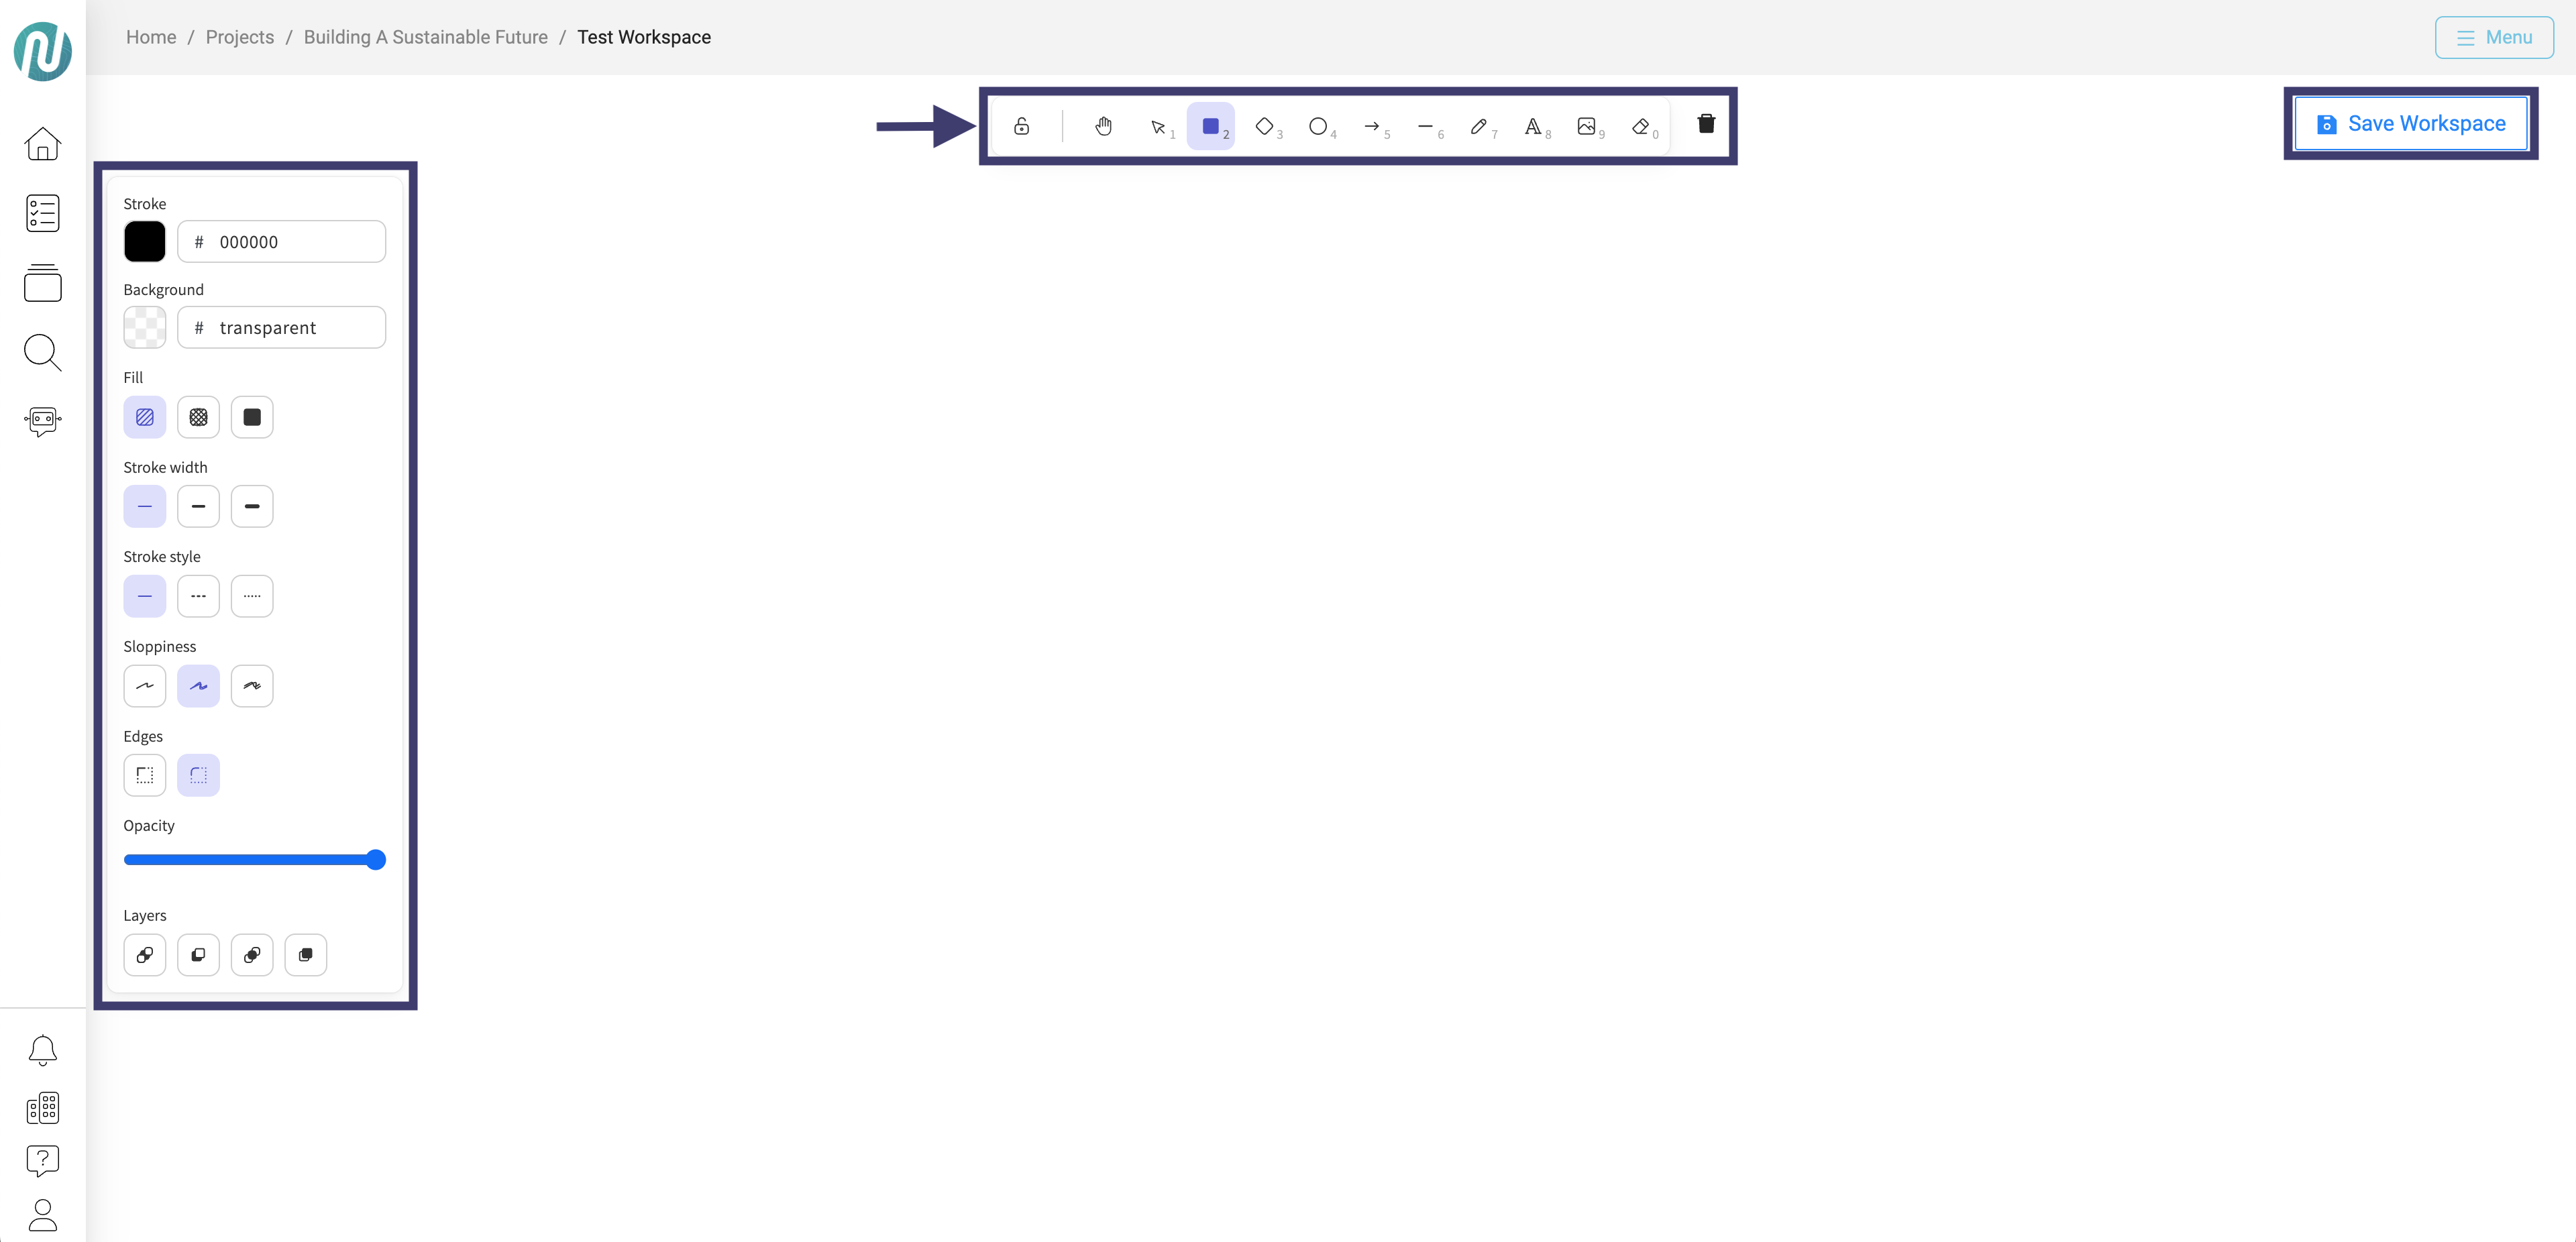
After clicking Save, you will be brought to a blank workspace. Here you can be creative and design your project from scratch. Use the tools and options provided to add elements, organize your content, and customize the workspace to suit your needs. Don't hesitate to explore different features to bring your vision to life
Create from Template
Click the Add Content button.

A Content Type Selection modal will appear.
Select Workspace

A Content Type - Workspace modal will appear.
Select Create from Template
Create a Title
Choose a Template (currently not available)
Select Open Edit after Save
Select Save
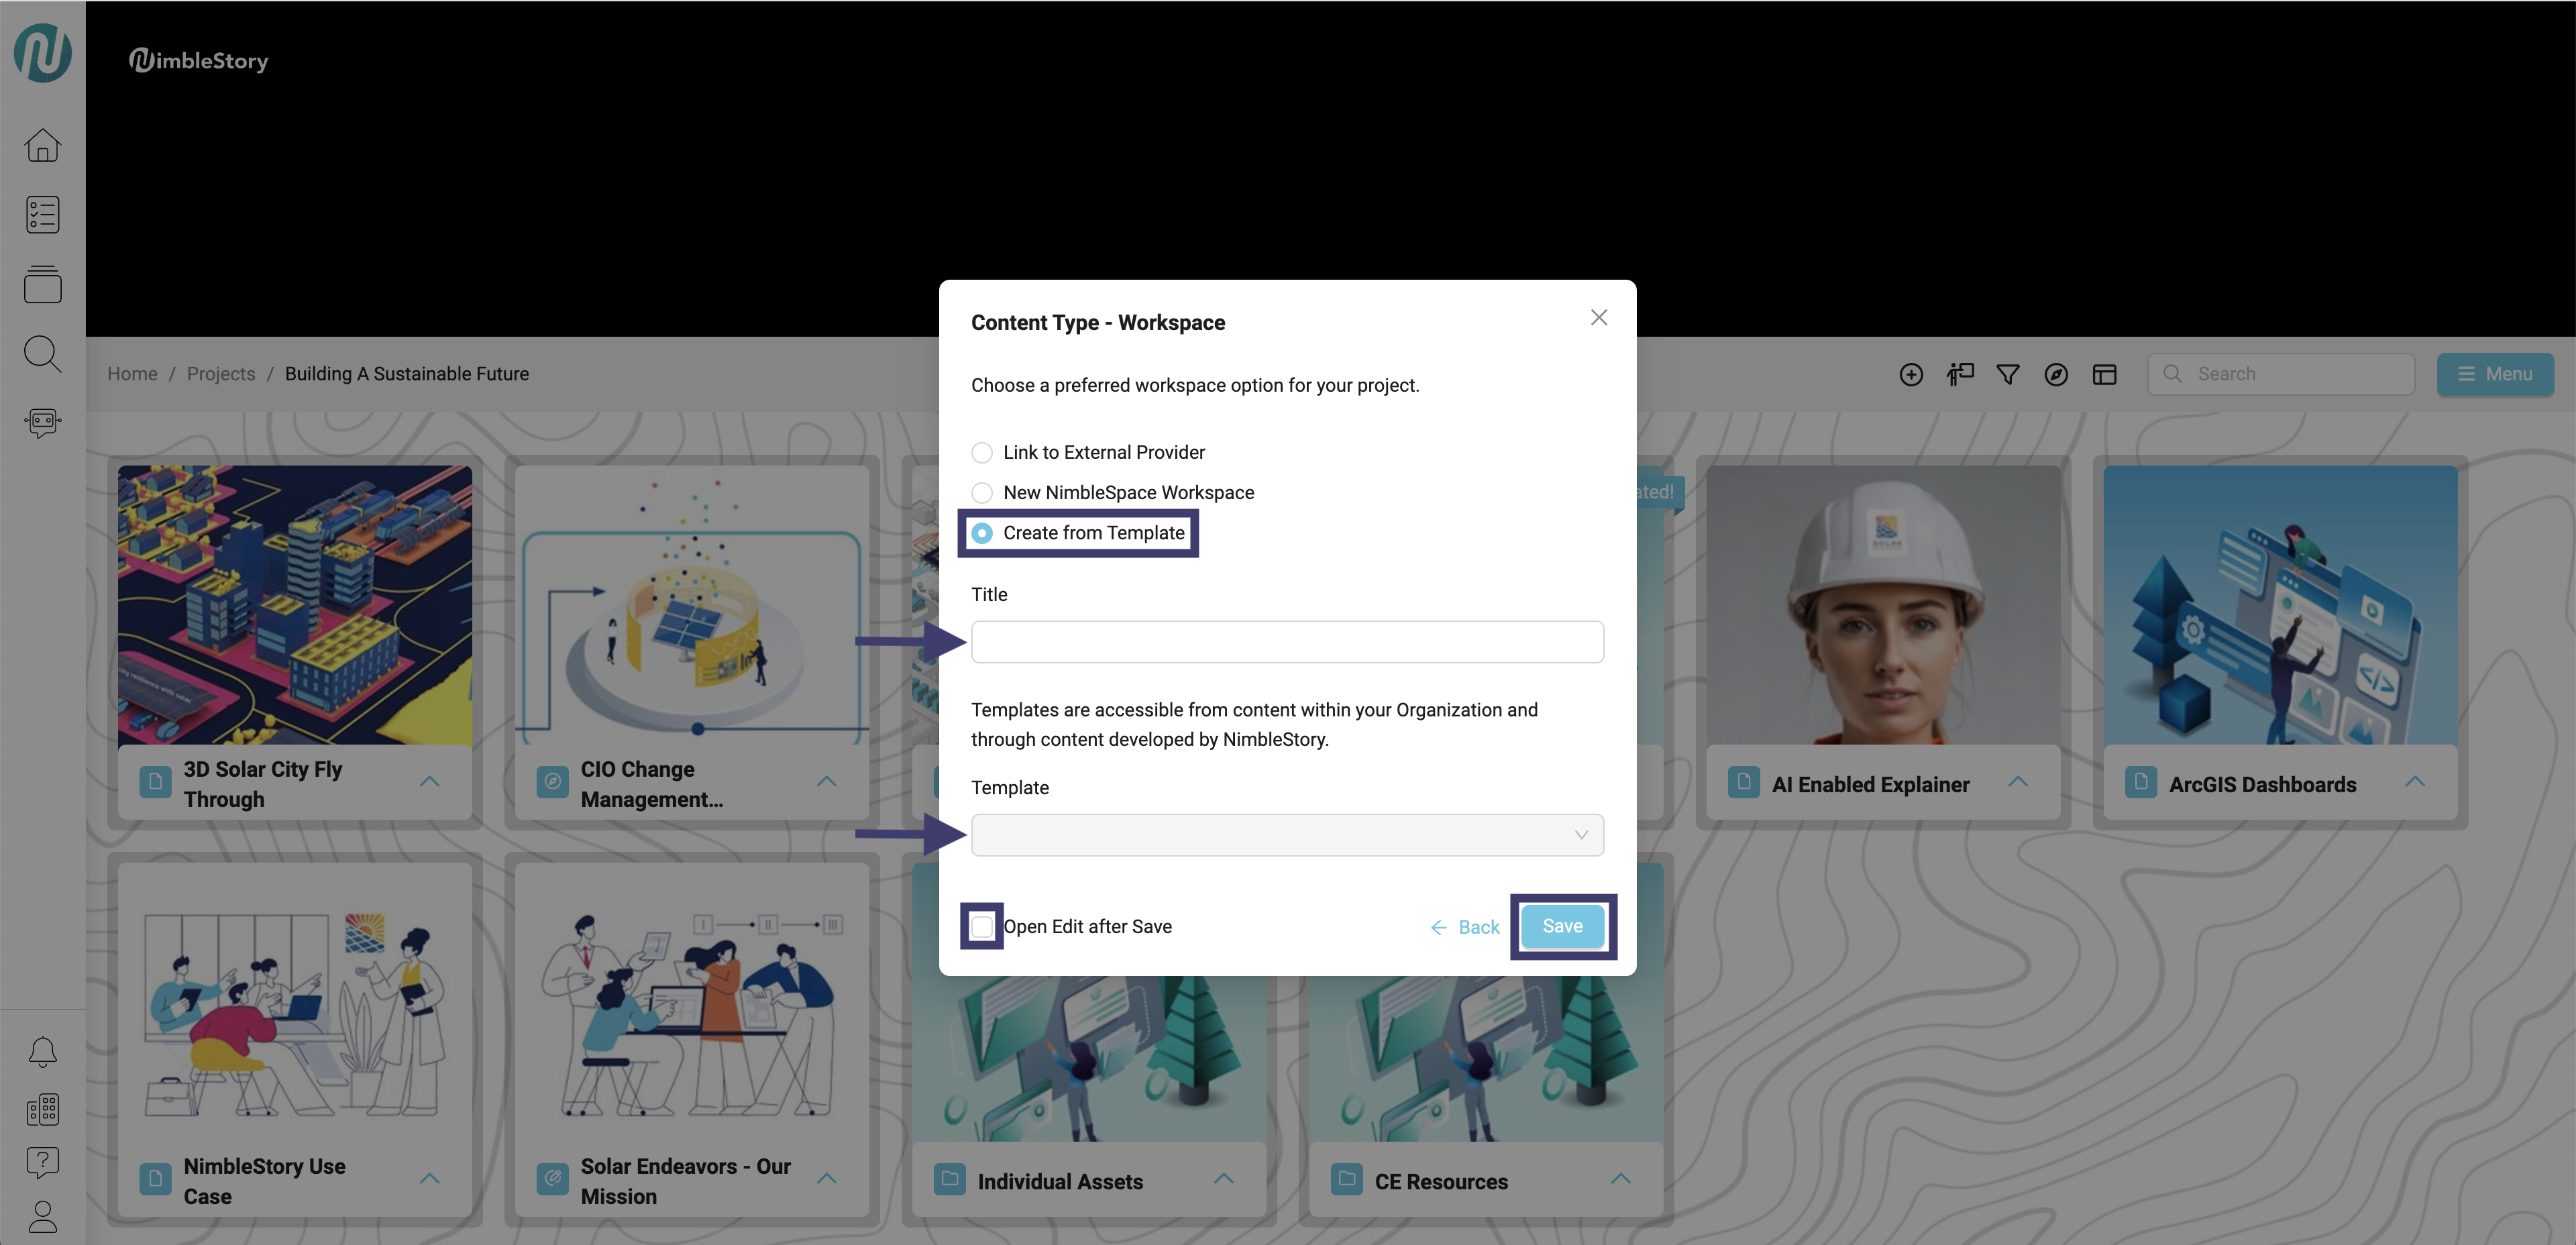
There are currently no templates implemented within the system. This feature is in the works!
Audience | Public |
Section | NimbleStory Basic |
Status | Rough Draft |
Applies to | NimbleStory 3.0 and higher |
Next Review Date | Nov 2022 |
| Version | Date | Comment |
|---|---|---|
| Current Version (v. 2) | Dec 02, 2024 21:03 | @a user |
| v. 1 | Dec 02, 2024 21:02 | @a user |
