NS FAQ Materials
Basic Use of NimbleStory
Forgot Password
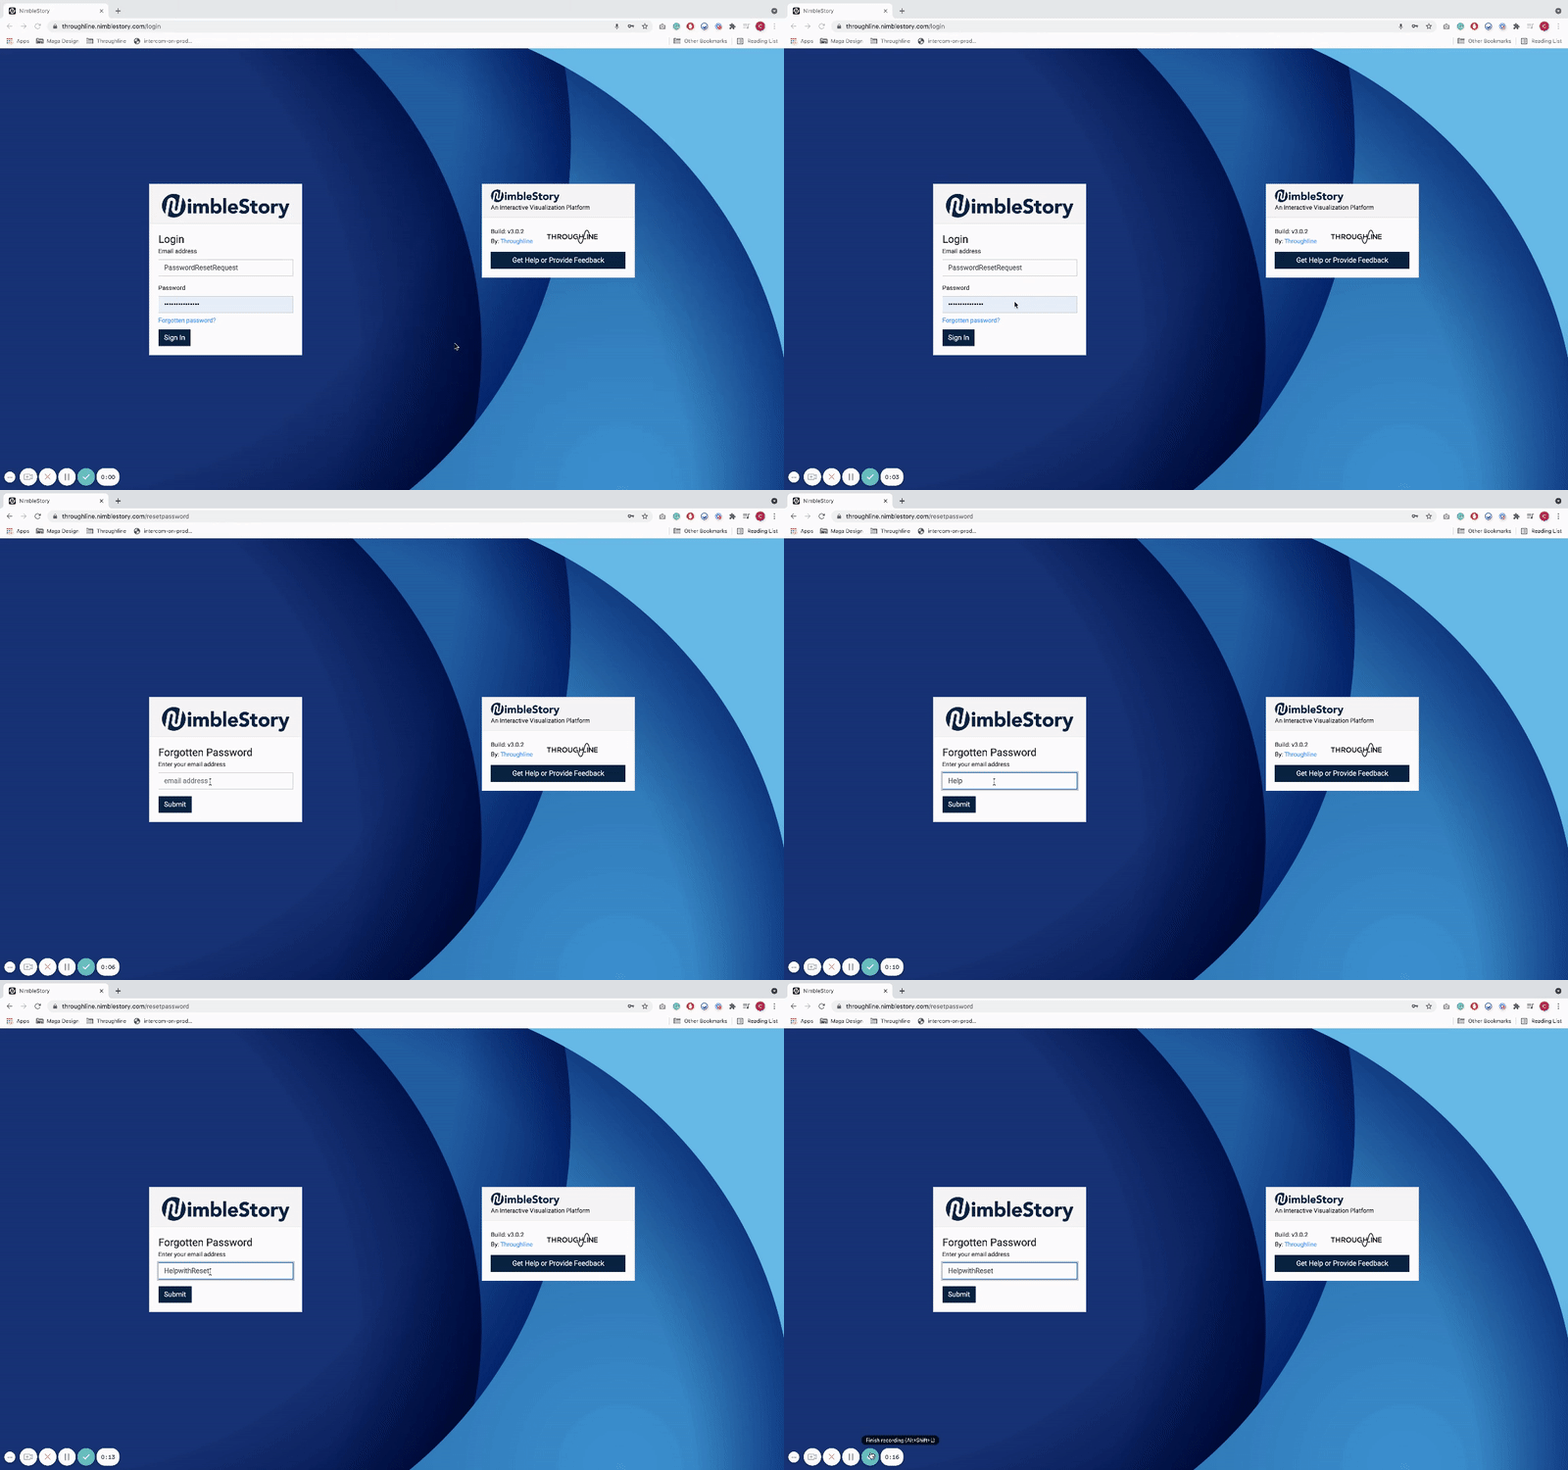
If you have forgotten your password and need to reset it you can do so from the NimbleStory login page. Select “Forgot Password” from this screen and navigate to the password reset form. Enter your email and submit a request.
Resetting Password
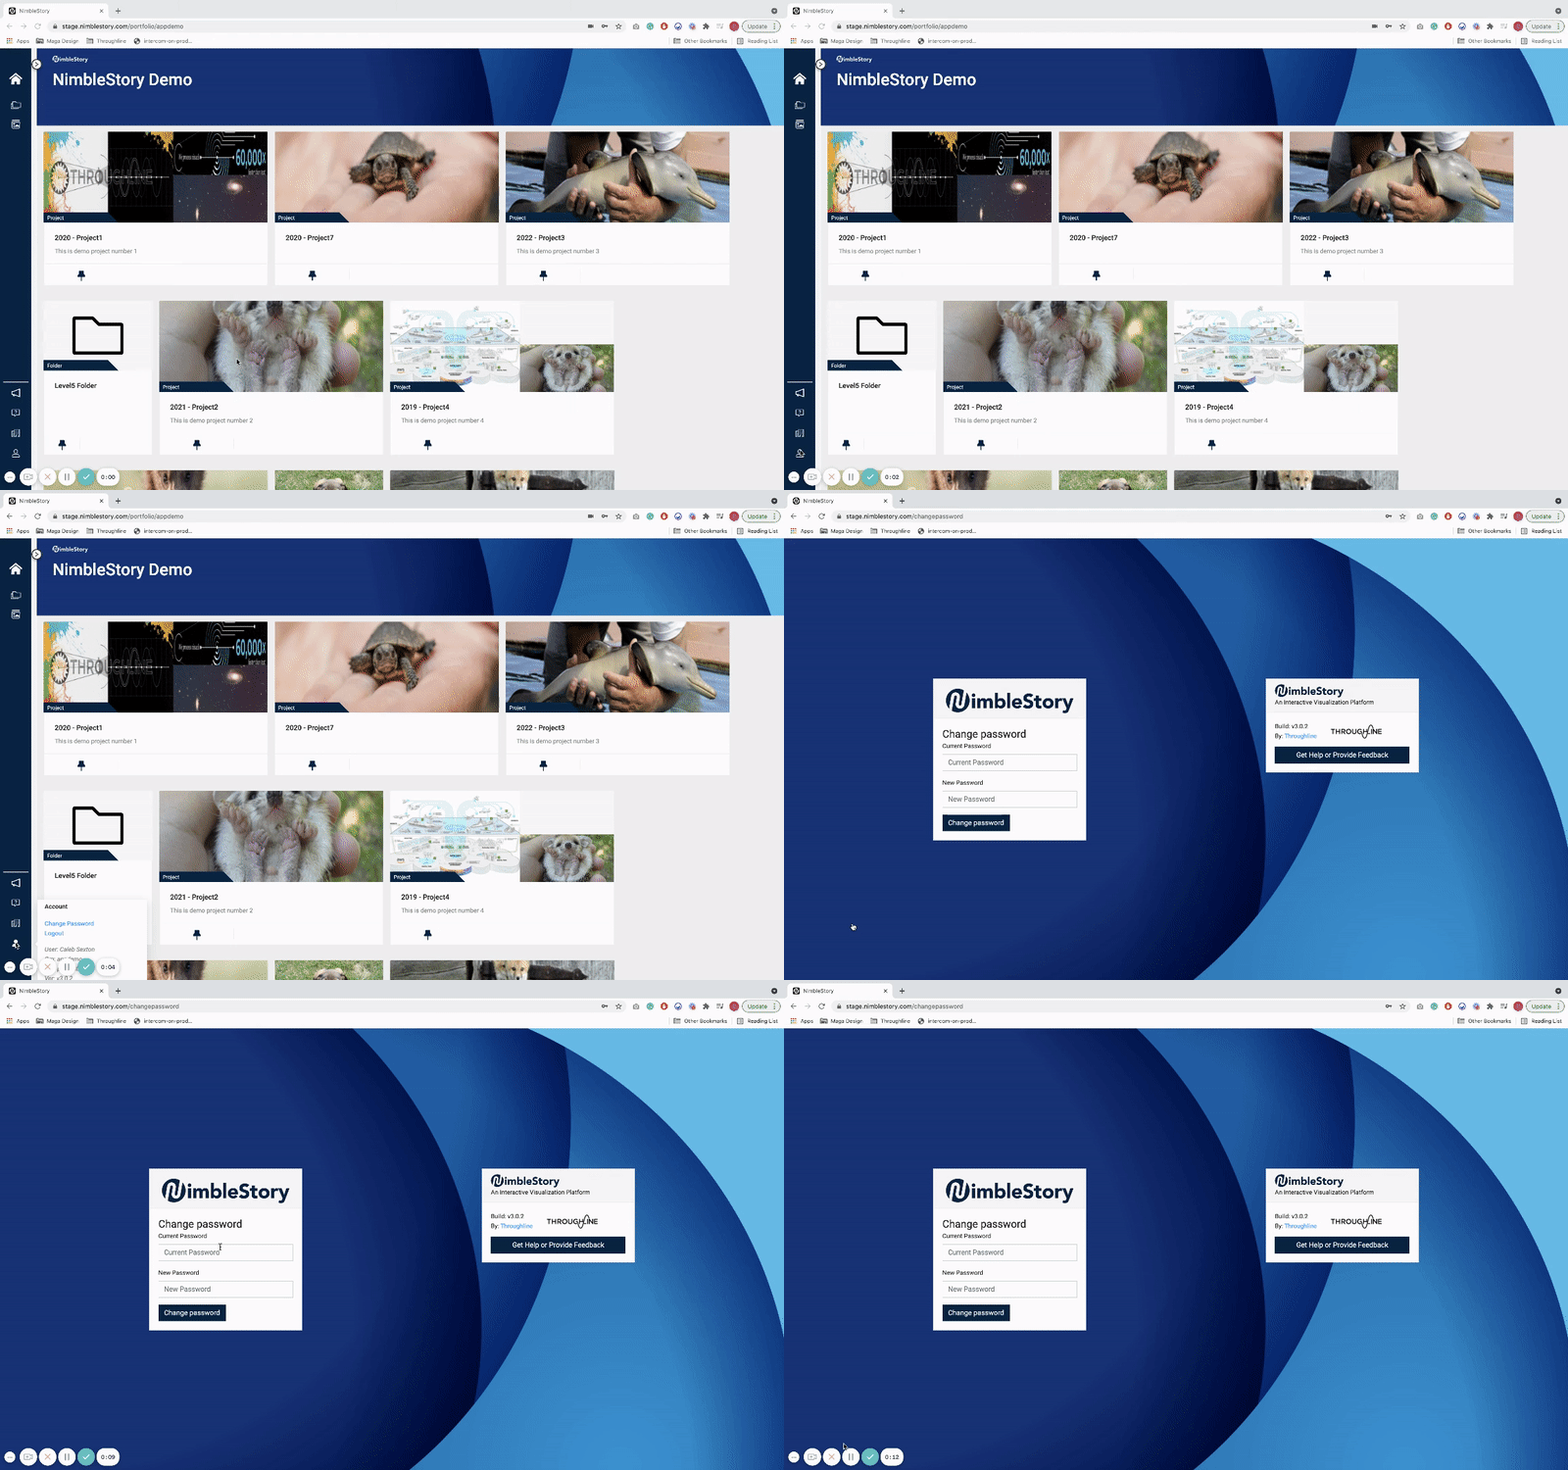
To reset your NimbleStory account password, navigate to the action panel at the bottom of the primary navigation rail. Then, hover over the Account Management icon near the bottom of the screen. Your account information will appear. Select the “Change Password” option at the top of the Account Management space, and complete the password reset form by entering your existing password and your new password. Confirm and finalize your new password by pressing the “Change Password” button. If you have forgotten your password entirely, email support@nimblestory.com for a new one.
Filing a Bug
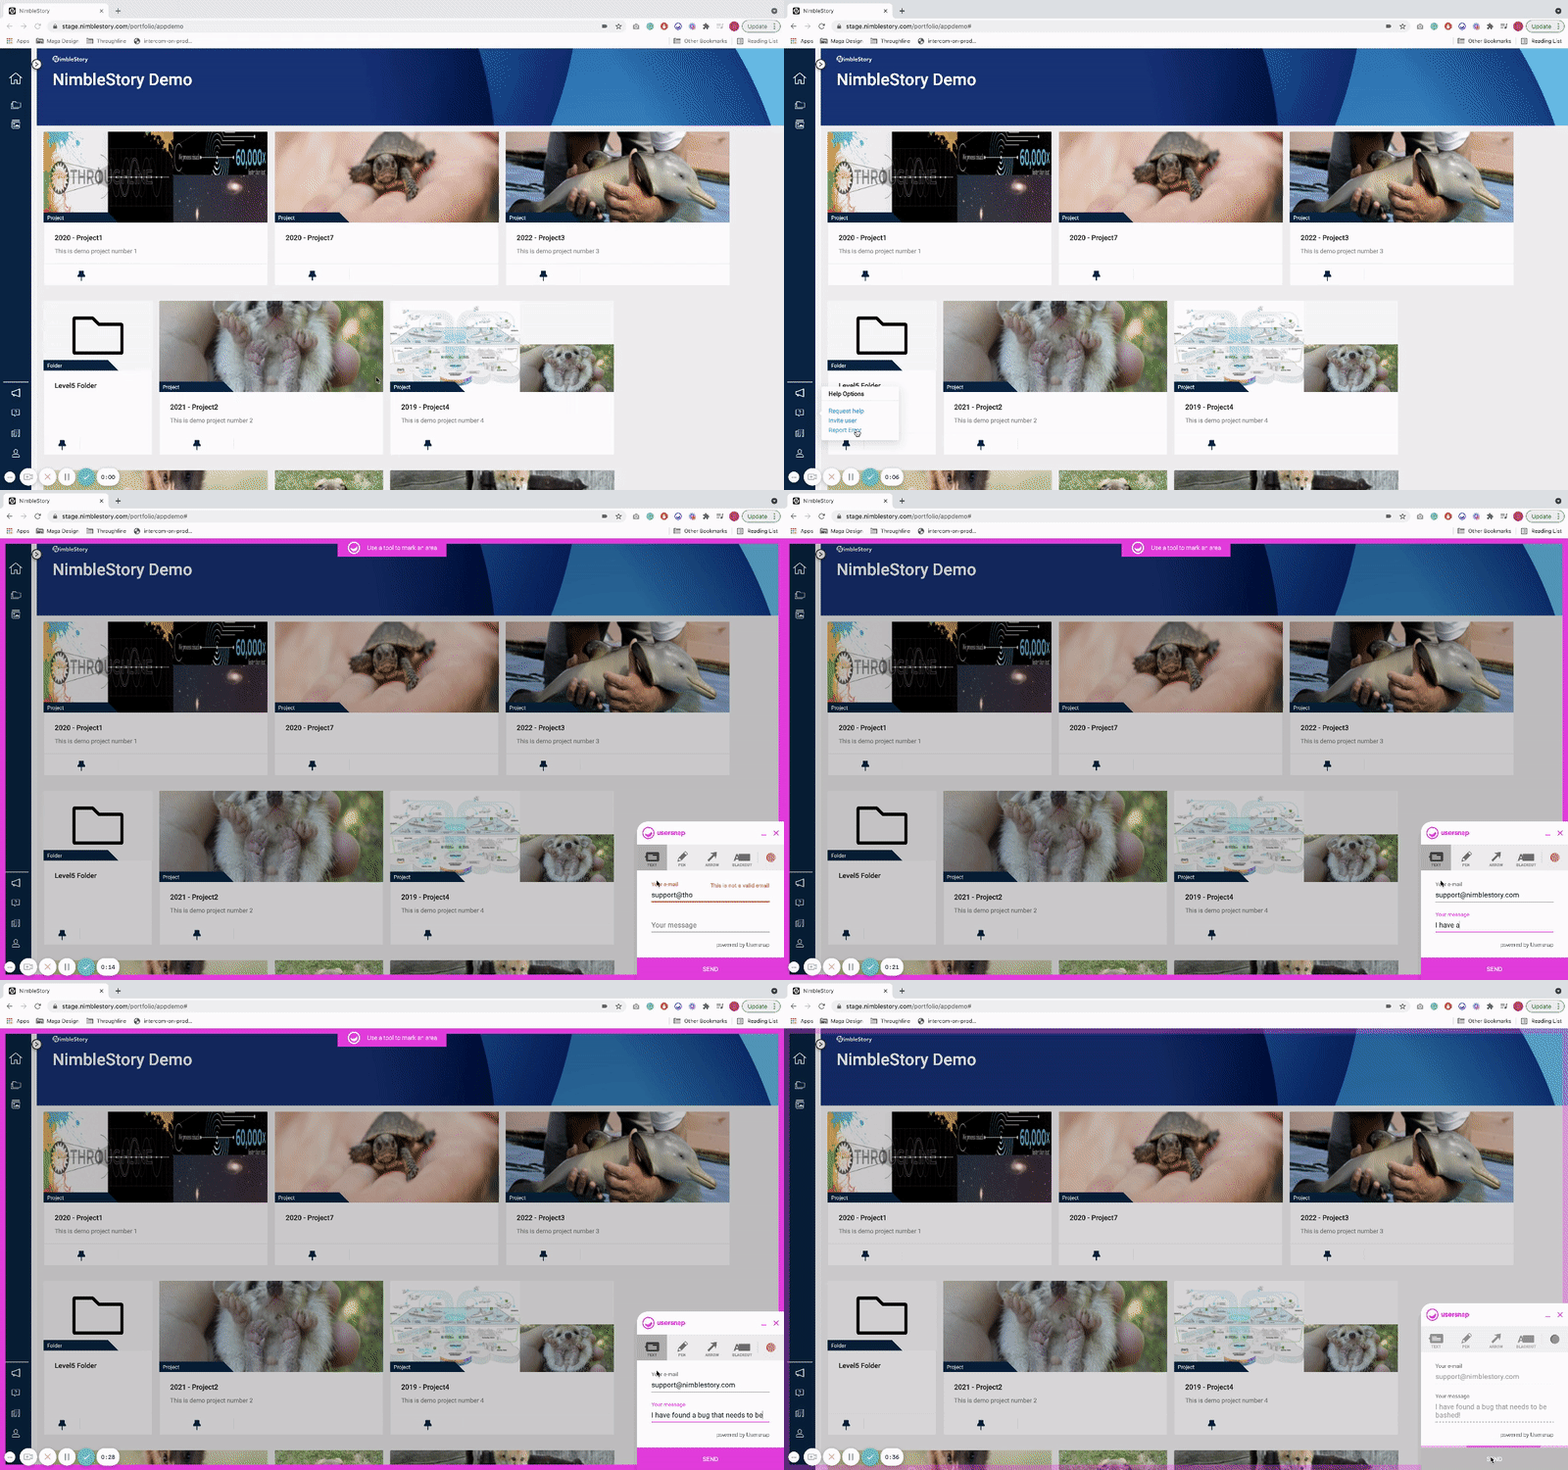
If you encounter a bug, you can report the error by filing a report. To do so, first hover over the “Help Options” icon in the bottom of the left-side navigation rail. Next, select “Report Error”. This will activate our error capture tool which you can use to capture a screenshot to send to the team. Input your email address and a brief message describing the error. You can also use the pen, arrow, and blackout features to draw directly on the page, further indicating the location or nature of the bug. Once you have completed the report, push “Send” to send your message to the Throughline Team. You can cancel at any time by pushing the “Close” button in the upper right corner of the modal and confirming that you wish to leave the reporting system.
Adding New Users
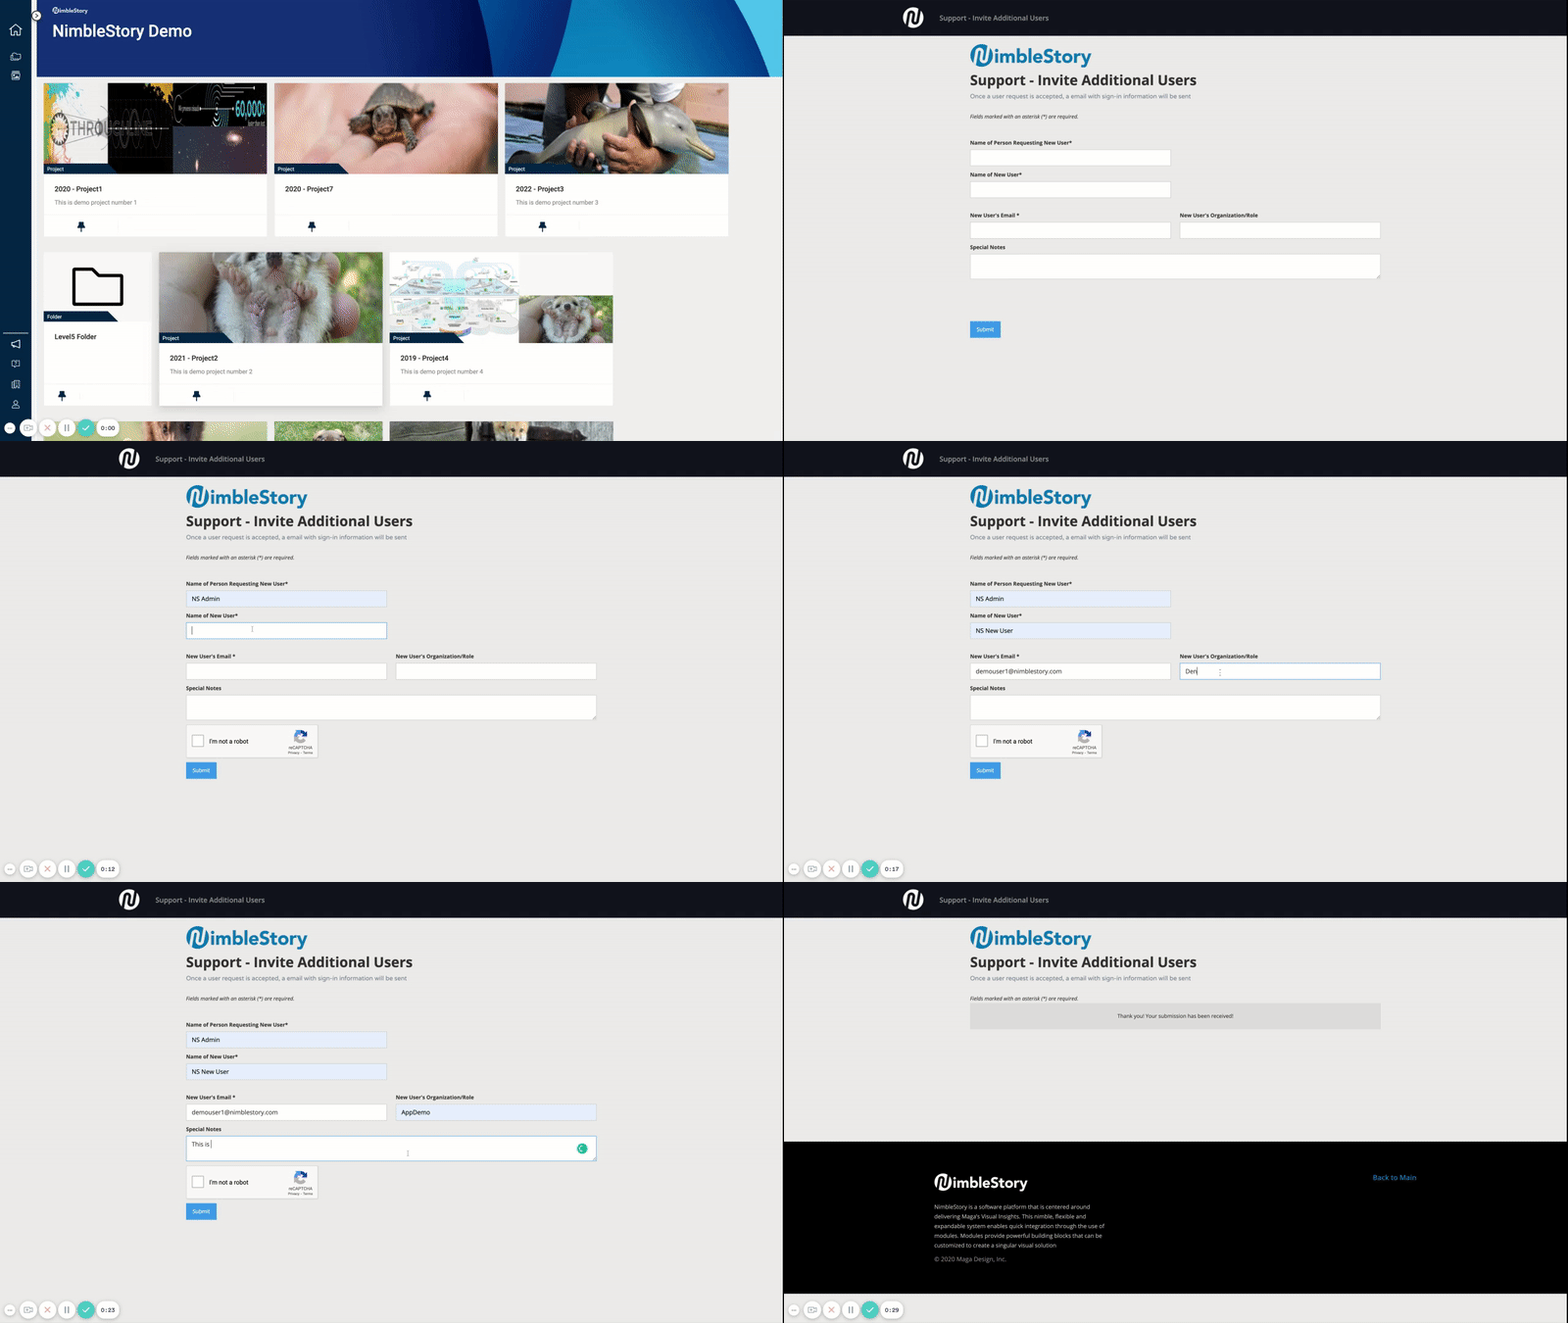
To add a new user to an existing project, hover over the “Help Options” icon in the lower section of the left-side navigation rail. Then, select “Invite User” from the menu. Next, complete the new user request form and submit. Once the request has been processed, sign-in information for the new user will be sent through email.
Org > Project > Content Structure
NimbleStory’s structure is comprised of three main components: Organizations, Projects, and Content. Organizations are the largest group that contain one or more projects and represent your organization’s core account space. Depending upon the defined set of permissions a single user may be associated with multiple organizations from which they can access via the “Change Organization” icon from the primary navigation rail. Within Organizations are Projects, which are more specialized collections of materials that make up one individual working space within the Organization. Assets, known as Content, are the various components within a given Project space. Content can consist of documents, web bundles, embedded links, and other files that connect to the given project.
Content Management in NimbleStory
Adding assets (various types)
Assets can be added to a Project by first selecting the Add Content card which will appear as the last card in the set of existing content cards. If the Add Content card does not appear within your project contact your admin to have it enabled. Next, select the type of asset you wish to upload.
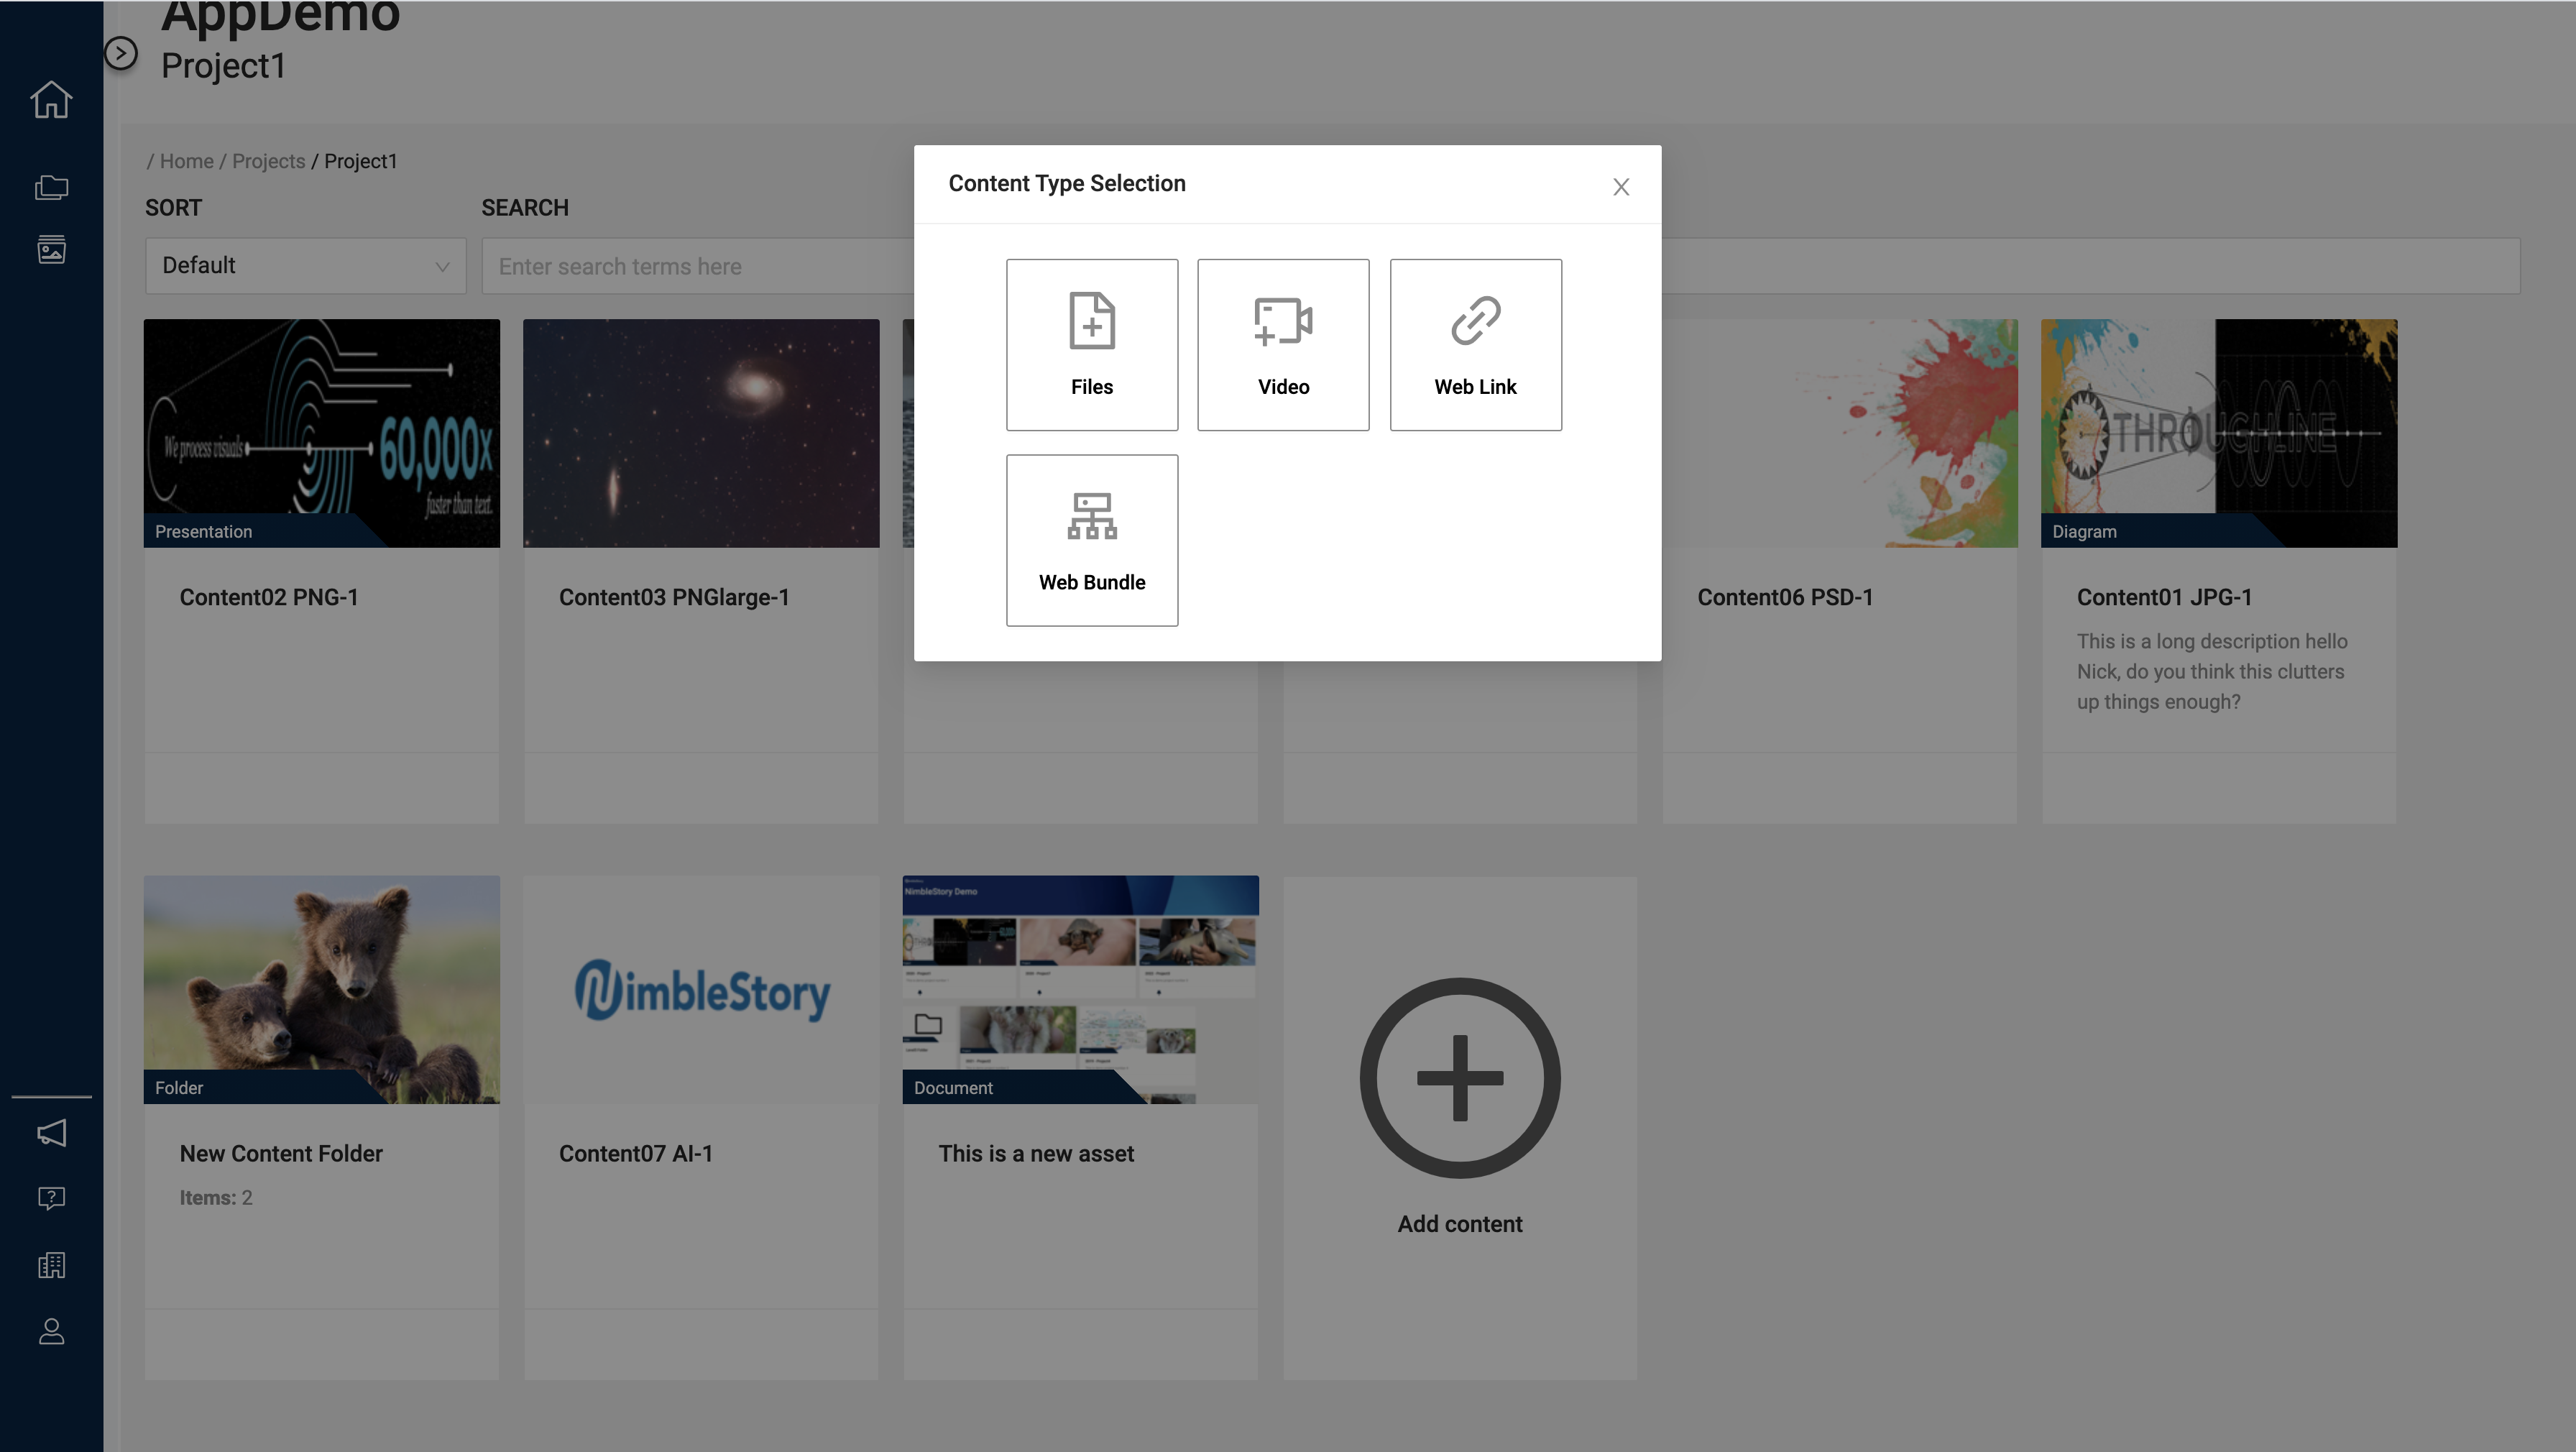
File
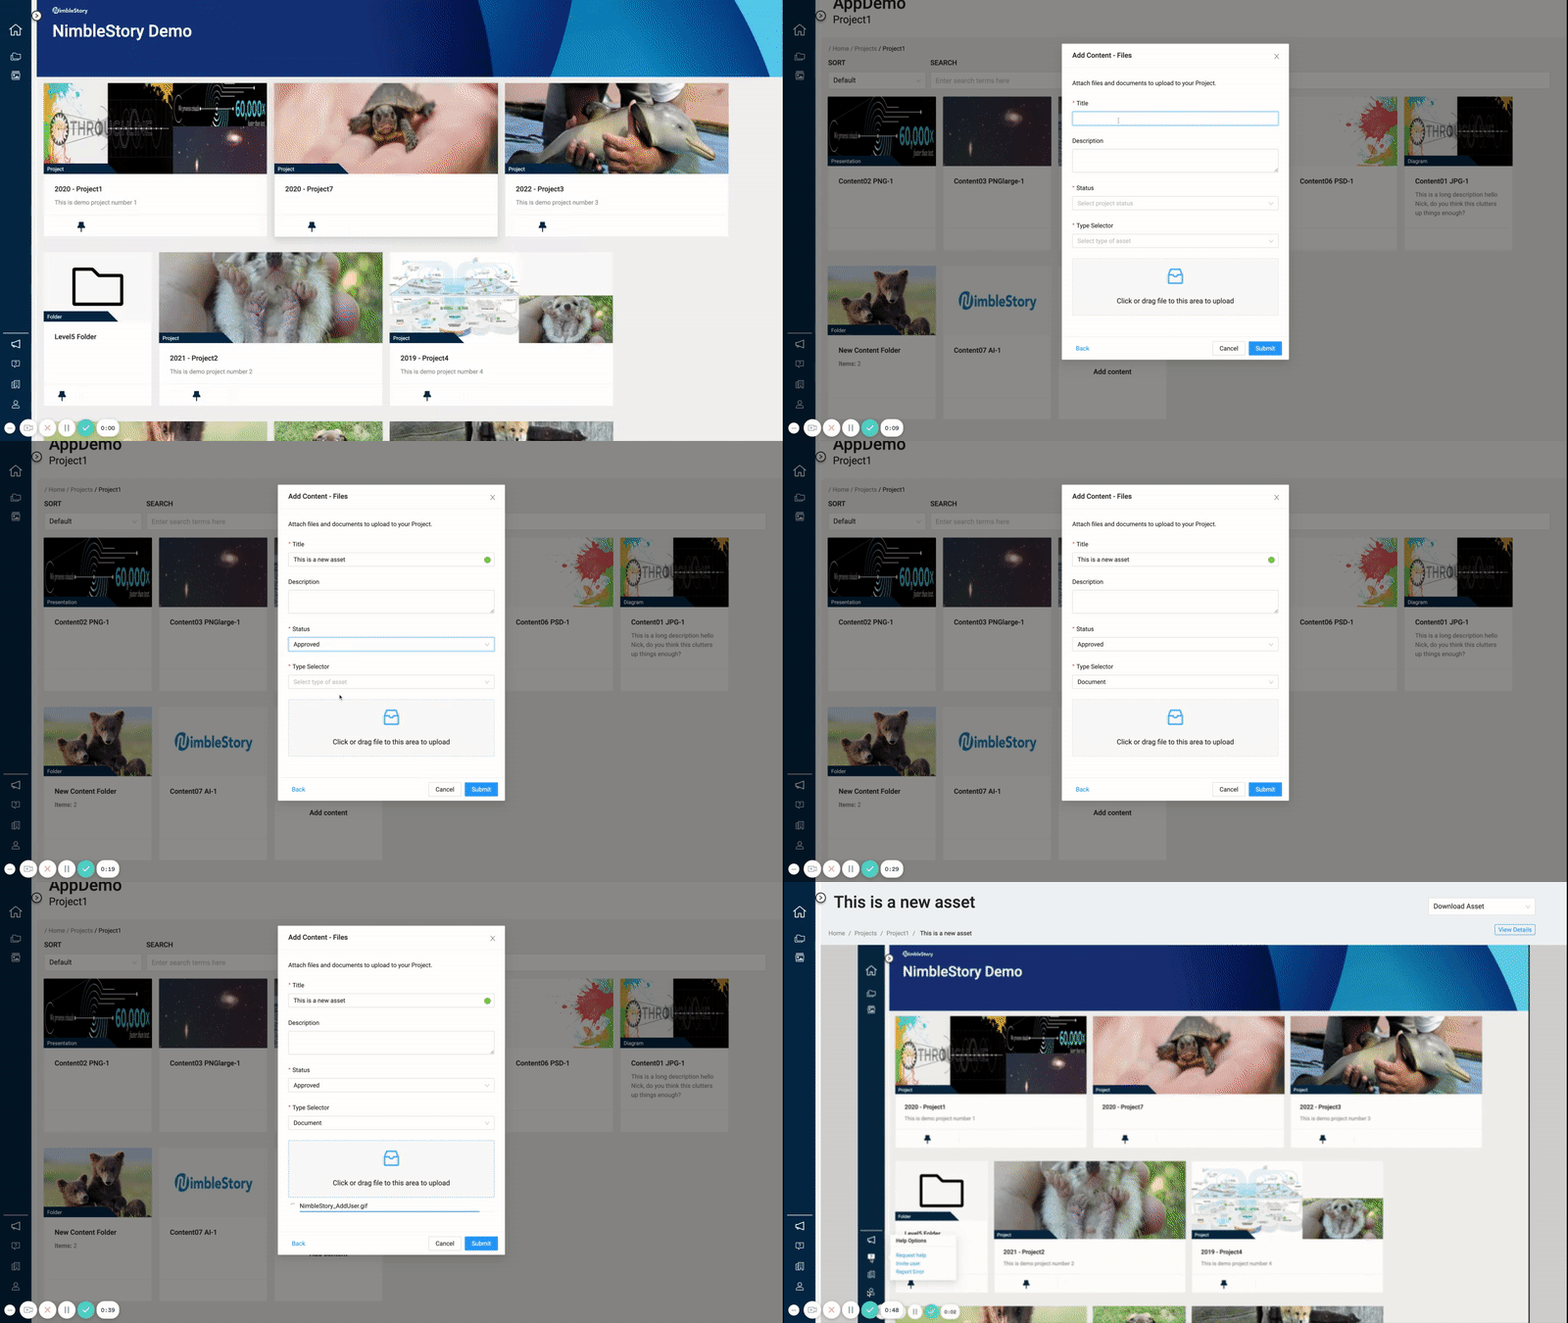
To upload a file, first select the “File” icon from the asset types. Next, provide a Title for the piece of content and select a Status and Type Selector to be associated it. You can add an optional description for the file detailing other important information on the asset. Then, click or drag the file into the upload area and submit the asset. The file will now appear as its own content card within your Project space and made accessible to users.
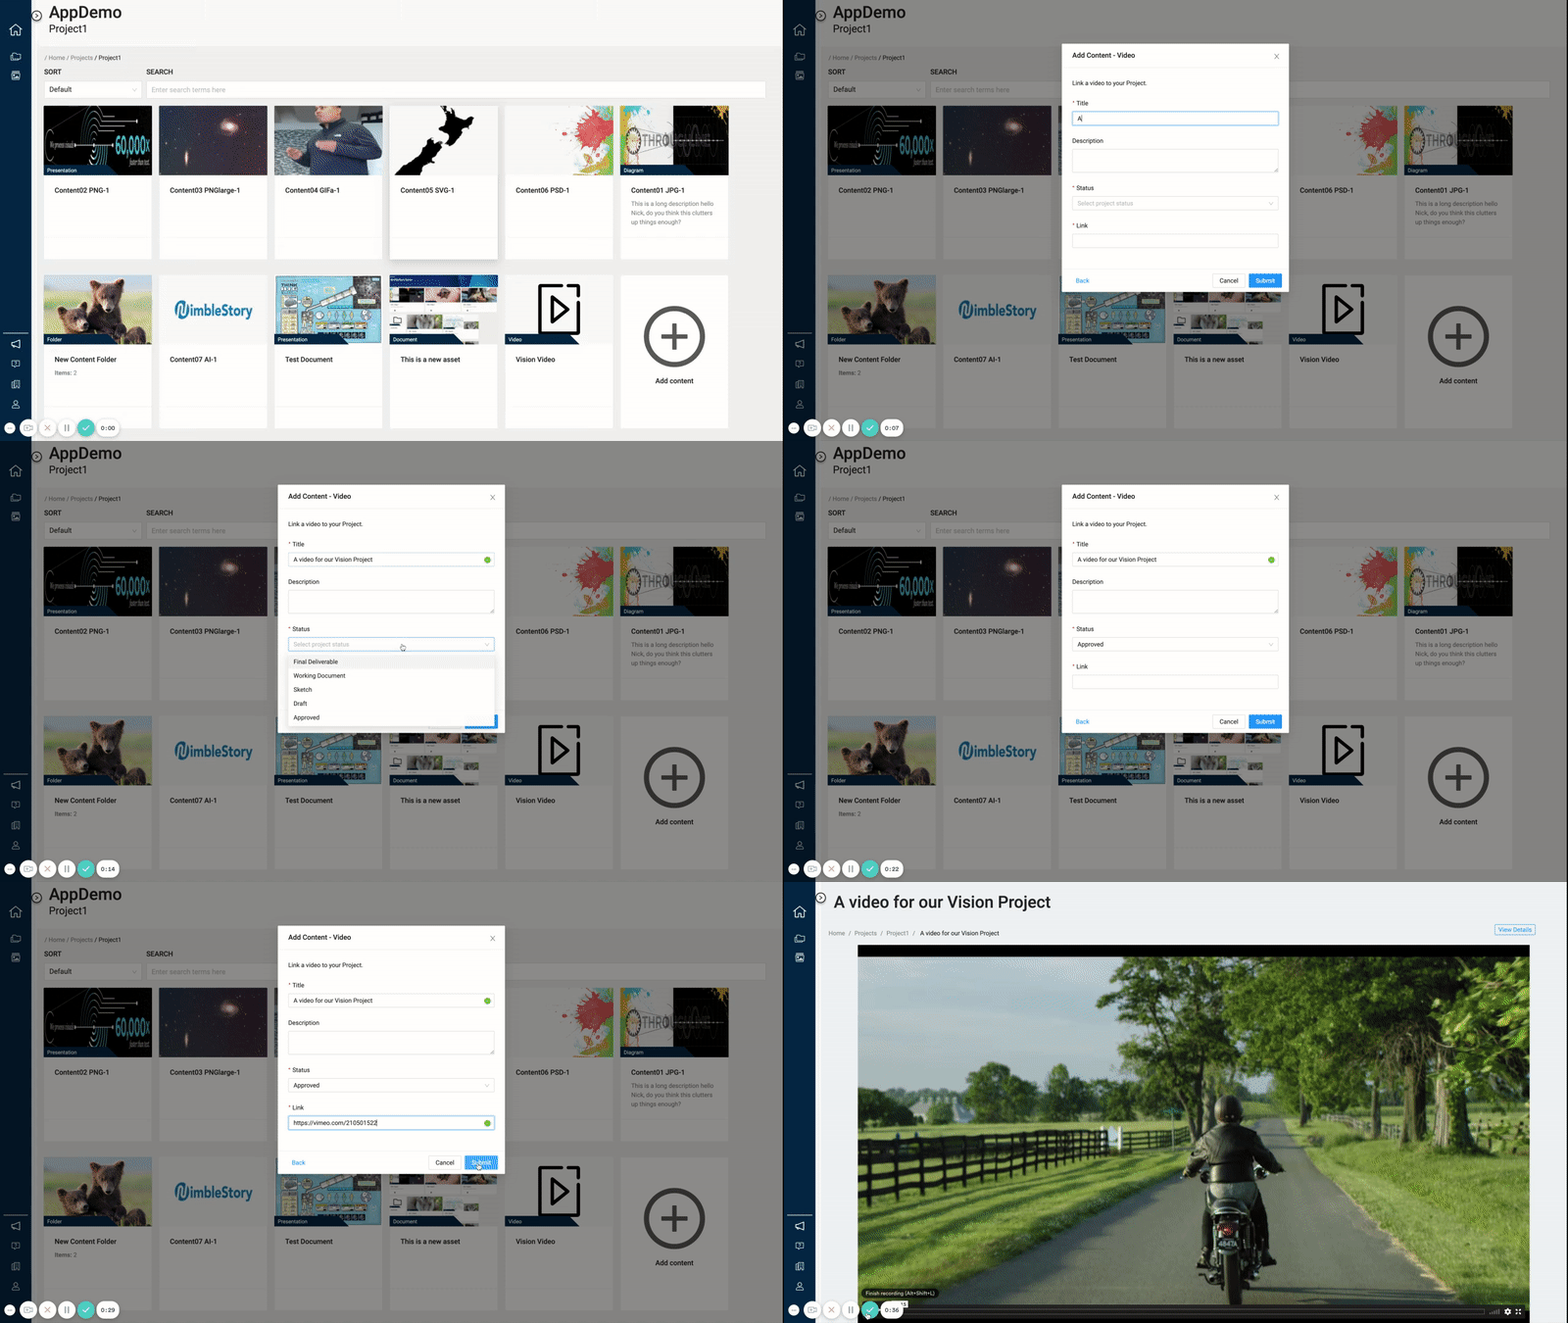
Video URL
To embed a video select the Video button option from the Content Type Selection options. Currently, Video URLs only work with Vimeo. Within the Add Video option list, you must give the video a title that will appear as the asset’s name and select the status for the Vimeo video. You can add an optional description for the file detailing and other important information on the asset. The final step is to upload the embedded link which can be done simply by copying the Vimeo web URL and pasting it into the Link input space. Once you press Submit the embedded video will appear within the project as a selectable Content Card.
Web Link
You can also add web links to external pages as assets within a Project. To do so, select the “Web Link” option from the asset types provided in the “Add Content” menu. Provide a title for the web link and select a status for the asset. You can add any additional information about the URL into the description portion. Next, copy and paste the desired URL into the “Link” option and submit the new asset. This asset will appear as a content card within your Project. It is important to note that due to certain security standards not all website URLs, or web applications, are embeddable within NimbleStory and should be evaluated on a site-by-site basis.
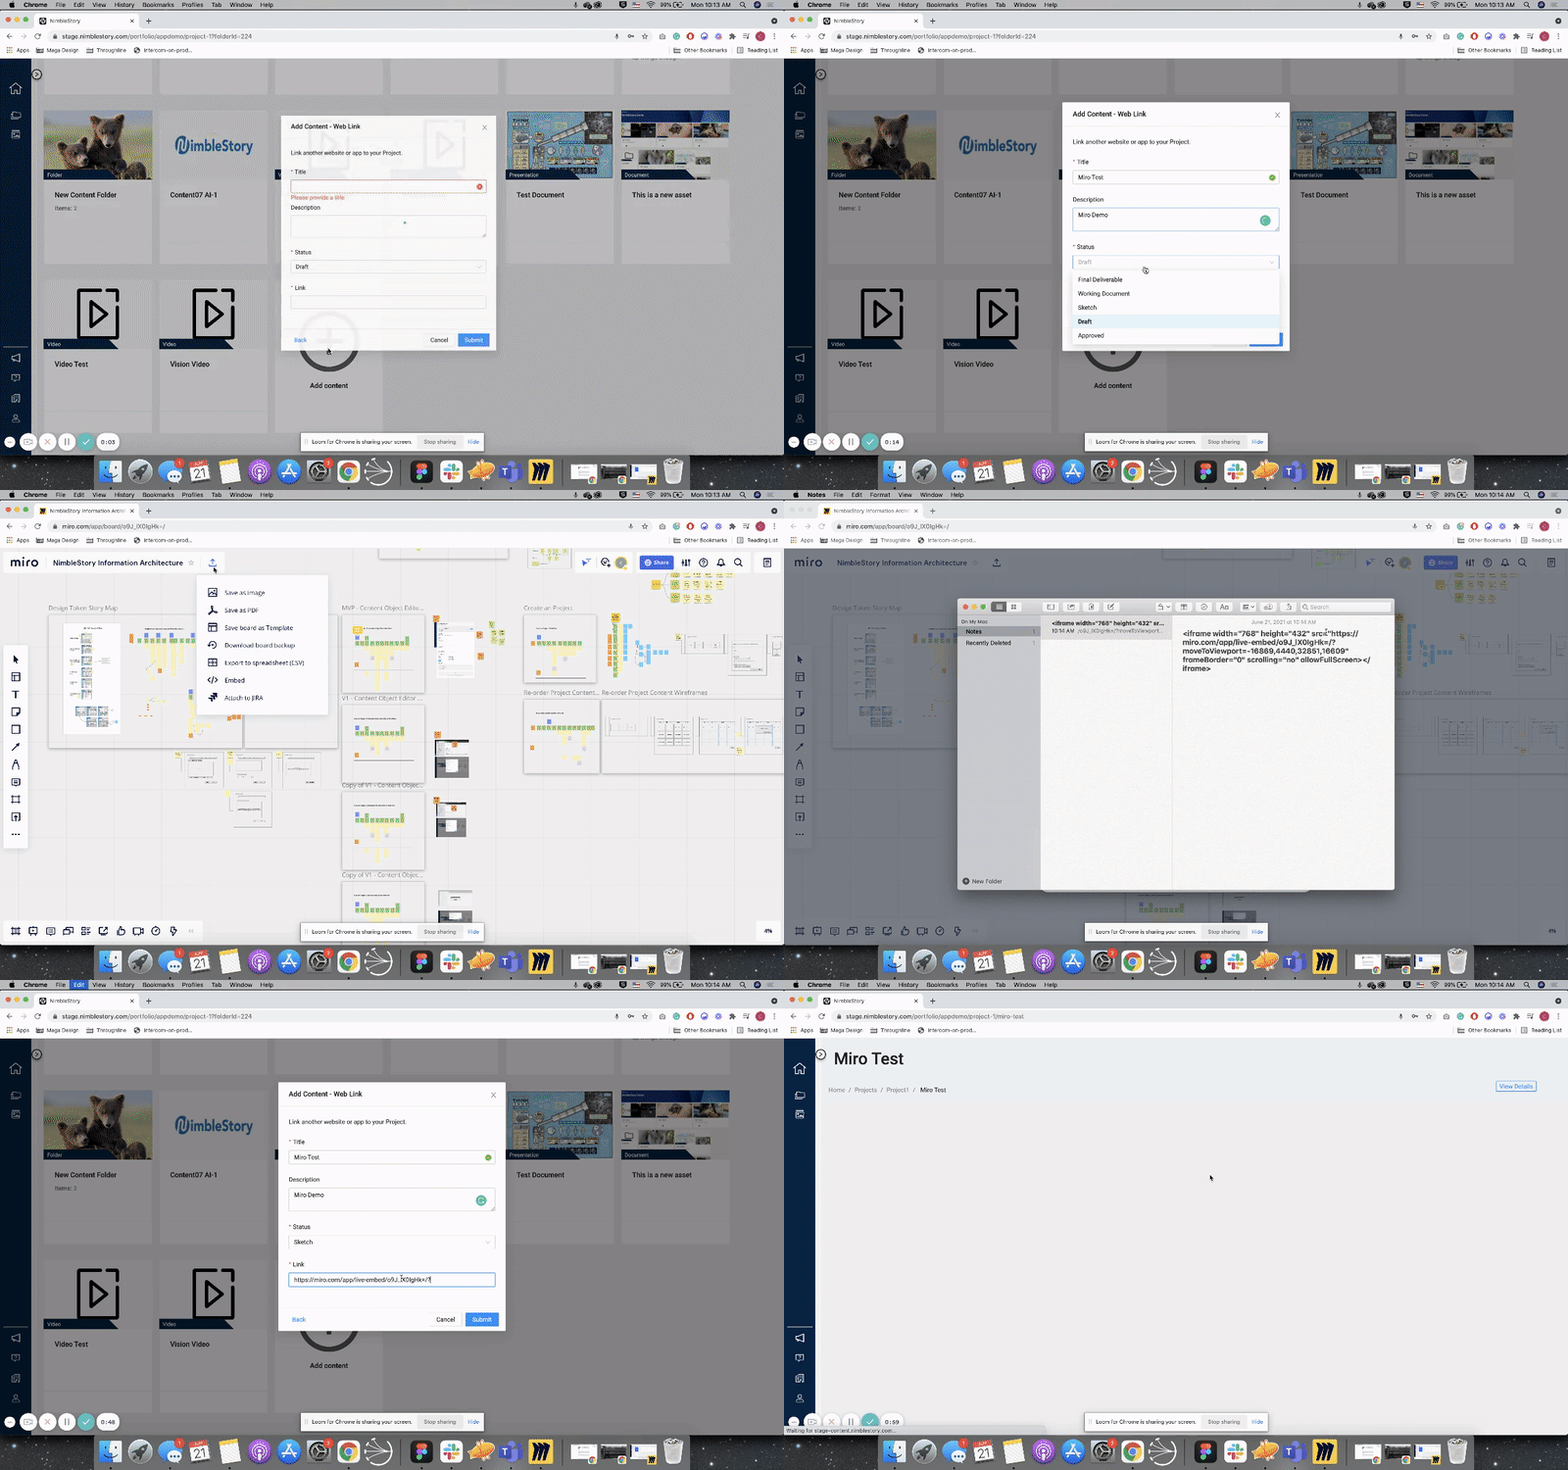
Also, through the web link asset type, you can add embedded URLs for other applications such as Miro by copying the internal iframe portion of the embedded URL link to the Miro board and submitting the embedded URL as the desired link. This allows for Miro boards to be directly linked to your NimbleStory Project as an asset.
Web bundle
Web Bundles are a special type of asset that allows you to added interactive content to your Project. They are a packaged folder of files that includes HTML, CSS, JavaScript, or other filetypes that can be rendered within the browser. To add a web bundle, select “Web Bundle” from the asset types. Next, give a title for the bundle and select a status for the asset. Additional information on the web bundle can be added in the description box. To upload the bundle, click or drag the .zip file into the upload area and submit the “Add Content” form. The web bundle will now appear as an asset within the project. It is important to note that for the bundle to function properly the base HTML file should be titled “index.html” for NimbleStory to appropriately load the content.
Folder
Folders can be added to your Project space which allow your organization create additional levels of structure. A folder can host any form content or assets made available in NimbleStory. To add a Folder select the Add Content card and select the Folder option. When adding a folder the only required input is the Title. You may also add a description and a card image thumbnail to differentiate the Folder card within the project.
Editing Content
Content can still be modified once it is uploaded to NimbleStory. To edit content within a project, first select the “Edit” icon at the bottom of the content card. You can then change the title, description, and any other information associated with the given asset. Also, the size of the content card can be changed, allowing for a more customized view of your project. When all necessary changes have been made, click the “Save” button to exit the edit mode and update the content card.
Document
To edit a document asset type, first click the “Edit” icon on the bottom of a document asset type content card. This will open the Edit Content view where you can view the existing title, description, status, card size, associated files, and card cover image. All of these aspects can be updated and saved. Once you have finished editing the content, click the “Save” button. The new content card information will be visible on the card.
Website
Website asset types can also be edited by first selecting the “Edit” icon at the bottom of the content card. From the edit view, you can change the title, description, status, card size, and any association files. You can also edit the web link itself. When you have finished editing, click the “Save” button. All new changes will appear on the content card.
External Link
Content in the form of external links can also be edited by selecting the “Edit” icon at the bottom of a content card and entering the edit view. From this window, changes can be made to the title, description, status, card size, link, and associated files. When any necessary changes have been made, save the updates and the new information with appear on the card.
Image
Images can also be edited through the editor view by selecting the “Edit” icon on the bottom of an image asset type content card. Then, the title, description, status, card size, and associated files can all be updated. To update the card, push the “Save” button to upload your changes and return to the Project page.
Video
Editing a video once added as content into NimbleStory works similarly to the other content edit processes. First, click the “Edit” icon found on the bottom of a video content card. This action will open an editing view where you can update information regarding the content such as the title, description, status, and the size of the card. You can also upload any additional associated files. Once you save and exit, any changes will appear on the content card.
